@abletest/able v0.0.4
ABLE A/B TESTING FOR CLOUDFLARE APPLICATIONS WITH UMAMI ANALYTICS DASHBOARD
Who is this for?
Someone who is hosting a JAMStack application on Cloudflare and wants to run a split test. We offer the option to use your own analytics service like Google Analytics, or we
can deploy an Umami Webserver to AWS infrastructure for you which will use ECS and RDS under your custom domain name with the url ableumami.yoursite.whatever, and
in about 30-40 minutes you will have a fully operational split test with a beautiful and informative dashboard for your own custom events!
PREREQUISITES
- IF USING UMAMI DASHBOARD:
- AWS account and credentials configured on local machine
aws-cdkinstalled globally
npminstalledHave handy your
- Cloudflare
EMAIL - Cloudflare
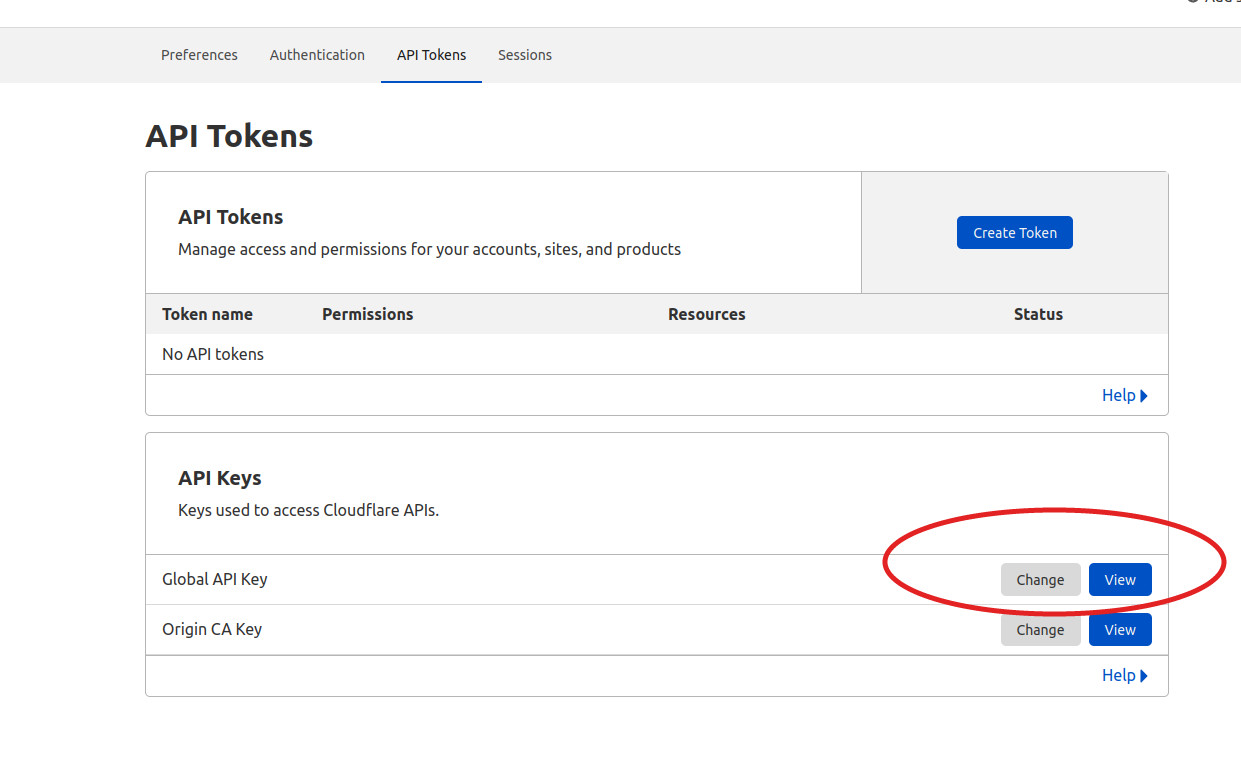
GLOBAL API_KEY- Found underProfile->API Tokens

- Cloudflare
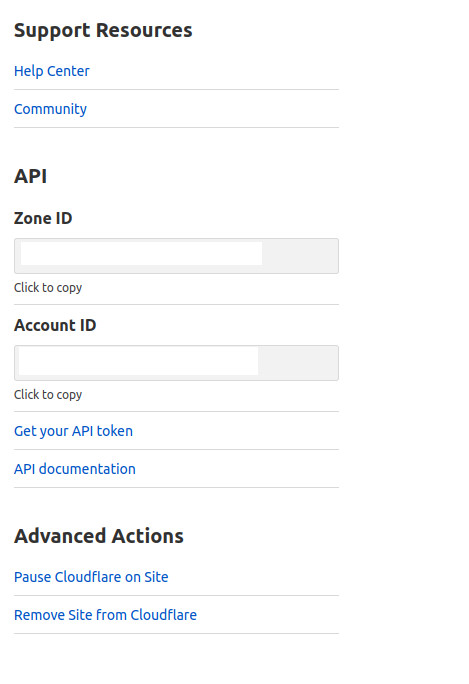
ACCOUNT_ID- Click on your application and these are found on the lower right sidebar - Cloudflare
ZONE_IDfor the site you will be testing against

- Have your Cloudflare Pages set to deploy all branches to preview branches (the default)
- Cloudflare
TO USE
npm i -g @abletest/able(may have to usesudo)IF USING UMAMI DASHBOARD:
- Run
cdk bootsrap aws://${AWS_ACCOUNT_NUMBER}/'us-east-1'(this must use us-east-1 region)
- Run
able setup- Setup of Umami server infrastructure (if selected) takes approximately 20-25 minutes.able config- This will generate a file calledableConfig.jsonthat you will fill in with your split test configurations. If you are using the Umami Dashboard, log in usingadminandumamiand set up your destinations there undersettings->add websiteand copy the script tags into the appropriate variants in theableConfig.jsonfile. Be careful to nest your single quotes inside your double quotes and not vice-versa ;)Create and push your test branches to github and Cloudflare where they will be deployed to preview branches. Enter these URLS, which are going to match the branch name along with the Cloudflare pages site name; ie,
test.mysite.pages.dev, into theableConfig.jsonfile.able deployto deploy the split test to Cloudflare. This will take approximately 5-10 seconds.
TO UPDATE
Make changes to the
ableConfig.jsonfileable updateto push those changes to Cloudflare. They will be live in a few seconds.
TO TEARDOWN
able destroy-testto remove split test from Cloudflare.able destroy-umamito teardown Umami server. This process takes approximately 25-30 minutes.
TO RUN NEW TESTS
Push new code with tests to your repo & Cloudflare pages site
Edit your Umami dashboard with new control and variant names and copy the scipt tags
Update the
variantssection of theableConfig.jsonfile with the new control and test variant paths and scriptsRun the
able updatecommand