@actionlogementservices/aurelia-plugin-ui v2.1.1
@actionlogementservices/aurelia-plugin-ui
An Aurelia plugin that provides custom elements and ui services for aurelia v1 applications on top of Bootstrap 5.
Description
This plugin provides 3 services:
DialogService: integrates Bootstrap modal dialog in your application with an aurelia ViewModel/View approach.ToastService: integrates Bootstrap toasts in your application.LockService: implements a logical screen lock to prevent user from interacting with the page.
And several custom elements :
simple-select,filterable-select,badges-select: custom elements that provides selection based on memory loaded client datasource.auto-complete,badges-auto-complete,address-auto-complete: custom elements that provides selection based on 'on-the-fly' requests to a server datasource.input-datepicker: custom element that integrates the vanilla-js datepicker with Bootstrap style.simple-table: custom element that implements a bootstrap style table with in-memory sorting and selection.
Installation
Ensure your aurelia v1 application is using Bootstrap 5 and Bootstrap icons 1.
Install the plugin:
npm install @actionlogementservices/aurelia-plugin-uiRegister the plugin in aurelia:
// in your main.js or main.ts
export function configure(aurelia) {
  aurelia.use
    .standardConfiguration()
    .plugin(PLATFORM.moduleName('@actionlogementservices/aurelia-plugin-ui'))
Usage
DialogService
Display modal dialog with Bootstrap style.
- Inject the
DialogServicein your viewmodel and use theopenmethod to open the dialog. - Create a view and a viewmodel for your modal dialog.
- Inject the
DialogControllerin the modal viewmodel to retrieve input parameters and use- the
okmethod of the controller to pass output parameters to the caller and close the modal. - the
cancelmethod of the controller to close the modal without passing output parameters.
- the
In the caller, retrieve asynchronously the output parameters from the result of the
opencall : seeDialogResult. If the modal was cancelled the propertywadCancelledis true.// the caller code, example.js import { inject } from 'aurelia-framework'; import { DialogService } from '@actionlogementservices/aurelia-plugin-ui'; import { ExampleDialog } from './dialogs/example-dialog'; @inject(DialogService) export class Example { /** @param {DialogService} dialog */ constructor(dialog) { this._dialog = dialog; } ... openExampleDialog() const { wasCancelled, output } = await this._dialog.open({ viewModel: ExampleDialog, model: { inParam1: 1000 }, locked: true }); const result = wasCancelled ? undefined : output.outParam1; }// the modal code, example-dialog.js import { inject } from 'aurelia-framework'; import { DialogController } from '@actionlogementservices/aurelia-plugin-ui'; @inject(DialogController) export class ExampleDialog { /** @type {Number} */ input; /** * @param {DialogController} controller */ constructor(controller) { this._controller = controller; } // the modal code, example-dialog.js activate({ inParam1 }) { this.inParam1 = inParam1; } ... confirm() { this._controller.ok({ outParam2: this.inParam1 * 2 }); } cancel() { this._controller.cancel(); }// the modal html, example-dialog.html <template> <div class="modal-dialog"> <div class="modal-content"> <div class="modal-header"> <h5 class="modal-title">Compute</h5> <button type="button" class="btn-close" data-bs-dismiss="modal" aria-label="Close" click.trigger="cancel()"></button> </div> <div class="modal-body">...</div> <div class="modal-footer"> <button class="btn btn-primary" click.trigger="confirm()">Oui</button> <button class="btn btn-secondary" click.trigger="cancel()">Non</button> </div> </div> </div> </template>
ToastService
Display toasts with Bootstrap style.
- Inject the
ToastServicein your viewmodel and use theinfo,success,warningorerrormethods to display a transient toast. You can specify an optional delay.
// the caller code, example.js
import { inject } from 'aurelia-framework';
import { ToastService } from '@actionlogementservices/aurelia-plugin-ui';
import { ExampleDialog } from './dialogs/example-dialog';

@inject(ToastService)
export class Example {
  /** @param {ToastService} toast */
  constructor(toast) {
    this._toast = toast;
  }
  ...
  showToast()
    this._toast.info('Hello !');
  }
LockService
Prevent user interaction with Bootstrap back drop.
- Inject the
LockServicein your viewmodel and use thelockandunlockmethods to display a transient toast. Don't forget to call the
unlockmethod even in case of exception.// the caller code, example.js import { inject } from 'aurelia-framework'; import { LockService } from '@actionlogementservices/aurelia-plugin-ui'; @inject(LockService) export class Example { /** @param {LockService} lock */ constructor(lock) { this._lock = lock; } ... async lockScreen() { this._lock.lock(); await lenghtyAsyncOperation().finally(() => this._lock.unlock()); }
simple-select custom element
Single selection dropdown element with databound in-memory datasource, and customizable dropdown item template, well adapted for small number of items (typically less than 50).
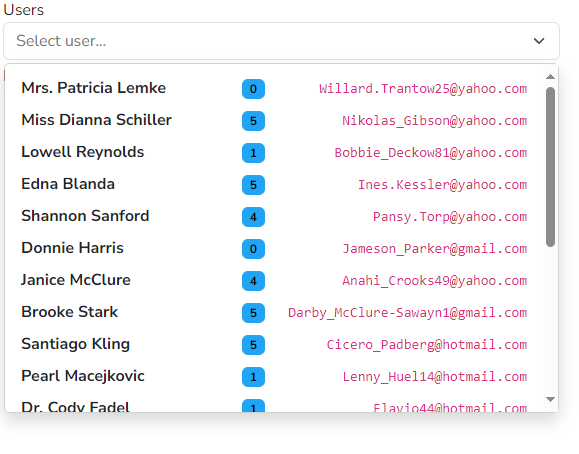
- Prepare a datasource in your viewmodel representing an array of items.
- Use the
<simple-select>element in your view and data bind thedatasourceattribute. Data bind the
selected-itemattribute to your viewmodel to retrieve user selection as a single item.<simple-select class="form-select" selected-item.bind="selectedItem" datasource.bind="itemsList"></simple-select>Specify an optional template for the dropdown item
<simple-select class="form-select" selected-item.bind="selectedItem" datasource.bind="itemsList">
  <template replace-part="itemTemplate">
    <p class="fw-semibold my-1">${item.code}</p>
    <p class="my-1">${item.name}</p>
  </template>
</simple-select>
You can also retrieve user selection with an item property using
selected-valueandvalue-keyattributes.<simple-select class="form-select" value-key="code" selected-value.bind="selectedValue" datasource.bind="itemsList"></simple-select>You can specify the optional following attributes : | Attribute name | Role | Possible values | Default value | |--- |---|--- |---| |
value-key| Property of the item used to differentiate them | Any string representing a property present on the item |name| |label-key| Property of the item used to display them in the dropdown | Any string representing a property present on the item |description| |placeholder| Placeholder in the select when no selection is done | Any string | | |disabled| Disable the user interaction |trueorfalse|false| |autosize| Autosize the dropdown width to the parent width rather than the content of the dropdown |trueorfalse|true| |clear-selection-text| Text displayed in the dropdown to clear the selection | Any string |Effacer la sélection|
filterable-select custom element
Single selection dropdown element with databound in-memory datasource, filtered by user input and customizable dropdown item template, well adapted for small number of items (typically less than 100).
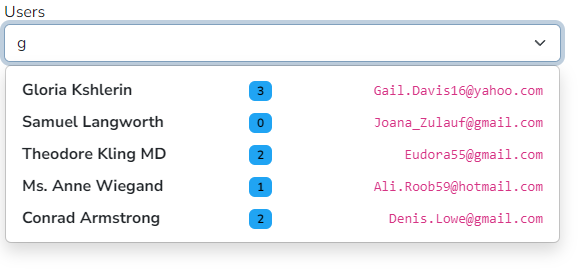
- Prepare a datasource in your viewmodel representing an array of items.
- Use the
<filterable-select>element in your view and data bind thedatasourceattribute. Data bind the
selected-itemattribute to your viewmodel to retrieve user selection as a single item.<filterable-select class="form-select" selected-item.bind="selectedItem" datasource.bind="itemsList"></filterable-select>Specify an optional template for the dropdown item
<filterable-select class="form-select" selected-item.bind="selectedItem" datasource.bind="itemsList">
  <template replace-part="itemTemplate">
    <p class="fw-semibold my-1">${item.code}</p>
    <p class="my-1">${item.name}</p>
  </template>
</filterable-select>
You can also retrieve user selection with an item property using
selected-valueandvalue-keyattributes.<filterable-select class="form-select" value-key="code" selected-value.bind="selectedValue" datasource.bind="itemsList"></filterable-select>You can specify the optional following attributes : | Attribute name | Role | Possible values | Default value | |--- |---|--- |---| |
value-key| Property of the item used to differentiate them | Any string representing a property present on the item |name| |label-key| Property of the item used to display them in the dropdown | Any string representing a property present on the item |description| |placeholder| Placeholder in the select when no selection is done | Any string | | |disabled| Disable the user interaction |trueorfalse|false| |autosize| Autosize the dropdown width to the parent width rather than the content of the dropdown |trueorfalse|true| |clear-selection-text| Text displayed in the dropdown to clear the selection | Any string |Effacer la sélection| |no-result-text| Text displayed when user input filters out all items | Any string |Aucun résultat|
badges-select custom element
Multiple selections dropdown element with databound in-memory datasource, filtered by user input, with badges representing current selection, and customizable dropdown item template, well adapted for small number of items (typically less than 100).
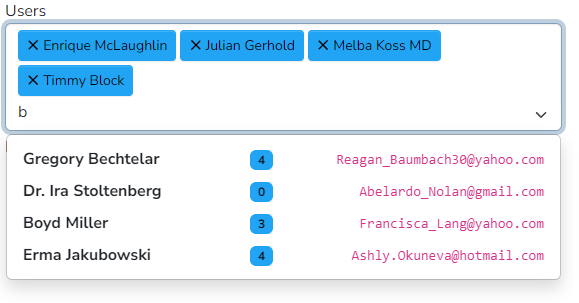
- Prepare a datasource in your viewmodel representing an array of items.
- Use the
<badges-select>element in your view and data bind thedatasourceattribute. Data bind the
valuesattribute to your viewmodel to retrieve user selection as an array os items.<badges-select class="form-select" selected-items.bind="selectedItems" datasource.bind="itemsList"></badges-select>Specify an optional template for the dropdown item
<badges-select class="form-select" values.bind="selectedItems" datasource.bind="itemsList">
  <template replace-part="itemTemplate">
    <p class="fw-semibold my-1">${item.code}</p>
    <p class="my-1">${item.name}</p>
  </template>
</badges-select>
You can also retrieve user selection with an item property using
selected-valueandvalue-keyattributes.<badges-select class="form-select" value-key="code" selected-values.bind="selectedValue" datasource.bind="itemsList"></badges-select>You can specify the optional following attributes : | Attribute name | Role | Possible values | Default value | |--- |---|--- |---| |
value-key| Property of the item used to differentiate them | Any string representing a property present on the item |name| |label-key| Property of the item used to display them in the dropdown | Any string representing a property present on the item |description| |placeholder| Placeholder in the select when no selection is done | Any string | | |disabled| Disable the user interaction |trueorfalse|false| |autosize| Autosize the dropdown width to the parent width rather than the content of the dropdown |trueorfalse|true| |no-result-text| Text displayed when user input filters out all items | Any string |Aucun résultat|
auto-complete custom element
Single selection dropdown element with query controller, filtered by user input and customizable dropdown item template, well adapted for large number of items.
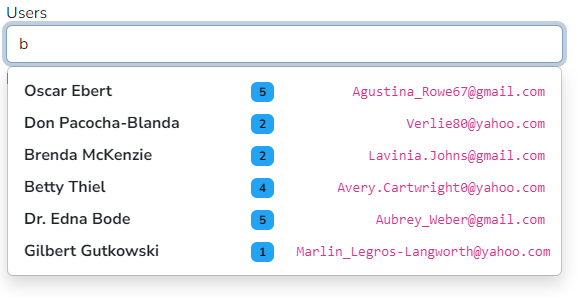
Expose a controller in your viewmodel representing the logic to query the server datasource.
import { inject, NewInstance } from 'aurelia-framework';
import { AutoCompleteController } from '@actionlogementservices/aurelia-plugin-ui';

@inject(NewInstance.of(AutoCompleteController))
export class ExempleAutoComplete {
  /** @type {AutoCompleteController<any>} */ itemsController;

  /**
  * @param {AutoCompleteController<any>} controller
  */
  constructor(controller) {
    this.itemsController = controller;
  }
Use the
<auto-complete>element in your view and data bind thecontrollerattribute.Data bind the
selected-itemattribute to your viewmodel to retrieve user selection as a single item.<auto-complete class="form-control" selected-item.bind="selectedItem" controller.bind="itemsController"></auto-complete>Configure the controller in the viewmodel by passing a method with the following signature:
(text: string) => Promise<T[]>activate() { const searchItems = this._service.searchItems.bind(this._service); this.itemsController.configure(searchItems); }Pass an optional callback to transform the result of the query to a suitable item model
activate() {
  const searchItems = this._service.searchItems.bind(this._service);
  const buildItemModel = item => {
    if (!item) return;
    const fullName = `${item.firstname} ${item.lastname.toUpperCase()}`;
    return Object.assign(item, { fullName });
  }
  this.itemsController.configure(searchItems, buildItemModel);
}
Specify an optional template for the dropdown item
<auto-complete class="form-control" selected-item.bind="selectedItem" controller.bind="itemsController">
  <template replace-part="itemTemplate">
    <p class="fw-semibold my-1">${item.code}</p>
    <p class="my-1">${item.fullName}</p>
  </template>
</auto-complete>
You can also retrieve user selection with an item property using
selected-valueandvalue-keyattributes.<auto-complete class="form-control" value-key="code" selected-value.bind="selectedValue" controller.bind="itemsController"></auto-complete>You can specify the optional following attributes : | Attribute name | Role | Possible values | Default value | |--- |---|--- |---| |
value-key| Property of the item used to differentiate them | Any string representing a property present on the item |name| |label-key| Property of the item used to display them in the dropdown | Any string representing a property present on the item |description| |placeholder| Placeholder in the select when no selection is done | Any string | | |disabled| Disable the user interaction |trueorfalse|false| |autosize| Autosize the dropdown width to the parent width rather than the content of the dropdown |trueorfalse|true| |no-result-text| Text displayed when user input filters out all items | Any string |Aucun résultat| |delay| Throttling delay in ms before requesting data | Any number > 0 |700
badges-auto-complete custom element
Multiple selections dropdown element with query controller, filtered by user input, with badges representing current selection, and customizable dropdown item template, well adapted for large number of items.
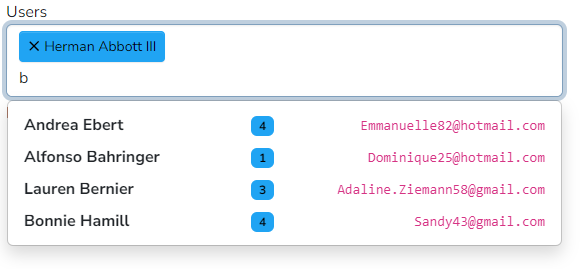
Expose a controller in your viewmodel representing the logic to query the server datasource.
import { inject, NewInstance } from 'aurelia-framework';
import { AutoCompleteController } from '@actionlogementservices/aurelia-plugin-ui';

@inject(NewInstance.of(AutoCompleteController))
export class ExempleAutoComplete {
  /** @type {AutoCompleteController<any>} */ itemsController;

  /**
  * @param {AutoCompleteController<any>} controller
  */
  constructor(controller) {
    this.itemsController = controller;
  }
Use the
<badges-auto-complete>element in your view and data bind thecontrollerattribute.Data bind the
valuesattribute to your viewmodel to retrieve user selection as an array of items.<badges-auto-complete class="form-control" values.bind="selectedItem" controller.bind="itemsController"></badges-auto-complete>Configure the controller in the viewmodel by passing a method with the following signature:
(text: string) => Promise<T[]>activate() { const searchItems = this._service.searchItems.bind(this._service); this.itemsController.configure(searchItems); }Pass an optional callback to transform the result of the query to a suitable item model
activate() {
  const searchItems = this._service.searchItems.bind(this._service);
  const buildItemModel = item => {
    if (!item) return;
    const fullName = `${item.firstname} ${item.lastname.toUpperCase()}`;
    return Object.assign(item, { fullName });
  }
  this.itemsController.configure(searchItems, buildItemModel);
}
Specify an optional template for the dropdown item
<badges-auto-complete class="form-control" values.bind="selectedItems" controller.bind="itemsController">
  <template replace-part="itemTemplate">
    <p class="fw-semibold my-1">${item.code}</p>
    <p class="my-1">${item.fullName}</p>
  </template>
</badges-auto-complete>
You can also retrieve user selection with an item property using
selected-valueandvalue-keyattributes.<badges-auto-complete class="form-control" value-key="code" selected-value.bind="selectedValue" controller.bind="itemsController"></badges-auto-complete>You can specify the optional following attributes : | Attribute name | Role | Possible values | Default value | |--- |---|--- |---| |
value-key| Property of the item used to differentiate them | Any string representing a property present on the item |name| |label-key| Property of the item used to display them in the dropdown | Any string representing a property present on the item |description| |placeholder| Placeholder in the select when no selection is done | Any string | | |disabled| Disable the user interaction |trueorfalse|false| |autosize| Autosize the dropdown width to the parent width rather than the content of the dropdown |trueorfalse|true| |no-result-text| Text displayed when user input filters out all items | Any string |Aucun résultat| |delay| Throttling delay in ms before requesting data | Any number > 0 |700
address-auto-complete custom element
Single selection dropdown element with french gouv Base Adresse Nationale query controller, filtered by user input, and customizable dropdown item template. This custom element requires to use aurelia-vadation, aurelia-configuration, aurelia-fetch and define a config.json file with the following section:
{
  "api": {
    "address": "https://your_ban_api_instance_address"
  }
}
- Use the
<address-auto-complete>element in your view. Data bind the
valueattribute to your viewmodel to retrieve user selection as a single item.<address-auto-complete value.bind="selectedAddress"></address-auto-complete>You can specify the optional following attributes : | Attribute name | Role | Possible values | Default value | |--- |---|--- |---| |
mode| Query mode of the BAN api | eitherzipCodeto get only city oraddressto get full address |address| |manual-entry| Allow user to fill the address manualy if not found. Works only withmode="address"|trueorfalse|false| |placeholder| Placeholder in the select when no selection is done | Any string | | |disabled| Disable the user interaction |trueorfalse|false| |autosize| Autosize the dropdown width to the parent width rather than the content of the dropdown |trueorfalse|false|When manual entry option is enabled :
<address-auto-complete value.bind="selectedAddress" manual-entry="true"></address-auto-complete>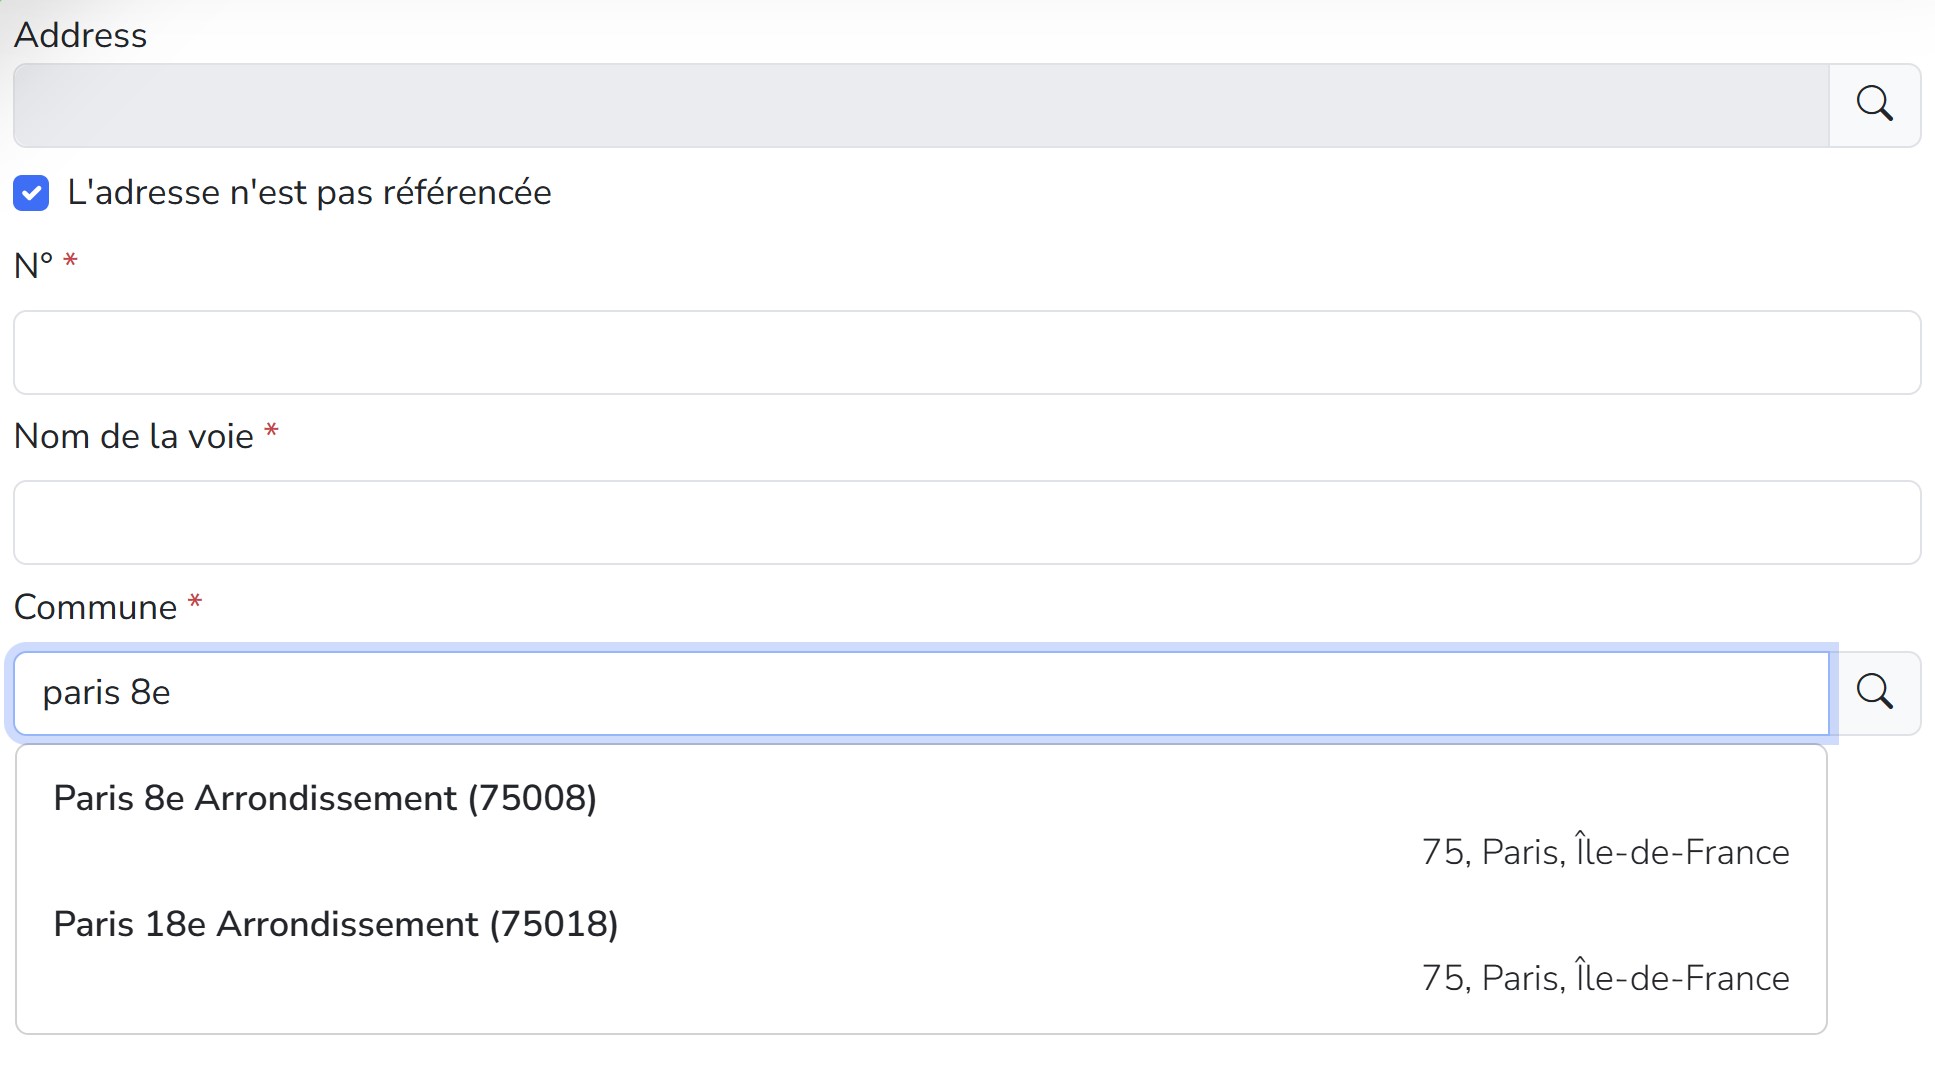
input-datepicker custom element
Single selection calendar dropdown element based on vanilla-js datepicker.
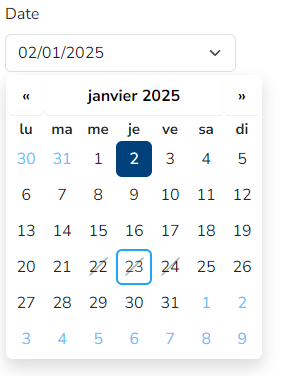
- Use the
<input-datepicker>element in your view. Data bind the
dateattribute to your viewmodel to retrieve user selection as a single item.<input-datepicker date.bind="date"></input-datepicker>You can specify the optional following attributes : | Attribute name | Role | Possible values | Default value | |--- |---|--- |---| |
placeholder| Placeholder in the select when no selection is done | Any string | | |disabled| Disable the user interaction |trueorfalse|false| |readonly| Readonly field |trueorfalse|false| |autohide| Auto hide dropdown after selection |trueorfalse|true| |disabled-days| Days of week to disable | 0 for sunday, 1 for monday, and so on | | |disabled-dates| Specific dates to disable | Iso string dates | |
simple-table custom element
Mutliple selection and scrollable html table with custom column template and in memory sorting, well adapted for small number of items (typically less than 100).
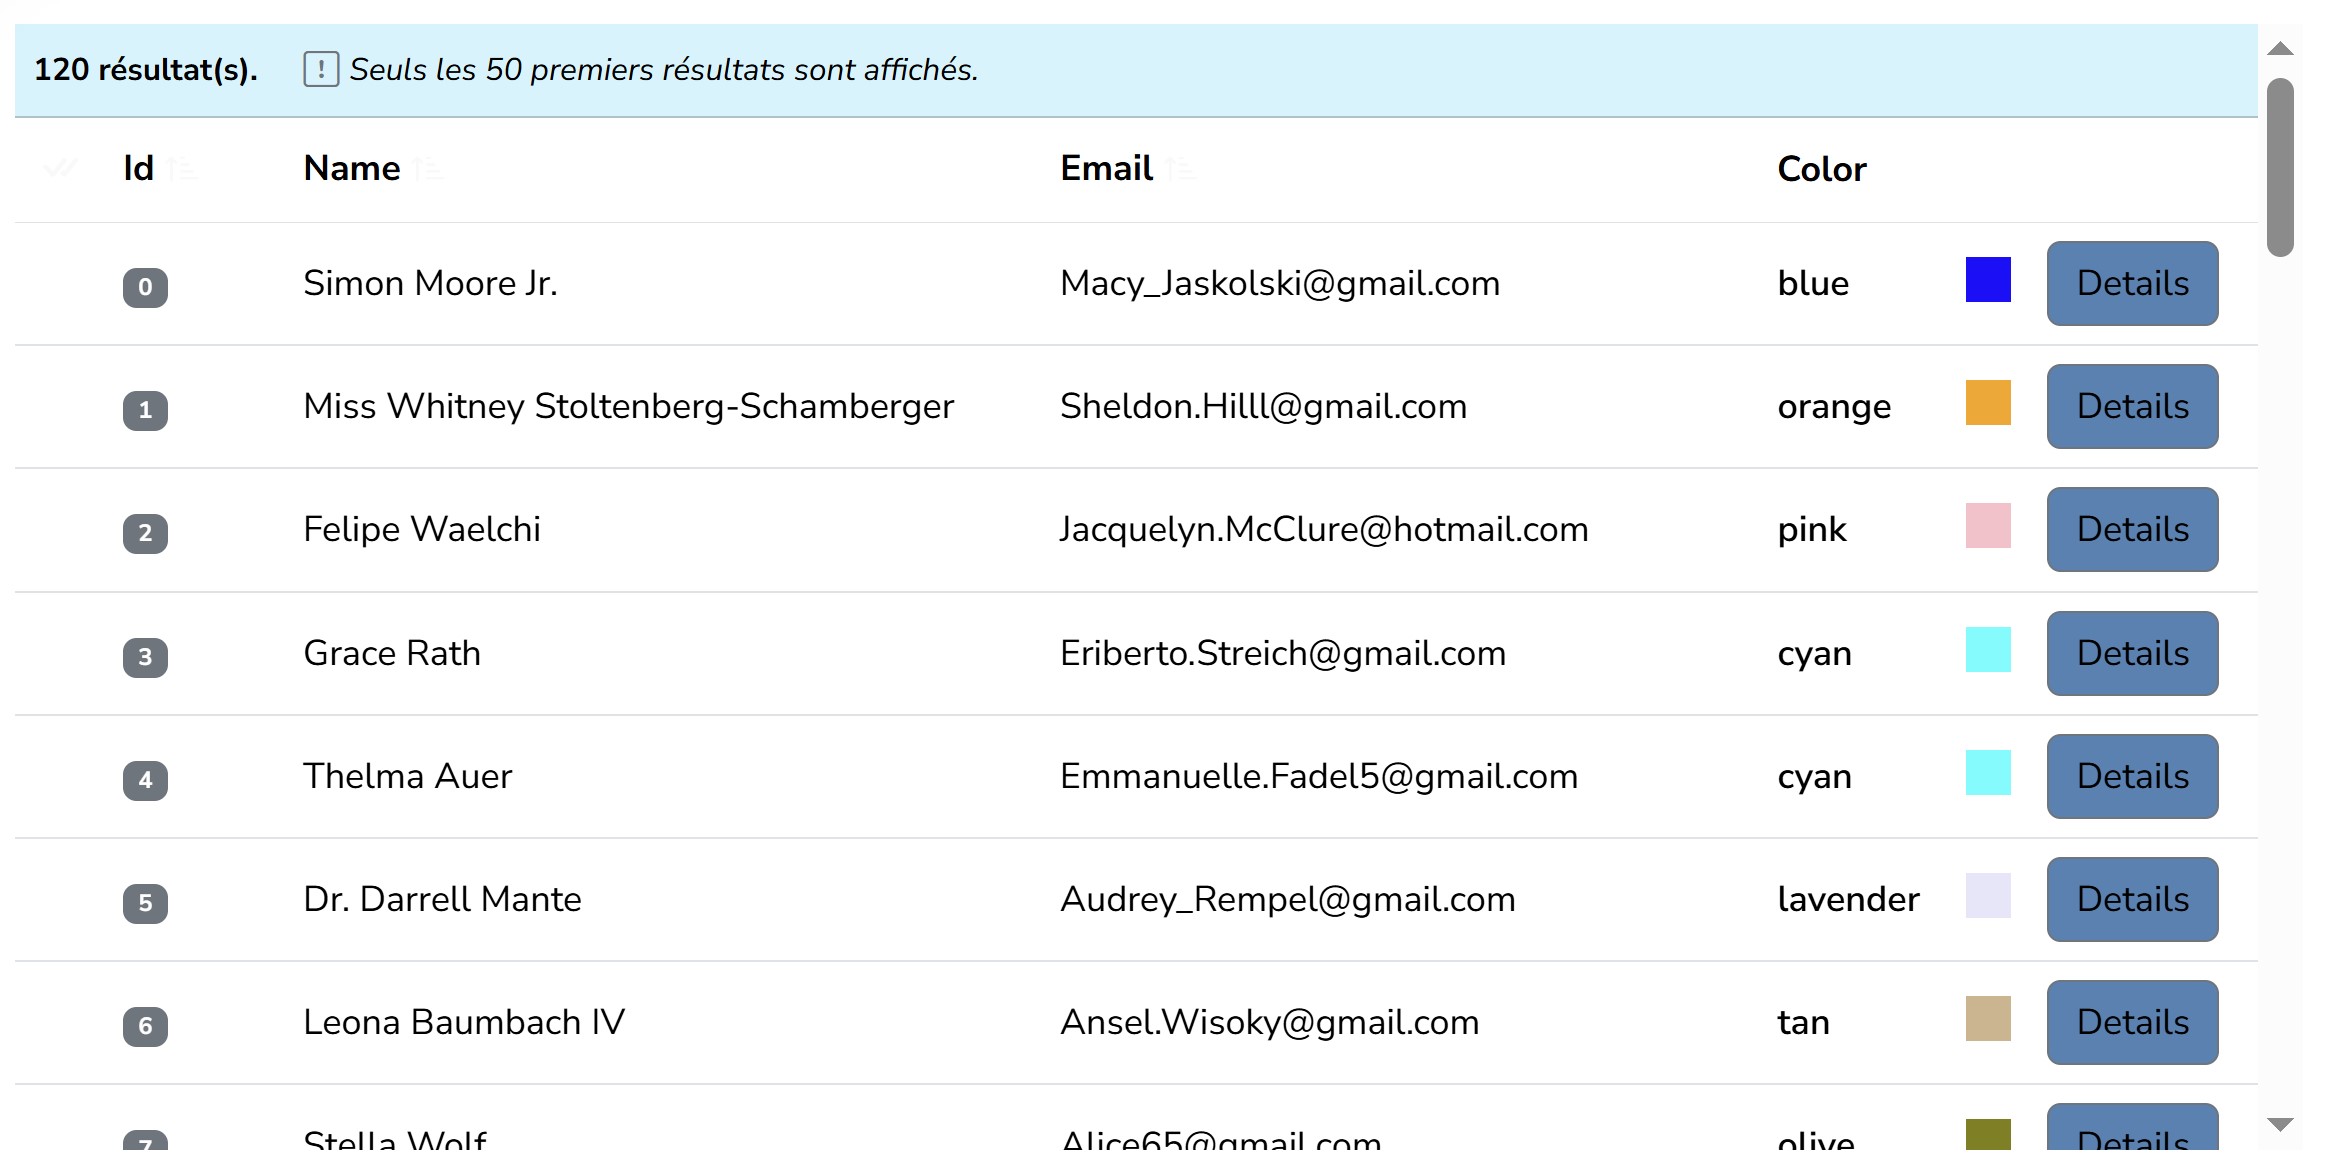
- Use the
<simple-table>element in your view and define columns withheaderandcell-keyattributes and optionally a column template. - Data bind the
datasourceattribute to your viewmodel to retrieve user selection as array of items. Data bind the
valuesattribute to your viewmodel to retrieve user selection as an array of items.<simple-table datasource.bind="itemsList" selected-items.bind="selectedItems" selection-mode="multiple" value-key="Id"> <column header="Id" cell-key="id" sortable="true" sort-type="numeric" width="80px"> <small><span class="badge text-bg-secondary">${item.id}</span></small> </column> <column header="Name" cell-key="name" sortable="true"></column> <column header="Email" cell-key="email" sortable="true"></column> <column header="Color" cell-key="color" width="120px"> <div class="d-flex justify-content-between flex-nowrap"> <div class="fw-semibold m-0">${item.color}</div> <div class="ps-2 m-0" style="height: 20px; width: 20px; background-color: ${item.color};"></div> </div> </column> <column> <button class="btn btn-secondary" click.trigger="item.showItemDetails(item)">Details</button> </column> </simple-table>You can specify the optional following attributes on the
simple-tableelement : | Attribute name | Role | Possible values | Default value | |--- |---|--- |---| |value-key| Property of the item used to differentiate them | Any string representing a property present on the item |name| |max-rows| Maximal number of displayed rows | Any number > 0 |50| |max-height| CSS max height of the table | Any css height expression |500px| |selection-mode| Selection mode |noneorsingleormultiple|none| |selected-items| Selected items | Array of objects |[]| |fixed-row-height| Enable/disable the fixed row height feature. Whenfalsetext will wrap and rows will have different height |trueorfalse|true| |no-result-text| Text displayed when there is no items | Any string |Aucun résultat| |warning-template-text| Warning template text shown when not all items are displayed. Must contain the{maxRows}token | Any string with{maxRows}|Seuls les {maxRows} premiers résultats sont affichés.| |result-text| Text displayed after the # of items | Any string |résultat(s).|You can specify the optional following attributes on the
columnelement : | Attribute name | Role | Possible values | Default value | |--- |---|--- |---| |header| Header of the column | Any string representing a property present on the item | | |cell-key| Property of the item used to display as cell content | Any string representing a property present on the item | | |sortable| Is the column sortable |trueorfalse|false| |sort-order| Sorting order of the column |trueorfalse| | |sort-type| Sorting type |textornumeric|text| |width| CSS width of the column | Any css width expression |auto|
input-mask custom attribute
Implements mask feature on html input leveraging the npm inputmask package.
- Use the input-mask on an html input element with either
currencyorpercentagevalue. - Define the formating options with the numberFormat converter options.
<input
  type="text"
  input-mask="currency"
  value.one-time="amount | numberFormat"
  value.from-view="amount | cleanInputMask" />
Compatibility
This plugin has been tested on aurelia v1 with webpack. The following peer dependencies are required:
bootstrap 5.3.3,bootstrap-icons 1.11.3, and if using theaddress-auto-completeelement:aurelia-fetch-client 1.8.2,aurelia-configuration 2.0.0.aurelia-validation 2.0.0

