1.0.0 • Published 5 years ago
@alicloud/console-bench-core v1.0.0
安装
安装依赖,并写入 package.json
npm install @alicloud/console-bench-core -S环境要求
- Node.js >= 8.x
- 找阿里云企业工作台团队,提供 OpenAPI 访问凭证,示例如下:
{
  "appName": "my-app", // 应用的唯一标识
  "arnPostfix": "my-role", // 角色定义
  "consoleKey": "xxx",
  "consoleSecret": "xxx",
  "openapiList": [ // OpenAPI调用白名单
    {
      "product": "ecs",
      "actions": [
        "DescribeInstances",
        "xxxx"
      ]
    }
  ]
}
快速使用
const Core = require('@alicloud/console-bench-core');

var client = new Core({
  consoleKey: ${consoleKey},
  consoleSecret: ${consoleSecret},
  endpoint: 'console-work.aliyuncs.com',
  product: 'Ecs',
  apiVersion: '2014-05-26'
});

var params = {
  RegionId: "cn-zhangjiakou",
  AliUid: "xxx",
  IdToken : 'xxx' // AliUid 或 IdToken
}

var requestOption = {
  method: 'GET'
};

client
	.request('DescribeInstances', params, requestOption)
	.then((result) => {
  		console.log(JSON.stringify(result));
		}, (ex) => {
  		console.log(ex);
	})
说明:
- endpoint: 测试环境下需要 host 绑定
114.55.202.134 console-work.aliyuncs.com
关于 OpenAPI 调用权限的配置说明
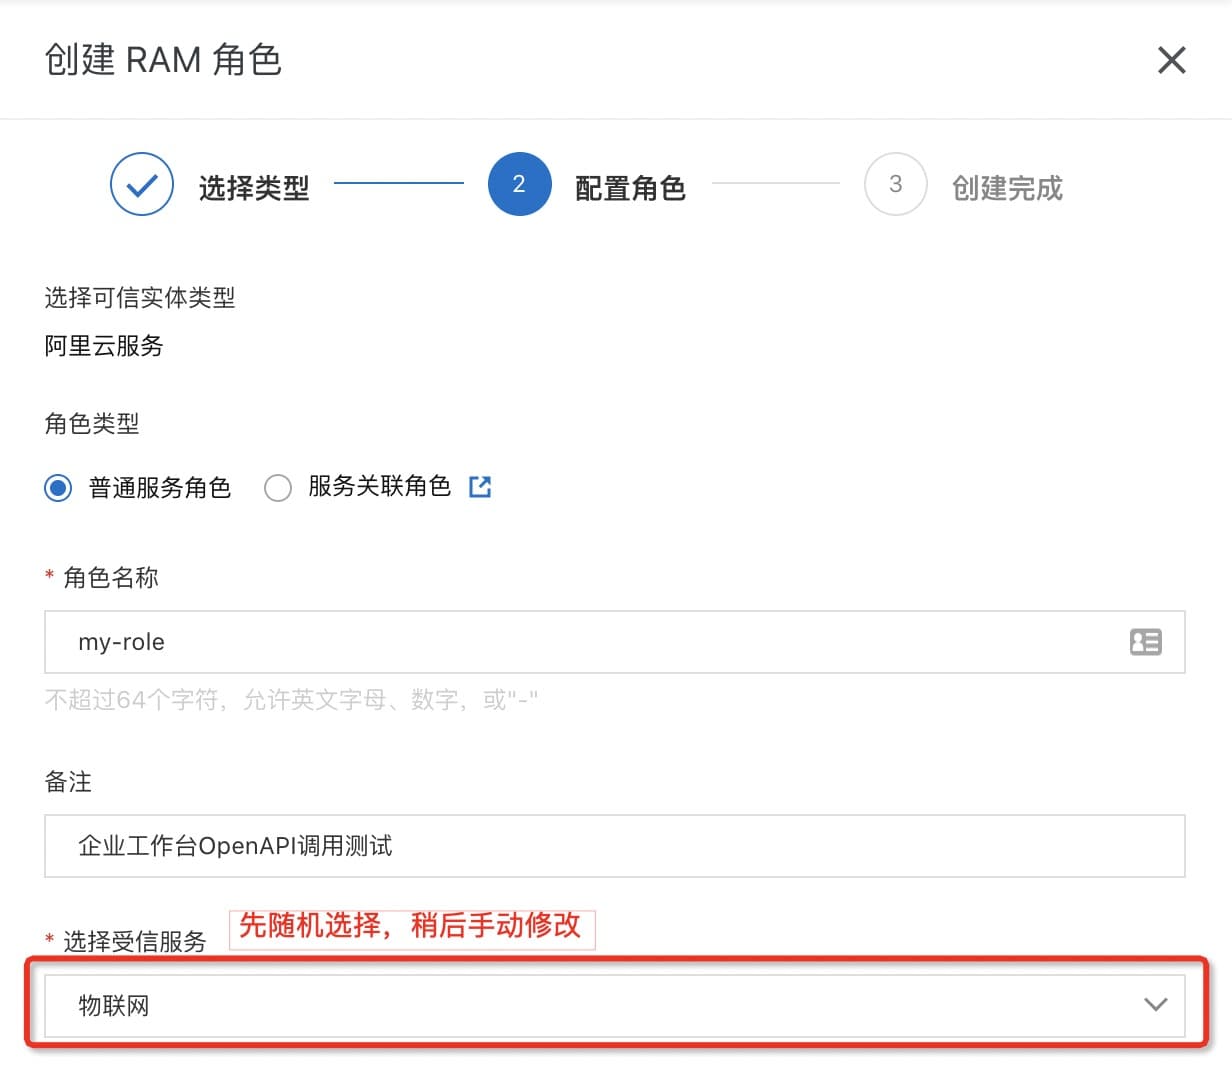
添加服务角色
首先登录阿里云 RAM控制台 ,创建服务角色

修改角色信任策略
角色的权限主体设置成企业工作台:

{
    "Statement": [
        {
            "Action": "sts:AssumeRole",
            "Effect": "Allow",
            "Principal": {
                "Service": [
                    "console.aliyuncs.com"
                ]
            }
        }
    ],
    "Version": "1"
}
添加角色权限
按需给该角色添加您应用的权限:

整理调用的OpenAPI
把您产品需要的 OpenAPI 整理处理,按照如下格式提交给企业工作台团队:
[
  {
    "product": "ecs",
    "actions": [
      "DescribeInstances",
      "DescribeRegions"
      "..."
    ]
  },
  {
    ...
  }
]
完成配置
经过上述步骤,就可以基于企业工作台提供的 SDK ,进行OpenAPI的调用测试。
许可证
Copyright (c) 2009-present, Alibaba Cloud All rights reserved.
1.0.0
5 years ago