@azure/web-pubsub-tunnel-tool v1.0.0-beta.11
Azure Web PubSub local tunnel tool
Web PubSub local tunnel provides a local development environment for customers to enhance their local development experience. There's no need to use third-party tools to expose local ports anymore, use Web PubSub local tunnel as the tunnel between the Web PubSub service and your local server to keep your local development environment secure and safe.
Web PubSub local tunnel provides:
- A way to tunnel traffic from Web PubSub to your local server
- A way to view the end-to-end data flow from your client to Web PubSub through the tunnel and to your local server
- Provides an embedded upstream server for you to get started
- Provides a simple client for you to get started with your server development
Benefits:
- Secured local: no need to expose your local server to public
- Secured connection: use Microsoft Entra ID and Web PubSub access policy to connect
- Simple configuration: URL template sets to
tunnel:///<your_server_path> - Data inspection: vivid view of the data and the workflow
Prerequisite
- Node.js version 16 or higher
Install
npm i -g @azure/web-pubsub-tunnel-toolUsage
Usage: awps-tunnel [options] [command]

A local tool to help tunnel Azure Web PubSub traffic to local web app and provide a vivid view to the end to end workflow.

Options:
  -v, --version   Show the version number.
  -h, --help      Show help details.

Commands:
  status          Show the current configuration status.
  bind [options]  Bind configurations to the tool so that you don't need to specify them every time running the tool.
  run [options]   Run the tool.
  help [command]  Display help details for subcommand.

You could also set WebPubSubConnectionString environment variable if you don't want to configure endpoint.
Prepare the credential
Using connection string
In your Web PubSub service portal, copy your connection string from your Web PubSub service portal
Set the connection string to your local environment variable. Currently only environment variable is supported if you're using connection string
In Linux or macOS:
export WebPubSubConnectionString="<your connection string>"Or in Windows:
set WebPubSubConnectionString=<your connection string>
Using Azure Identity
In your Web PubSub service portal, go to Access control tab, and add role
Web PubSub Service Ownerto your identity.In your local terminal, use Azure CLI
az loginto sign in to your identity.Alternatively, you could set account information via defined environment variables, or use Managed identity authentication directly for supported Azure services.
Run
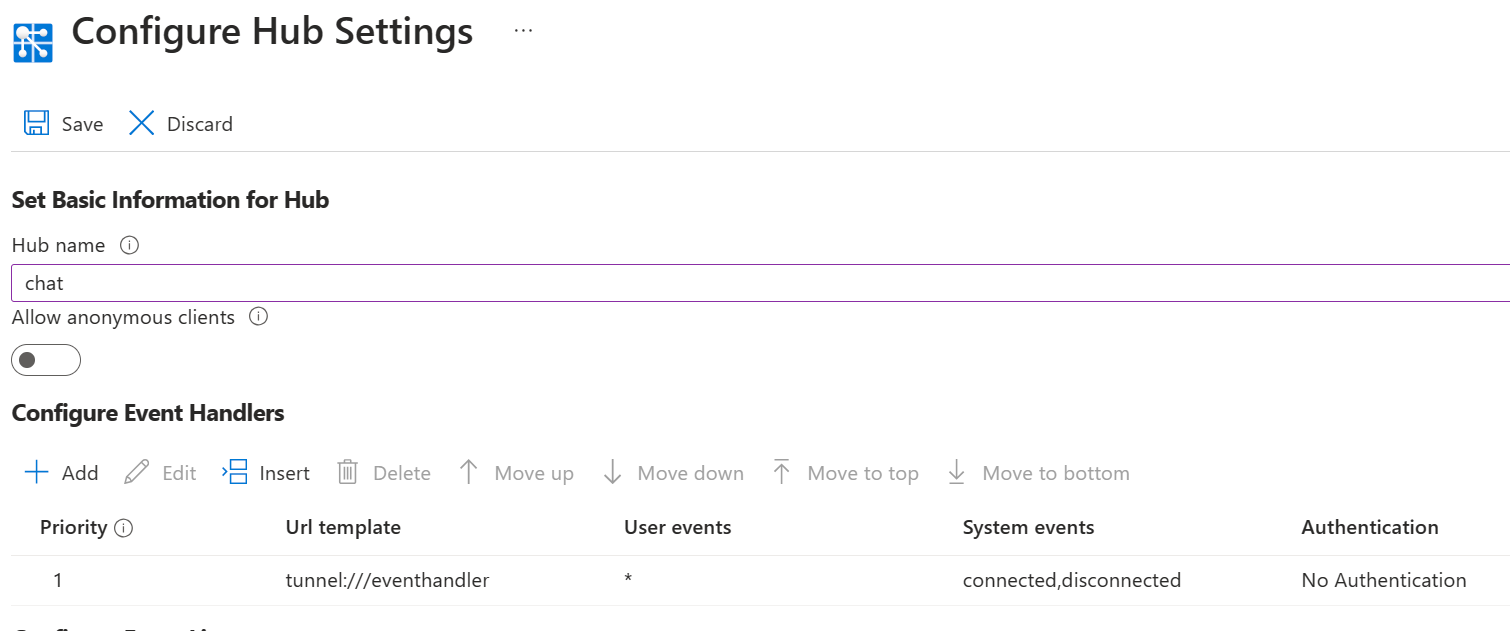
In your Web PubSub service portal, go to Settings tab, specify the event handler URL to start with
tunnel:///to allow tunnel connection.
Run the tool with the hub you set before, for example, connect to an endpoint
https://<awps-host-name>.webpubsub.azure.comwith hubchat:awps-tunnel run --hub chat --endpoint https://<awps-host-name>.webpubsub.azure.comYou could also use
awps-tunnel bind --hub chat --endpoint https://<awps-host-name>.webpubsub.azure.comto save the configuration and thenawps-tunnel run.You see output like
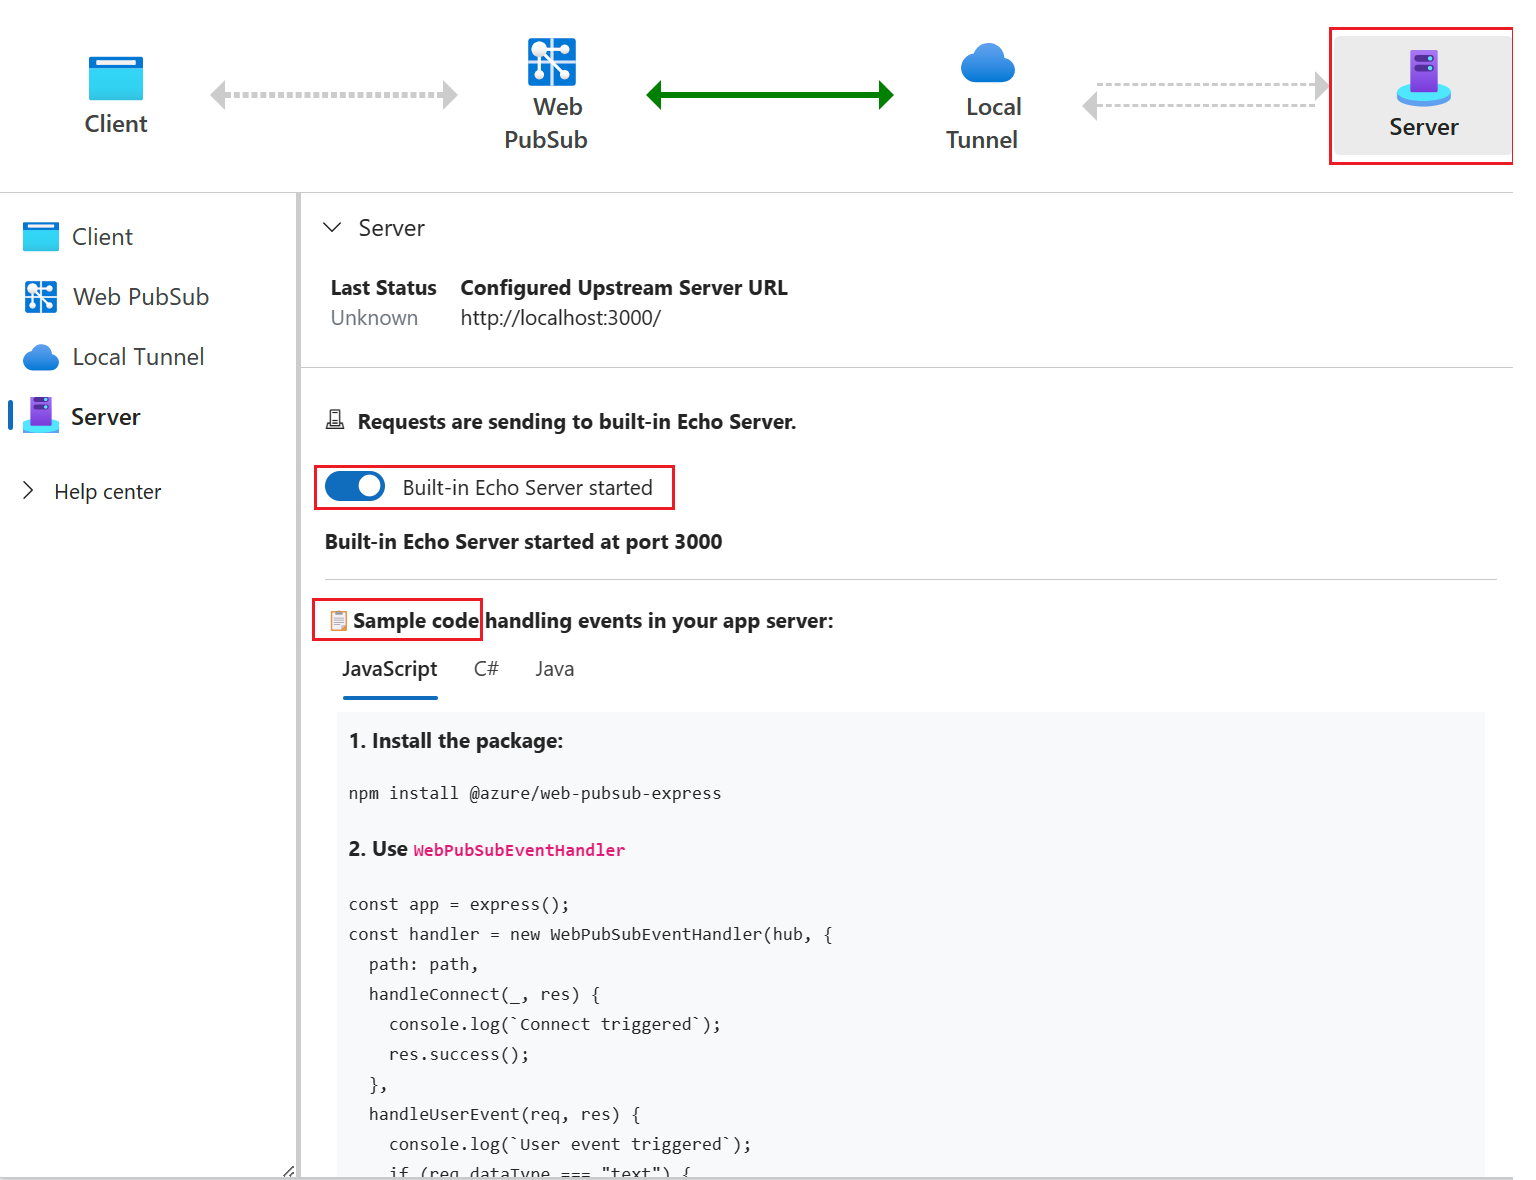
Open webview at: http://127.0.0.1:4000, open the link in your browser and you could see the tunnel status and the workflow.Now switch to Server tab, and check Built-in Echo Server to start a builtin upstream server with code similar to the sample code shown below it.

Alternatively, you can start your own upstream server at http://localhost:3000. You can also specify option
--upstream http://localhost:<custom-port>whenawps-tunnel runorawps-tunnel bindto configure your own upstream server at a custom port. For example, run the below code to start this sample upstream server, when it starts, the upstream serves requests to http://localhost:3000/eventhandler/.cd samples/upstream npm install node server.jsNow switch to Client tab, select
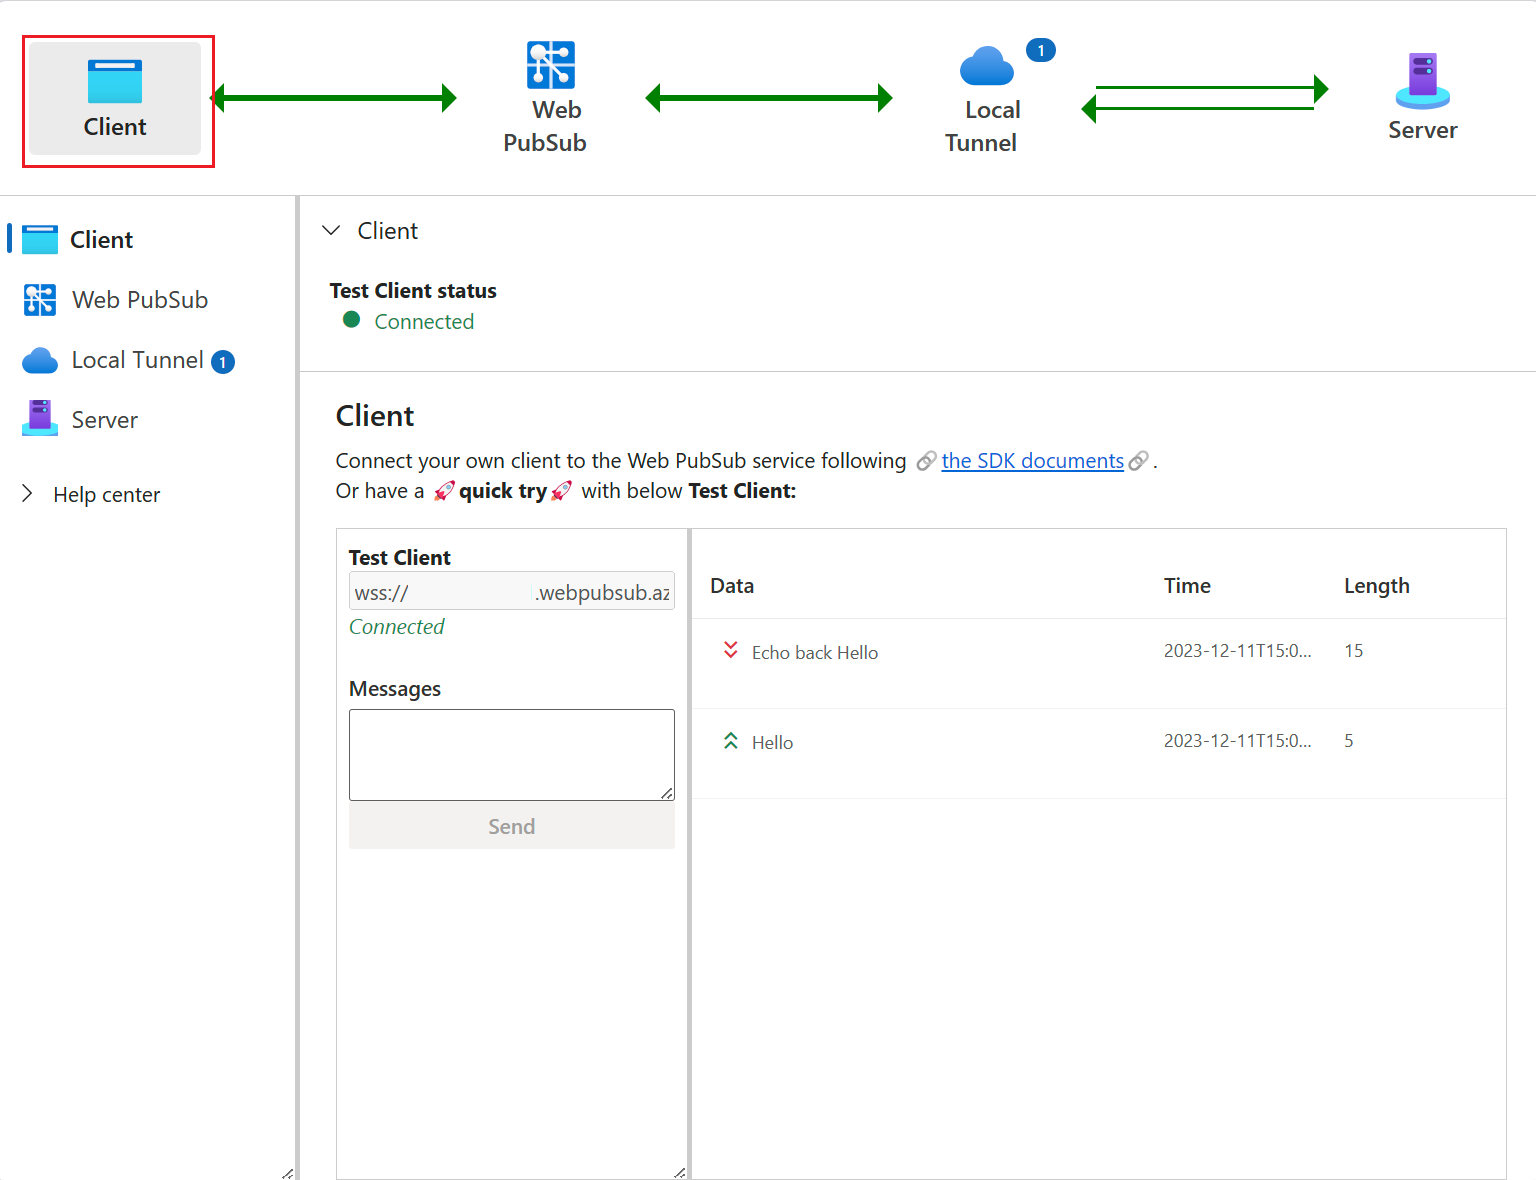
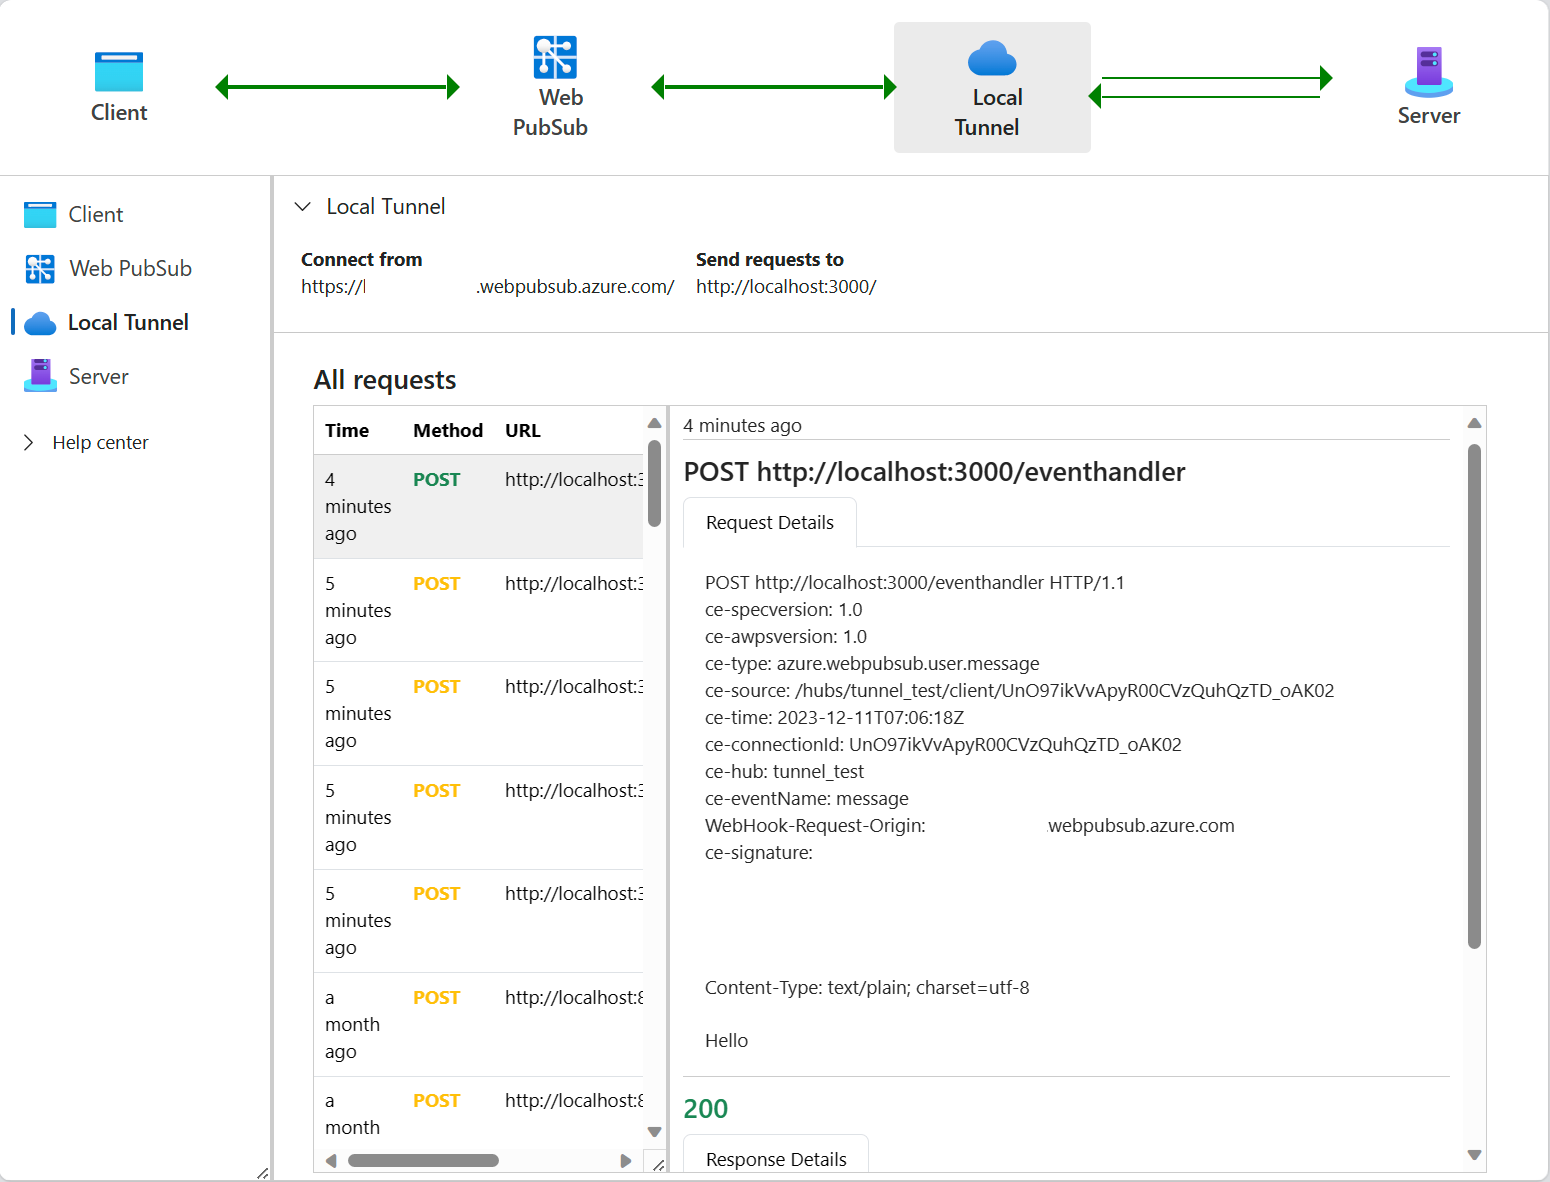
Connectto start a test WebSocket connection to the Azure Web PubSub service. You would see the traffic goes through Web PubSub to Local Tunnel and finally reaches the upstream server. The tunnel tab provides the details of the request and responses, providing you with a vivid view of what is requesting your upstream server and what is reponding from the upstream server.

1 year ago
1 year ago
1 year ago
2 years ago
2 years ago
2 years ago
2 years ago
2 years ago
2 years ago
2 years ago
2 years ago
2 years ago
2 years ago