@chezearth/swagger v0.7.6-alpha.2
Note
This is a fork of Scott Ganyo's popular swagger-api/swagger-node, which I believe is a great project. I would like to update it and to this end I am focussing on three things:
- Updating the dependencies to get rid of vulnerabilities
- Updating the Swagger libraries to handle the new OpenAPI 3.0 standards (much better than Swagger 2 in my view)
- Ensuring the Swagger Tools (validator, router, etc.) work with modern (ES2017+) JavaScript, especially
async/await.Along the way, I expect to add more tests and to change some aspects of the code. I would like the product to work on NodeJS v6 or newer, as I think it is unlikely many people will start a new project in an older version -- and this library is for new projects. So far, I have only updated one dev dependency,
mocha, to remove a critical vulnerability identified by NPM's audit. It has broken the code and tests. I am working on getting theswagger project createsequence to execute properly (the app exits after choosing the framework) and then to get the tests to pass. Then Travis should build successfully with Node v6, v8, v10 and v11.The workaround for the
createcommand to work is to specify your project name and framework (with-f <framework>), e.g.swagger project create myProject -f expressin the command and bypass the menu sequence.
I have also found that the Editor doesn't work properly if this package is installed in your local node_modules directory, so it is best to install it globally (
npm i -g @chezearth/swagger-- see more details in the install docs about root access). Charles Rethman.
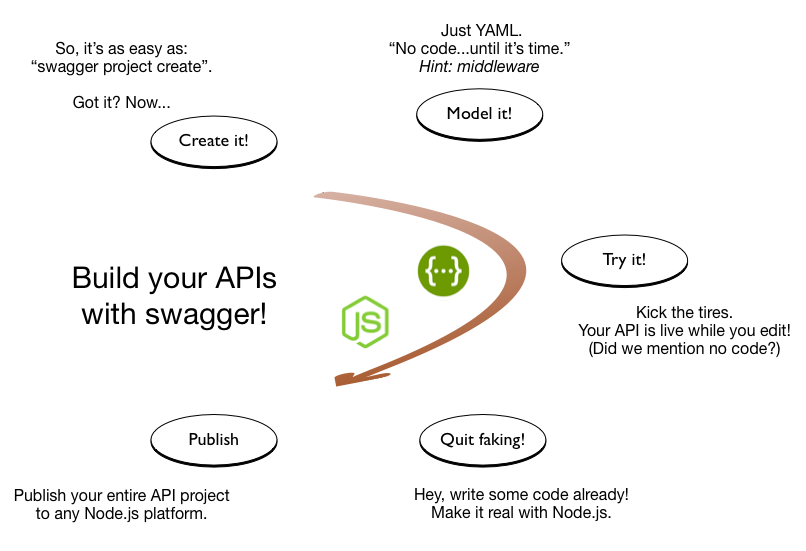
The swagger module provides tools for designing and building Swagger-compliant APIs entirely in Node.js. It integrates with popular Node.js servers, including Express, Hapi, Restify, and Sails, as well as any Connect-based middleware. With swagger, you can specify, build, and test your API from the very beginning, on your laptop. It allows you to change and iterate your design without rewriting the logic of your implementation.

Remember, one great thing about this approach is that all of the Swagger validation logic is handled for you, and all of the routing logic is managed through the Swagger configuration. You don't have to code (or recode!) any of that stuff yourself.
Your swagger API in five steps
1. Install the swagger module
Install using npm. For complete instructions, see the install page.
$ npm install -g swagger2. Create a new swagger project
Use the CLI to create and manage projects. Learn more on the quick start page.
$ swagger project create hello-world3. Design your API in the Swagger Editor
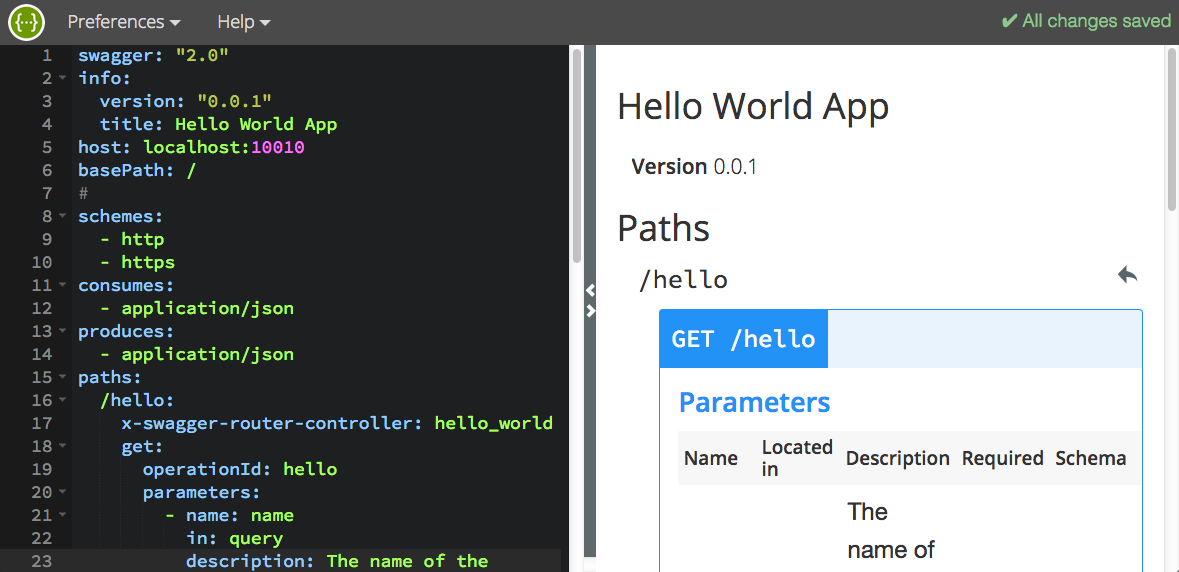
The interactive, browser-based Swagger Editor is built in. It provides Swagger 2.0 validation and endpoint routing, generates docs on the fly, and consumes easy-to-read YAML.
$ swagger project edit
4. Write controller code in Node.js
Code your API's business logic in Node.js.
function hello(req, res) {
    var name = req.swagger.params.name.value || 'stranger';
    var hello = util.format('Hello, %s!', name);
    res.json({ "message": hello });
}
If you look at the Swagger file in the editor (shown in step 3 above), the x-swagger-router-controller element (line 17 in the editor screenshot) specifies the name of the controller file associated with the /hello path. For example:
    paths:
        /hello:
            x-swagger-router-controller: hello_world
Controller source code is always placed in ./api/controllers. So, the controller source file for this project is ./api/controllers/hello_world.js.
The operationId element specifies which controller function to call. In this case (line 19), it is a function called hello. Learn more.
5. Run the server
Run the project server.
$ swagger project startNow, call the API!
It just works!
$ curl http://127.0.0.1:10010/hello?name=Scott
{ "message": "Hello, Scott!" }
Installing the swagger module
See the Installing swagger for details.
Using the swagger module
Go to the swagger module doc page. It includes all the information you need to get started.
About this project
This initiative grew out of Apigee-127, an API design-first development framework using Swagger. Apigee donated the code to create the swagger-node project in 2015.
Copyright 2016 Apigee Corporation
Licensed under the Apache License, Version 2.0 (the "License"); you may not use this file except in compliance with the License. You may obtain a copy of the License at
http://www.apache.org/licenses/LICENSE-2.0
Unless required by applicable law or agreed to in writing, software distributed under the License is distributed on an "AS IS" BASIS, WITHOUT WARRANTIES OR CONDITIONS OF ANY KIND, either express or implied. See the License for the specific language governing permissions and limitations under the License.
