@pipedream/mongodb v0.1.1
Overview
The MongoDB API provides powerful capabilities to interact with a MongoDB database, allowing you to perform CRUD (Create, Read, Update, Delete) operations, manage databases, and execute sophisticated queries. With Pipedream, you can harness these abilities to automate tasks, sync data across various apps, and react to events in real-time. It’s a combo that’s particularly potent for managing data workflows, syncing application states, or triggering actions based on changes to your data.
Example Use Cases
Real-time Data Syncing with Google Sheets: Sync new MongoDB document entries to a Google Sheet for easy sharing and reporting. Whenever a new customer is added to the MongoDB database, a Pipedream workflow triggers and appends the customer data to a Google Sheet, keeping your sales team updated in real-time.
Automated Backup Notifications via Email: Set up a daily database backup and use Pipedream to monitor the completion status of the backup operation. Once a backup is successfully completed, trigger an SMTP action to send an email notification to the system admin, ensuring peace of mind with regular backup status updates.
Slack Alerts for High-Value Transactions: Monitor your MongoDB for transactions exceeding a certain value and send alerts to a Slack channel when such transactions occur. Finance teams can stay on top of significant movements without manual database checks, improving response time and financial oversight.
Getting Started
To get started, you need to set up a user to connect to your MongoDB cluster. This guide assumes your MongoDB cluster is hosted on Mongo Atlas.
First, log in to Mongo Atlas to complete the next steps.
Create the MongoDB User
First, create a dedicated user for connecting MongoDB to Pipedream.
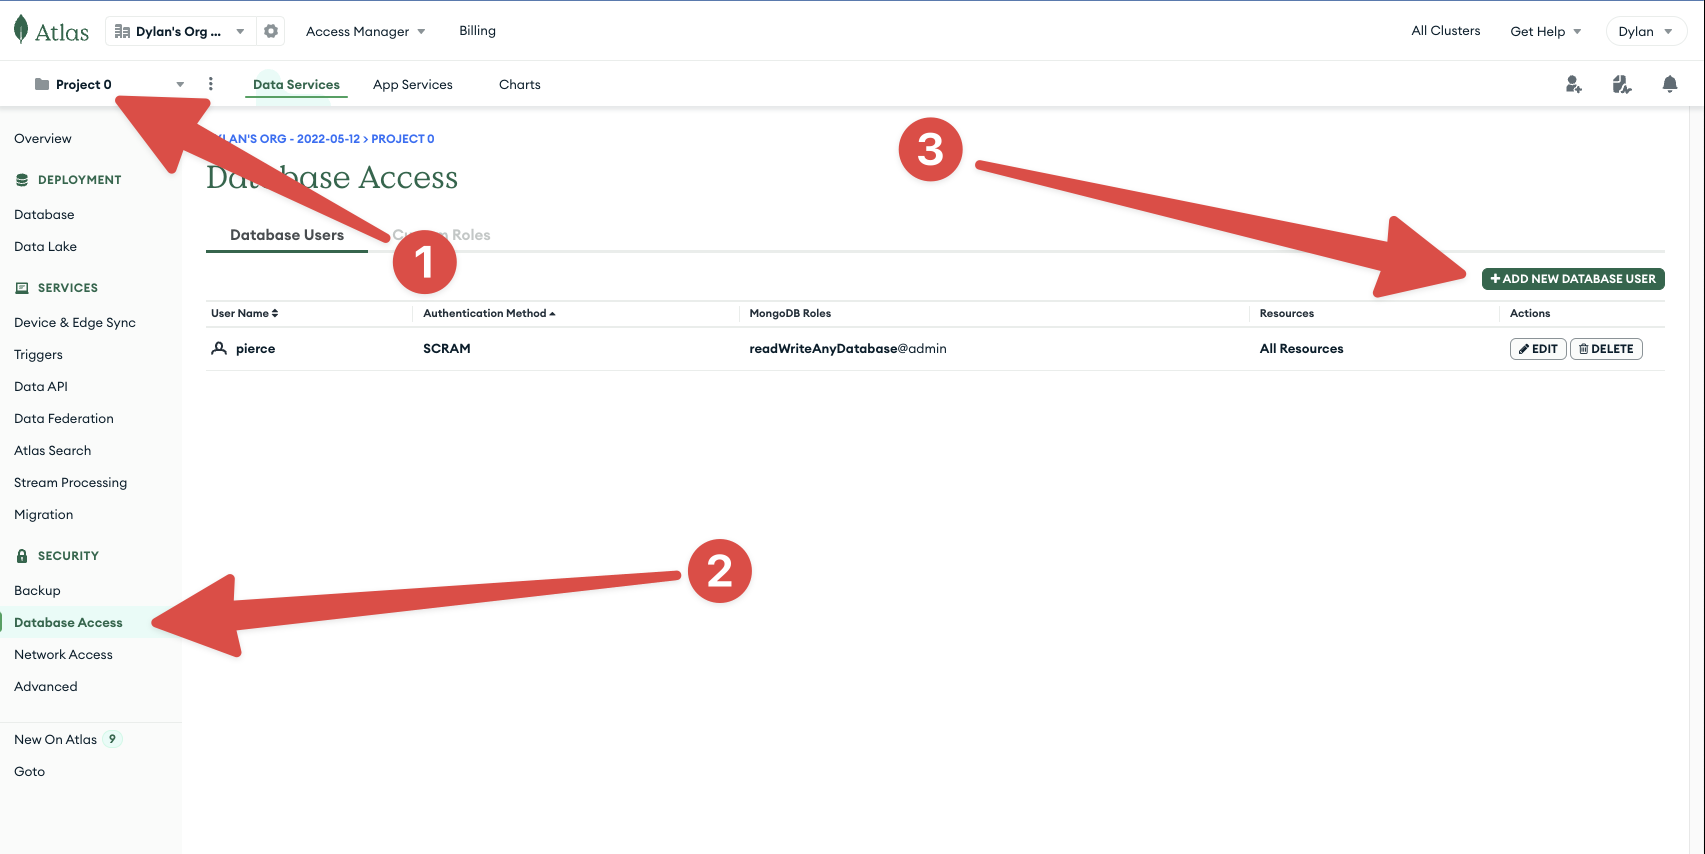
Select the MongoDB project where your cluster resides, then select the Database Access tab. Here, you'll see a list of users who can connect to your MongoDB cluster.
Click Create new database user to get started.

In the new pop-up, choose the Password authentication method first. Name the user pipedream so it’s easy to remember which service this user account is used for.
Generate a password and select a pre-built or custom role. Pre-built roles offer options like read-only or read and write access to all databases in the cluster. For more fine-tuned control, like restricting Pipedream to reading a single database, use a custom role.
Finally click Add user to create this new user account.

Provide the Credentials
Now, with a dedicated MongoDB user, connect to Pipedream. Return to Pipedream to set up a new MongoDB action in a workflow or to add your MongoDB account in the Connected Accounts area.
Copy and paste the Username and Password fields from the previous step, when you created the pipedream user in Mongo Atlas.
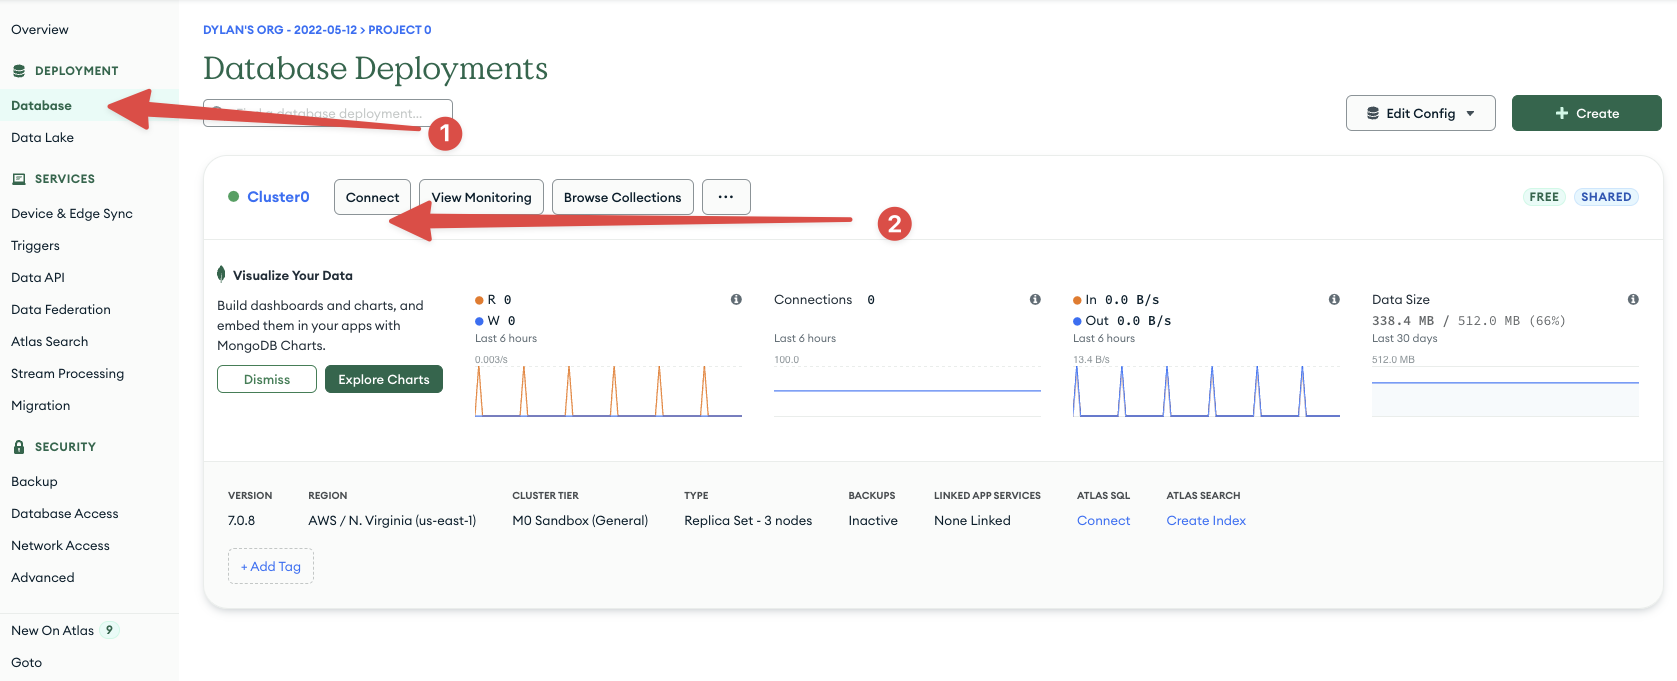
To find your database hostname, go to the Databases view in Mongo Atlas and click the Connect button for your chosen database.
Select the Compass or Node.js option. Then you’ll see the connection URI string. The hostname is the latter portion of the string, as shown below:

Lastly, provide the Database name to connect to.
Allowing Pipedream Connections
By default, Pipedream workflows can start anywhere within the us-east-1 AWS IP range. You'll need to expose your MongoDB Atlas Cluster to the internet or use a Pipedream VPC to assign a specific outbound IP address to your workflows.
Allowing any IP Address Range
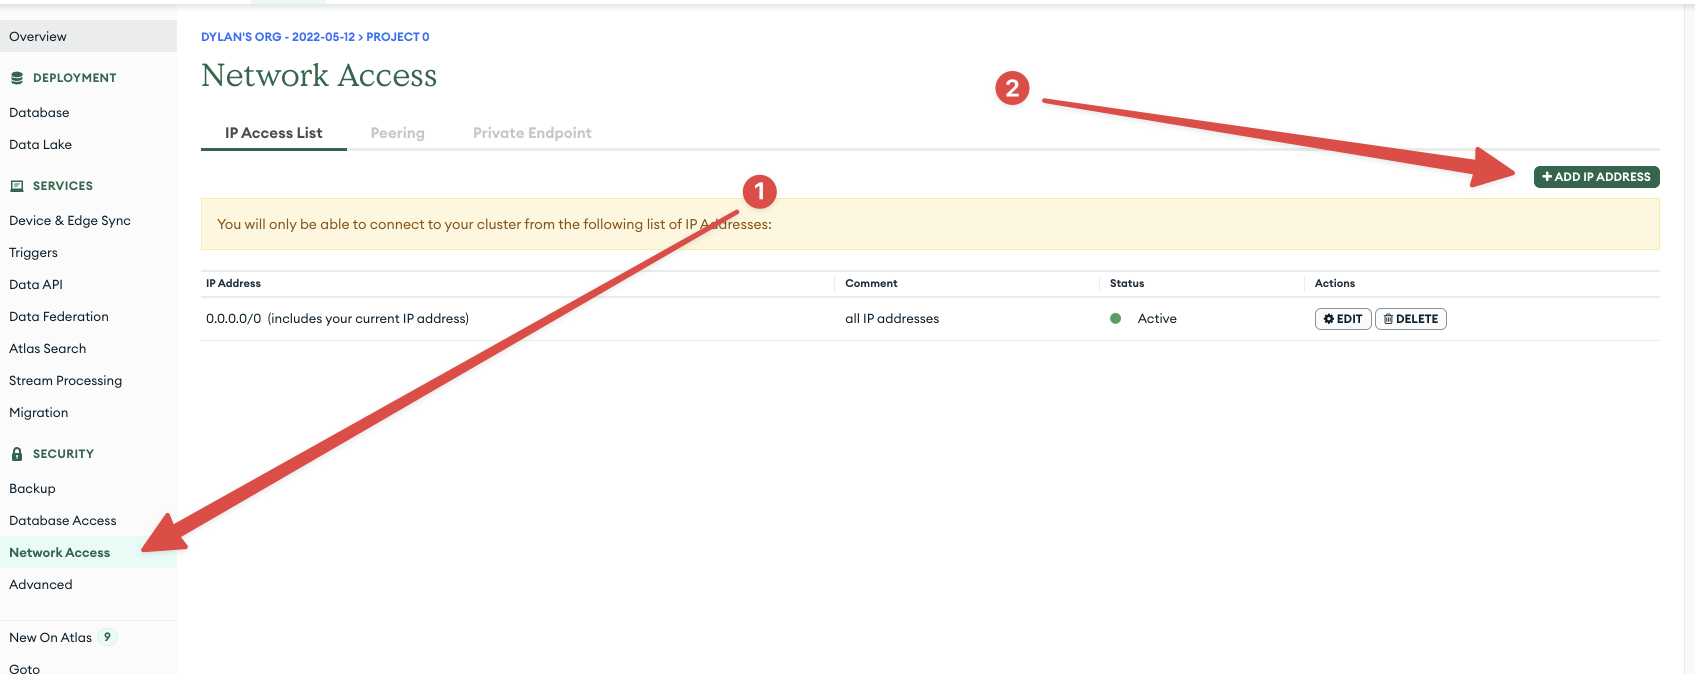
First, open the Network Access section of your MongoDB Atlas project. Then click Add new IP address in the top right-hand corner:

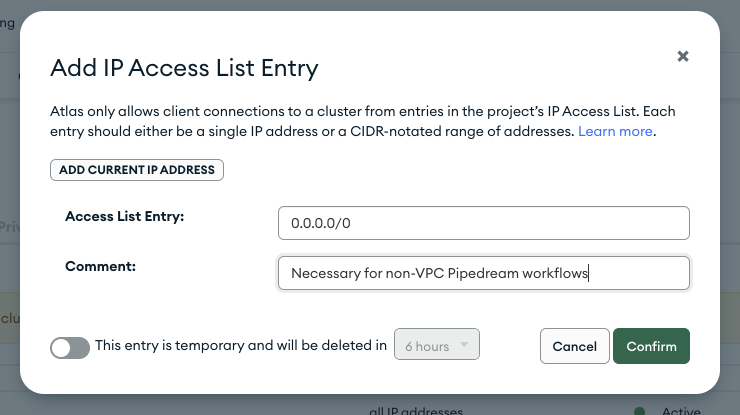
Then enter 0.0.0.0/0 in the IP address field to allow connections from any IP address. In the description field, we recommend adding a note about this requirement for Pipedream.

Finally, click Confirm
Using a Pipedream VPC
Pipedream VPCs allow you to define a single static IP address for your workflows and allow you to run these workflows in a separate network.
Follow this guide to create a VPC and assign the IP address to your workflow.
Then create a new allowed IP address in MongoDB by opening the Network Access section in Atlas: