@playbuzz/angular-styleguide v1.0.1
Story Style Guide
Story style guide for the front end developers team, by @EladBet
These styles are based on angular-styleguide by @John_Papa and my development experience with Angular, and working in a team.
The purpose of this style guide is to provide guidance on building and improving quiliup applications by showing the conventions we used ,and more importantly, why we choose them.
Table of Contents
- Single Responsibility
- Modules
- Controllers
- SVG Icons
- Translation
- Services
- Factories
- Data Services
- Directives
- Resolving Promises for a Controller
- Manual Annotating for Dependency Injection
- Naming
- Application Structure LIFT Principle
- Modularity
- Startup Logic
- Angular $ Wrapper Services
- Animations
- Filters
Single Responsibility
Rule of 1
[Style Y001]
Define 1 component per file.
The following example defines the
appmodule and its dependencies, defines a controller, and defines a factory all in the same file./* avoid */ angular.module('app', ['ngRoute']) .controller('SomeController', SomeController) .factory('someFactory', someFactory); function SomeController() { } function someFactory() { }The same components are now separated into their own files.
/* recommended */

// app.module.js
angular.module('app', ['ngRoute']);
/* recommended */ // someController.js angular.module('app') .controller('SomeController', SomeController); function SomeController() { }/* recommended */ // someFactory.js angular.module('app') .factory('someFactory', someFactory); function someFactory() { }
Modules
Avoid Naming Collisions
[Style Y020]
Use unique naming conventions with separators for sub-modules.
Why?: Unique names help avoid module name collisions. Separators help define modules and their submodule hierarchy. For example
appmay be your root module whileapp.dashboardandapp.usersmay be modules that are used as dependencies ofapp.
Definitions (aka Setters)
[Style Y021]
Declare modules without a variable using the setter syntax.
Why?: With 1 component per file, there is rarely a need to introduce a variable for the module.
/* avoid */
var app = angular.module('app', [
    'ngAnimate',
    'ngRoute',
    'app.shared',
    'app.dashboard'
]);
Instead use the simple setter syntax.
/* recommended */
angular.module('app', [
    'ngAnimate',
    'ngRoute',
    'app.shared',
    'app.dashboard'
]);
Getters
[Style Y022]
When using a module, avoid using a variable and instead use chaining with the getter syntax.
Why?: This produces more readable code and avoids variable collisions or leaks.
/* avoid */
var app = angular.module('app');
app.controller('SomeController', SomeController);

function SomeController() { }
/* recommended */ angular.module('app') .controller('SomeController', SomeController); function SomeController() { }
Controllers
controllerAs View Syntax
[Style Y030]
Use the
controllerAssyntax over theclassic controller with $scopesyntax.Why?: Controllers are constructed, "newed" up, and provide a single new instance, and the
controllerAssyntax is closer to that of a JavaScript constructor than theclassic $scope syntax.Why?: It promotes the use of binding to a "dotted" object in the View (e.g.
customer.nameinstead ofname), which is more contextual, easier to read, and avoids any reference issues that may occur without "dotting".Why?: Helps avoid using
$parentcalls in Views with nested controllers.<!-- avoid --> <div ng-controller="Customer"> {{ name }} </div><!-- recommended --> <div ng-controller="Customer as customer"> {{ customer.name }} </div>
controllerAs Controller Syntax
[Style Y031]
Use the
controllerAssyntax over theclassic controller with $scopesyntax.The
controllerAssyntax usesthisinside controllers which gets bound to$scopeWhy?:
controllerAsis syntactic sugar over$scope. You can still bind to the View and still access$scopemethods.Why?: Helps avoid the temptation of using
$scopemethods inside a controller when it may otherwise be better to avoid them or move them to a factory. Consider using$scopein a factory, or if in a controller just when needed. For example when publishing and subscribing events using$emit,$broadcast, or$onconsider moving these uses to a factory and invoke from the controller./* avoid */ function Customer($scope) { $scope.name = {}; $scope.sendMessage = function() { }; }/* recommended - but see next section */ function Customer() { this.name = {}; this.sendMessage = function() { }; }
controllerAs with vm
[Style Y032]
Use a capture variable for
thiswhen using thecontrollerAssyntax. Choose a consistent variable name such asvm, which stands for ViewModel.Why?: The
thiskeyword is contextual and when used within a function inside a controller may change its context. Capturing the context ofthisavoids encountering this problem./* avoid */ function Customer() { this.name = {}; this.sendMessage = function() { }; }/* recommended */ function Customer() { var vm = this; vm.name = {}; vm.sendMessage = function() { }; }Note: You can avoid any jshint warnings by placing the comment above the line of code. However it is not needed when the function is named using UpperCasing, as this convention means it is a constructor function, which is what a controller is in Angular.
/* jshint validthis: true */
var vm = this;
Note: When creating watches in a controller using
controller as, you can watch thevm.*member using the following syntax. (Create watches with caution as they add more load to the digest cycle.)<input ng-model="vm.title"/>function SomeController($scope, $log) { var vm = this; vm.title = 'Some Title'; $scope.$watch('vm.title', function(current, original) { $log.info('vm.title was %s', original); $log.info('vm.title is now %s', current); }); }
Bindable Members Up Top
[Style Y033]
Place bindable members at the top of the controller, alphabetized, and not spread through the controller code.
Why?: Placing bindable members at the top makes it easy to read and helps you instantly identify which members of the controller can be bound and used in the View.
Why?: Setting anonymous functions in-line can be easy, but when those functions are more than 1 line of code they can reduce the readability. Defining the functions below the bindable members (the functions will be hoisted) moves the implementation details down, keeps the bindable members up top, and makes it easier to read.
/* avoid */
function Sessions() {
    var vm = this;

    vm.gotoSession = function() {
      /* ... */
    };
    vm.refresh = function() {
      /* ... */
    };
    vm.search = function() {
      /* ... */
    };
    vm.sessions = [];
    vm.title = 'Sessions';
/* recommended */ function Sessions() { var vm = this; vm.gotoSession = gotoSession; vm.refresh = refresh; vm.search = search; vm.sessions = []; vm.title = 'Sessions'; //////////// function gotoSession() { /* */ } function refresh() { /* */ } function search() { /* */ }
Function Declarations to Hide Implementation Details
[Style Y034]
Use function declarations to hide implementation details. Keep your bindable members up top. When you need to bind a function in a controller, point it to a function declaration that appears later in the file. This is tied directly to the section Bindable Members Up Top. For more details see this post.
Why?: Placing bindable members at the top makes it easy to read and helps you instantly identify which members of the controller can be bound and used in the View. (Same as above.)
Why?: Placing the implementation details of a function later in the file moves that complexity out of view so you can see the important stuff up top.
Why?: Function declaration are hoisted so there are no concerns over using a function before it is defined (as there would be with function expressions).
Why?: You never have to worry with function declarations that moving
var abeforevar bwill break your code becauseadepends onb.Why?: Order is critical with function expressions
/**
- avoid
Using function expressions. */ function Avengers(dataservice, logger) { var vm = this; vm.avengers = []; vm.title = 'Avengers';
var activate = function() {
    return getAvengers().then(function() {
        logger.info('Activated Avengers View');
    });
}

var getAvengers = function() {
    return dataservice.getAvengers().then(function(data) {
        vm.avengers = data;
        return vm.avengers;
    });
}

vm.getAvengers = getAvengers;

activate();
}
Notice that the important stuff is scattered in the preceding example. In the example below, notice that the important stuff is up top. For example, the members bound to the controller such as `vm.avengers` and `vm.title`. The implementation details are down below. This is just easier to read.

```javascript
/*
recommend
- Using function declarations
and bindable members up top. */ function Avengers(dataservice, logger) { var vm = this; vm.avengers = []; vm.getAvengers = getAvengers; vm.title = 'Avengers';
activate();

function activate() {
    return getAvengers().then(function() {
        logger.info('Activated Avengers View');
    });
}

function getAvengers() {
    return dataservice.getAvengers().then(function(data) {
        vm.avengers = data;
        return vm.avengers;
    });
}
}
Defer Controller Logic to Services
[Style Y035]
Defer logic in a controller by delegating to services and factories.
Why?: Logic may be reused by multiple controllers when placed within a service and exposed via a function.
Why?: Logic in a service can more easily be isolated in a unit test, while the calling logic in the controller can be easily mocked.
Why?: Removes dependencies and hides implementation details from the controller.
Why?: Keeps the controller slim, trim, and focused.
/* avoid */
function Order($http, $q, config, userInfo) {
    var vm = this;
    vm.checkCredit = checkCredit;
    vm.isCreditOk;
    vm.total = 0;

    function checkCredit() {
        var settings = {};
        // Get the credit service base URL from config
        // Set credit service required headers
        // Prepare URL query string or data object with request data
        // Add user-identifying info so service gets the right credit limit for this user.
        // Use JSONP for this browser if it doesn't support CORS
        return $http.get(settings)
            .then(function(data) {
             // Unpack JSON data in the response object
               // to find maxRemainingAmount
               vm.isCreditOk = vm.total <= maxRemainingAmount
            })
            .catch(function(error) {
               // Interpret error
               // Cope w/ timeout? retry? try alternate service?
               // Re-reject with appropriate error for a user to see
            });
    };
}
/* recommended */ function Order(creditService) { var vm = this; vm.checkCredit = checkCredit; vm.isCreditOk; vm.total = 0; function checkCredit() { return creditService.isOrderTotalOk(vm.total) .then(function(isOk) { vm.isCreditOk = isOk; }) .catch(showServiceError); }; }
Keep Controllers Focused
[Style Y037]
Define a controller for a view, and try not to reuse the controller for other views. Instead, move reusable logic to factories and keep the controller simple and focused on its view.
Why?: Reusing controllers with several views is brittle and good end-to-end (e2e) test coverage is required to ensure stability across large applications.
Assigning Controllers
[Style Y038]
When a controller must be paired with a view and either component may be re-used by other controllers or views, define controllers along with their routes.
Note: If a View is loaded via another means besides a route, then use the
ng-controller="Avengers as vm"syntax.Why?: Pairing the controller in the route allows different routes to invoke different pairs of controllers and views. When controllers are assigned in the view using
ng-controller, that view is always associated with the same controller./* avoid - when using with a route and dynamic pairing is desired */ // route-config.js angular.module('app') .config(config); function config($routeProvider) { $routeProvider .when('/avengers', { templateUrl: 'avengers.html' }); }<!-- avengers.html --> <div ng-controller="Avengers as vm"> </div>/* recommended */ // route-config.js angular.module('app') .config(config); function config($routeProvider) { $routeProvider .when('/avengers', { templateUrl: 'avengers.html', controller: 'Avengers', controllerAs: 'vm' }); }<!-- avengers.html --> <div> </div>
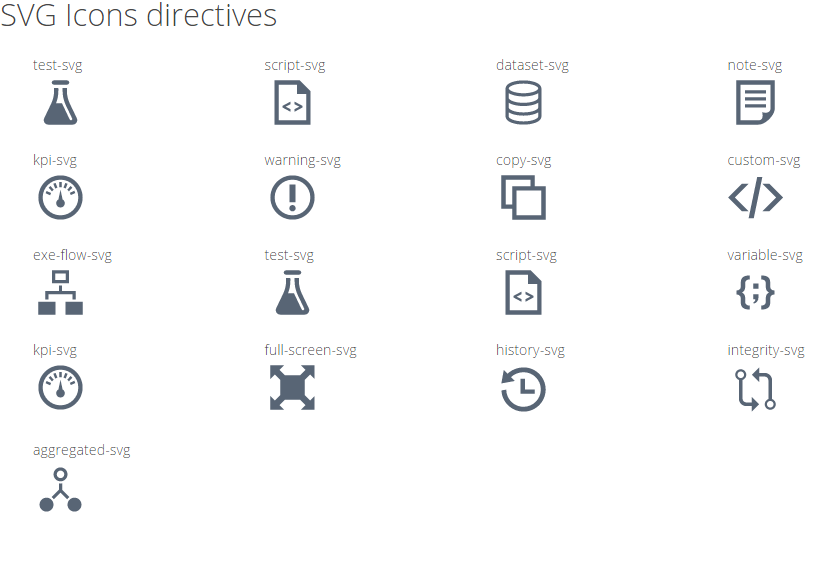
SVG Icons
[Style Y213]
SVG images are actually written in xml. This means you can manipulate images directly in your code editor (that is, if you take the time to learn the language). This gives you a ton of power to do complex manipulations and animations that are not possible with standard raster-based images.
Create a new
directivefor new SVG icon, perfix the directive name with theSvgperfix , set input parameters forwidth,heightandsvgClass.Put the directive in the
svg-icons.jsfile in thesharedfolder.Why?: This way you can use the same icon in different shapes and colors over and over again.
Why?: Helpful when you need to change the icon in all pages.
 <!-- svg-icons.js -->
.directive('testSvg', function() {
        return {
            restrict: 'E',
            scope: {
                width: '@',
                height: '@',
                svgClass:'@'
            },
            templateNamespace: 'svg',
            template:'<svg version="1.1" class="icon-svg" xmlns="http://www.w3.org/2000/svg" xmlns:xlink="http://www.w3.org/1999/xlink"  x="0px" y="0px" ng-attr-style="{{svgClass}}" ng-attr-width="{{width}}" ng-attr-height="{{height}}" viewBox="0 0 512 512" enable-background="new 0 0 512 512" xml:space="preserve">' +
                '<path d="M174.75,70c0-11.046,8.954-20,20-20h122.5c11.046,0,20,8.954,20,20s-8.954,20-20,20h-122.5 C183.704,90,174.75,81.046,174.75,70z M369.958,462c30.866,0,51.176-32.304,37.802-60.121l-64.847-134.865 c-18.044-37.528-27.413-78.635-27.413-120.275V120h-39.775c0,28.335-4.785,89.631,31.14,164.348         c36.038,74.95,49.581,103.666,56.859,118.785c8.105,16.839-15.017,25.674-22.841,9.311l-70.881-148.776h-55.786      c25.377-63.748,22.002-115.29,22.002-143.667H196.5v26.739c0,41.64-9.369,82.746-27.413,120.273L104.241,401.88                C90.865,429.696,111.179,462,142.043,462H369.958z"/>' +
            '</svg>'
       }
   })
- Add the new directive to `svg-icons.html` file in the `views\templates` folder.
*Why?*: This is helpful to prevent duplicate directives of the same SVG icon.
```html
<!-- svg-icons.html -->
<div class="col-md-3">
<span >test-svg</span>
<test-svg class="row" "width="50px" height="50px" svg-class="fill: #586575"></test-svg>
</div>
```
**[Back to top](#table-of-contents)**
## Translation
###### [Style [Y213](#style-y213)]
- For language translation services we use [angular-translate](//github.com/ngular-translate/angular-translate.git)
- For each string which is displayed to the user , use the Upper Case replacement starting with underline and replace all spaces with underline.
*Why?*: This way we can detect untreated strings with automated test.
```html
<h1>{{ '_TITLE' | translate }}</h1>
<p>{{ '_TWO_WORDS' | translate }}</p>
```
- Use the dedicated `json` language file in the `languages` folder to set the translations.
```javascript
/* en.json */
{
"_TITLE":"Tittle",
"_TWO_WORDS":"Two words"
}
```
**[Back to top](#table-of-contents)**
## Services
### Singletons
###### [Style [Y040](#style-y040)]
- Here's an example of a service and a factory that accomplish the same thing.
Note: [All Angular services are singletons](https://docs.angularjs.org/guide/services). This means that there is only one instance of a given service per injector.
```javascript
var app = angular.module('app',[]);
app.service('helloWorldService', function(){
this.hello = function() {
return "Hello World";
};
});
app.factory('helloWorldFactory', function(){
return {
hello: function() {
return "Hello World";
}
}
});
```
**[Back to top](#table-of-contents)**
## Factories
### Single Responsibility
###### [Style [Y050](#style-y050)]
- Factories should have a [single responsibility](http://en.wikipedia.org/wiki/Single_responsibility_principle), that is encapsulated by its context. Once a factory begins to exceed that singular purpose, a new factory should be created.
### Singletons
###### [Style [Y051](#style-y051)]
- Factories are instantiated with the `new` keyword.
- Factories are singletons and return an object that contains the members of the service.
Note: [All Angular services are singletons](https://docs.angularjs.org/guide/services).
```javascript
// factory
app.factory('helloFactory', function() {
return function(name) {
this.name = name;
this.hello = function() {
return "Hello " + this.name;
};
};
});
```
- Here's an example controller using the service and the two factories. With the `helloFactory` returning a function, the name value is set when the object is `new`'d.
```javascript
app.controller('helloCtrl', function($scope, helloWorldService, helloWorldFactory, helloFactory) {
init = function() {
helloWorldService.hello(); //'Hello World'
helloWorldFactory.hello(); //'Hello World'
new helloFactory('Readers').hello() //'Hello Readers'
}
init();
});
```
### Accessible Members Up Top
###### [Style [Y052](#style-y052)]
- Expose the callable members of the service (its interface) at the top, using a technique derived from the [Revealing Module Pattern](http://addyosmani.com/resources/essentialjsdesignpatterns/book/#revealingmodulepatternjavascript).
*Why?*: Placing the callable members at the top makes it easy to read and helps you instantly identify which members of the service can be called and must be unit tested (and/or mocked).
*Why?*: This is especially helpful when the file gets longer as it helps avoid the need to scroll to see what is exposed.
*Why?*: Setting functions as you go can be easy, but when those functions are more than 1 line of code they can reduce the readability and cause more scrolling. Defining the callable interface via the returned service moves the implementation details down, keeps the callable interface up top, and makes it easier to read.
```javascript
/* avoid */
function dataService() {
var someValue = '';
function save() {
/* */
};
function validate() {
/* */
};
return {
save: save,
someValue: someValue,
validate: validate
};
}/* recommended */
function dataService() {
var someValue = '';
var service = {
save: save,
someValue: someValue,
validate: validate
};
return service;
////////////
function save() {
/* */
};
function validate() {
/* */
};
}This way bindings are mirrored across the host object, primitive values cannot update alone using the revealing module pattern.
Function Declarations to Hide Implementation Details
[Style Y053]
Use function declarations to hide implementation details. Keep your accessible members of the factory up top. Point those to function declarations that appears later in the file. For more details see this post.
Why?: Placing accessible members at the top makes it easy to read and helps you instantly identify which functions of the factory you can access externally.
Why?: Placing the implementation details of a function later in the file moves that complexity out of view so you can see the important stuff up top.
Why?: Function declaration are hoisted so there are no concerns over using a function before it is defined (as there would be with function expressions).
Why?: You never have to worry with function declarations that moving
var abeforevar bwill break your code becauseadepends onb.Why?: Order is critical with function expressions
/**
- avoid
Using function expressions */ function dataservice($http, $location, $q, exception, logger) { var isPrimed = false; var primePromise;
var getAvengers = function() {
    // implementation details go here
};

var getAvengerCount = function() {
    // implementation details go here
};

var getAvengersCast = function() {
   // implementation details go here
};

var prime = function() {
   // implementation details go here
};

var ready = function(nextPromises) {
    // implementation details go here
};

var service = {
    getAvengersCast: getAvengersCast,
    getAvengerCount: getAvengerCount,
    getAvengers: getAvengers,
    ready: ready
};

return service;
}
```javascript
/**
recommended
- Using function declarations
and accessible members up top. */ function dataservice($http, $location, $q, exception, logger) { var isPrimed = false; var primePromise;
var service = {
    getAvengersCast: getAvengersCast,
    getAvengerCount: getAvengerCount,
    getAvengers: getAvengers,
    ready: ready
};

return service;

////////////

function getAvengers() {
    // implementation details go here
}

function getAvengerCount() {
    // implementation details go here
}

function getAvengersCast() {
    // implementation details go here
}

function prime() {
    // implementation details go here
}

function ready(nextPromises) {
    // implementation details go here
}
}
Data Services
Separate Data Calls
[Style Y060]
Refactor logic for making data operations and interacting with data to a factory. Make data services responsible for XHR calls, local storage, stashing in memory, or any other data operations.
Why?: The controller's responsibility is for the presentation and gathering of information for the view. It should not care how it gets the data, just that it knows who to ask for it. Separating the data services moves the logic on how to get it to the data service, and lets the controller be simpler and more focused on the view.
Why?: This makes it easier to test (mock or real) the data calls when testing a controller that uses a data service.
Why?: Data service implementation may have very specific code to handle the data repository. This may include headers, how to talk to the data, or other services such as
$http. Separating the logic into a data service encapsulates this logic in a single place hiding the implementation from the outside consumers (perhaps a controller), also making it easier to change the implementation./* recommended */ // dataservice factory angular.module('app.core') .factory('dataservice',['$http', 'logger', function($http, logger){ return { getAvengers: getAvengers }; function getAvengers() { return $http.get('/api/maa') .then(getAvengersComplete) .catch(getAvengersFailed); function getAvengersComplete(response) { return response.data.results; } function getAvengersFailed(error) { logger.error('XHR Failed for getAvengers.' + error.data); } } }]);Note: The data service is called from consumers, such as a controller, hiding the implementation from the consumers, as shown below.
/* recommended */

// controller calling the dataservice factory
angular.module('app.avengers')
.controller('Avengers', ['dataservice', 'logger' function(dataservice, logger) {

    var vm = this;
    vm.avengers = [];

    activate();

    function activate() {
        return getAvengers().then(function() {
            logger.info('Activated Avengers View');
        });
    }

    function getAvengers() {
        return dataservice.getAvengers()
            .then(function(data) {
                vm.avengers = data;
                return vm.avengers;
            });
    }
}]);
One service for one RESTful server data source
[Style Y061]
- A resource "class" object contains default methods.
Always use the default methods to interact with RESTful server-side data sources and when needded extended with custom actions.
Why?: Provides consistency in your resources.
Here's the default methods:
  { 'get':    {method:'GET'},
    'save':   {method:'POST'},
    'query':  {method:'GET', isArray:true},
    'remove': {method:'DELETE'},
    'delete': {method:'DELETE'} };
 /* avoid */

 var restServices = angular.module('restServices', ['ngResource']);

 restServices.factory('engineExecutionsAPI', ['$resource',
     function($resource){
         return $resource('/api/engineExecutions',{},{
             "get":{method:'GET',isArray:true ,params:{}}
         });
     }]
 );

 restServices.factory('engineGetExecutionStatusAPI', ['$resource',
     function($resource) {
         return $resource('/api/engineExecutions/id?filter=id,testId,finalResult,duration,sumResults,errorMessage&executionId=:id', {id: '@id'}, {
             "get": {method: 'GET', params: {}}
         });
     }]
 );

 restServices.factory('engineGetExecutionAPI', ['$resource',
     function($resource){
         return $resource('/api/engineExecutions/id',{},{
             "get":{method:'GET' ,params:{}}
         });
     }]
 );
 ```

Note: You can pass filter parameters in the controller so there is no need to announce them in the resource service.

 ```javascript
  /* recommended */

  var restServices = angular.module('restServices', ['ngResource']);

  restServices.factory('engineExecutionsAPI', ['$resource',
      function($resource){
          return $resource('/api/engineExecutions',{},{
          });
      }]
  );
  ```

### Extend $resource with custom actions
###### [Style [Y062](#style-y062)]

- Extend ngResource custom actions set by using input parameters.

  *Why?*: Using one service for RESTful data source make it easy to read and helps you instantly identify which method to use to interact with the data you need .

  *Why?*: This way we can detect untreated request with automated test.

 ```javascript
   /* avoid */

   var restServices = angular.module('restServices', ['ngResource']);

   restServices.factory('addMainGrid', ['$resource',
       function($resource){
           return $resource('/api/rda/addMainGrid',{},{
               "add":{method:'POST',params:{}}
           });
       }]);

   restServices.factory('updateMainGrid', ['$resource',
       function($resource){
           return $resource('/api/rda/updateMainGrid',{},{
               "update":{method:'POST',params:{}}
           });
       }]);

   restServices.factory('deleteMainGrid', ['$resource',
       function($resource){
           return $resource('/api/rda/deleteMainGrid',{},{
               "remove":{method:'POST',params:{}}
           });
       }]);
   ```

   ```javascript
     /* recommended */

     var restServices = angular.module('restServices', ['ngResource']);

      restServices.factory('rda', ['$resource',
         function($resource){
             return $resource('/api/rda/:method',{},{
                "add":{method:'POST',params:{method:'addMainGrid'}}
                "update":{method:'POST',params:{method:'updateMainGrid'}}
                "remove":{method:'POST',params:{method:'deleteMainGrid'}}
             });
         }]);
    ```


## Directives
### Limit 1 Per File
###### [Style [Y070](#style-y070)]

- Create one directive per file. Name the file for the directive.

 *Why?*: It is easy to mash all the directives in one file, but difficult to then break those out so some are shared across apps, some across modules, some just for one module.

 *Why?*: One directive per file is easy to maintain.

 > Note: "**Best Practice**: Directives should clean up after themselves. You can use `element.on('$destroy', ...)` or `scope.$on('$destroy', ...)` to run a clean-up function when the directive is removed" ... from the Angular documentation.

```javascript
/* avoid */
/* directives.js */

angular.module('app.widgets')

/* order directive that is specific to the order module */
.directive('orderCalendarRange',  function() {
   /* implementation details */
})

/* sales directive that can be used anywhere across the sales app */
.directive('salesCustomerInfo',  function() {
   /* implementation details */
})

/* spinner directive that can be used anywhere across apps */
.directive('sharedSpinner',  function sharedSpinner() {
   /* implementation details */
});
/* recommended */
/* calendarRange.directive.js */
/**
* @desc order directive that is specific to the order module at a company named Acme
* @example <div acme-order-calendar-range></div>
*/
angular.module('sales.order')
.directive('acmeOrderCalendarRange', function() {
/* implementation details */
});/* recommended */
/* customerInfo.directive.js */
/**
* @desc sales directive that can be used anywhere across the sales app at a company named Acme
* @example <div acme-sales-customer-info></div>
*/
angular
.module('sales.widgets')
.directive('acmeSalesCustomerInfo', salesCustomerInfo);
function salesCustomerInfo() {
/* implementation details */
}/* recommended */
/* spinner.directive.js */
/**
* @desc spinner directive that can be used anywhere across apps at a company named Acme
* @example <div acme-shared-spinner></div>
*/
angular.module('shared.widgets')
.directive('acmeSharedSpinner', function() {
/* implementation details */
});Note: There are many naming options for directives, especially since they can be used in narrow or wide scopes. Choose one that makes the directive and its file name distinct and clear. Some examples are below, but see the [Naming](#naming) section for more recommendations.Manipulate DOM in a Directive
[Style Y072]
When manipulating the DOM directly, use a directive. If alternative ways can be used such as using CSS to set styles or the animation services, Angular templating,
ngShoworngHide, then use those instead. For example, if the directive simply hides and shows, use ngHide/ngShow.Why?: DOM manipulation can be difficult to test, debug, and there are often better ways (e.g. CSS, animations, templates)
Restrict to Elements and Attributes
[Style Y074]
When creating a directive that makes sense as a stand-alone element, allow restrict
E(custom element) and optionally restrictA(custom attribute). Generally, if it could be its own control,Eis appropriate. General guideline is allowEAbut lean towards implementing as an element when it's stand-alone and as an attribute when it enhances its existing DOM element.Why?: It makes sense.
Why?: While we can allow the directive to be used as a class, if the directive is truly acting as an element it makes more sense as an element or at least as an attribute.
Note: EA is the default for Angular 1.3 +
<!-- avoid -->
<div class="my-calendar-range"></div>
/* avoid */ angular.module('app.widgets') .directive('myCalendarRange', function() { var directive = { link: link, templateUrl: '/template/is/located/here.html', restrict: 'C' }; return directive; function link(scope, element, attrs) { /* */ } });<!-- recommended --> <my-calendar-range></my-calendar-range> <div my-calendar-range></div>/* recommended */ angular.module('app.widgets') .directive('myCalendarRange', function() { var directive = { link: link, templateUrl: '/template/is/located/here.html', restrict: 'EA' }; return directive; function link(scope, element, attrs) { /* */ } });
Directives and ControllerAs
[Style Y075]
Use
controller assyntax with a directive to be consistent with usingcontroller aswith view and controller pairings.Why?: It makes sense and it's not difficult.
Note: The directive below demonstrates some of the ways you can use scope inside of link and directive controllers, using controllerAs. I in-lined the template just to keep it all in one place.
Note: Regarding dependency injection, see Manually Identify Dependencies.
Note: Note that the directive's controller is outside the directive's closure. This style eliminates issues where the injection gets created as unreachable code after a
return.<div my-example max="77"></div>angular.module('app') .directive('myExample', function(){ return { restrict: 'EA', templateUrl: 'app/feature/example.directive.html', scope: { max: '=' }, link: linkFunc, controller: ExampleController, controllerAs: 'vm', bindToController: true // because the scope is isolated };
  function linkFunc(scope, el, attr, ctrl) {
      console.log('LINK: scope.min = %s *** should be undefined', scope.min);
      console.log('LINK: scope.max = %s *** should be undefined', scope.max);
      console.log('LINK: scope.vm.min = %s', scope.vm.min);
      console.log('LINK: scope.vm.max = %s', scope.vm.max);
  }
}])
.controller('ExampleController', ['$scope', function($scope) {
  var vm = this;

  vm.min = 3;

  console.log('CTRL: $scope.vm.min = %s', $scope.vm.min);
  console.log('CTRL: $scope.vm.max = %s', $scope.vm.max);
  console.log('CTRL: vm.min = %s', vm.min);
  console.log('CTRL: vm.max = %s', vm.max);
}]);
```html
<!-- example.directive.html -->
<div>hello world</div>
<div>max={{vm.max}}<input ng-model="vm.max"/></div>
<div>min={{vm.min}}<input ng-model="vm.min"/></div>
Note: You can also name the controller when you inject it into the link function and access directive attributes as properties of the controller.// Alternative to above example
function linkFunc(scope, el, attr, vm) {
console.log('LINK: scope.min = %s *** should be undefined', scope.min);
console.log('LINK: scope.max = %s *** should be undefined', scope.max);
console.log('LINK: vm.min = %s', vm.min);
console.log('LINK: vm.max = %s', vm.max);
}[Style Y076]
Use
bindToController = truewhen usingcontroller assyntax with a directive when you want to bind the outer scope to the directive's controller's scope.Why?: It makes it easy to bind outer scope to the directive's controller scope.
Note:
bindToControllerwas introduced in Angular 1.3.0.<div my-example max="77"></div>angular.module('app') .directive('myExample', function() { var directive = { restrict: 'EA', templateUrl: 'app/feature/example.directive.html', scope: { max: '=' }, controller: ExampleController, controllerAs: 'vm', bindToController: true }; return directive; } .controller('ExampleController', [ function() { var vm = this; vm.min = 3; console.log('CTRL: vm.min = %s', vm.min); console.log('CTRL: vm.max = %s', vm.max); }]);<!-- example.directive.html --> <div>hello world</div> <div>max={{vm.max}}<input ng-model="vm.max"/></div> <div>min={{vm.min}}<input ng-model="vm.min"/></div>
Resolving Promises for a Controller
Promises and $q service
[Style Y080]
$q is a service that helps you run functions asynchronously, and use their return values (or exceptions) when they are done processing.
Why?: By using
promisesyou will produce more readable code, by reducing the nesting of callbacks in asynchronously calls./* avoid */ function save(exit, runTest) { TestApi.update(this.form, function (res) { if (res.status && runTest == true) { //run the test API.run({testId: res.id}, function (r) { alert('Success: ' + r); } } else alert('Failed: ' + res.reason); }); } function run() { //call save function with indication that I want to run the test in the end save(false, true); }/* recommended */ function save(exit) { var deferred = $q.defer(); TestApi.update(this.form, function (res) { deferred.notify('About the save'); if (res.status) deferred.resolve(res.id); else deferred.reject('Save Failed'); }); return deferred.promise; } function run() { var promise = save(false); promise.then(function(id) { //run the test API.run({testId: id}, function (res) { alert('Success: ' + res); } }, function(reason) { alert('Failed: ' + reason); }, function(update) { alert('Got notification: ' + update); }); }
Controller Activation Promises
[Style Y081]
Resolve start-up logic for a controller in an
initfunction.Why?: Placing start-up logic in a consistent place in the controller makes it easier to locate, more consistent to test, and helps avoid spreading out the activation logic across the controller.
Why?: The controller
initmakes it convenient to re-use the logic for a refresh for the controller/View, keeps the logic together, gets the user to the View faster, makes animations easy on theng-vieworui-view, and feels snappier to the user.
/* avoid */
function Avengers(dataservice) {
    var vm = this;
    vm.avengers = [];
    vm.title = 'Avengers';

    dataservice.getAvengers().then(function(data) {
        vm.avengers = data;
        return vm.avengers;
    });
}
/* recommended */
function Avengers(dataservice) {
var vm = this;
vm.avengers = [];
vm.title = 'Avengers';
init();
////////////
function init() {
return dataservice.getAvengers().then(function(data) {
vm.avengers = data;
return vm.avengers;
});
}
}Route Resolve Promises
[Style Y082]
When a controller depends on a promise to be resolved before the controller is activated, resolve those dependencies in the
$routeProviderbefore the controller logic is executed. If you need to conditionally cancel a route before the controller is activated, use a route resolver.Use a route resolve when you want to decide to cancel the route before ever transitioning to the View.
Why?: A controller may require data before it loads. That data may come from a promise via a custom factory or $http. Using a route resolve allows the promise to resolve before the controller logic executes, so it might take action based on that data from the promise.
Why?: The code executes after the route and in the controller’s activate function. The View starts to load right away. Data binding kicks in when the activate promise resolves. A “busy” animation can be shown during the view transition (via
ng-vieworui-view)Note: The code executes before the route via a promise. Rejecting the promise cancels the route. Resolve makes the new view wait for the route to resolve. A “busy” animation can be shown before the resolve and through the view transition. If you want to get to the View faster and do not require a checkpoint to decide if you can get to the View, consider the controller
activatetechnique instead./* avoid */ angular.module('app') .controller('Avengers', ['movieService', function(movieService) { var vm = this; // unresolved vm.movies; // resolved asynchronously movieService.getMovies().then(function(response) { vm.movies = response.movies; }); }]);/* better */ // route-config.js angular.module('app') .config(config); function config($routeProvider) { $routeProvider .when('/avengers', { templateUrl: 'avengers.html', controller: 'Avengers', controllerAs: 'vm', resolve: { moviesPrepService: function(movieService) { return movieService.getMovies(); } } }); } // avengers.js angular.module('app') .controller('Avengers', ['moviesPrepService', function(moviesPrepService) { var vm = this; vm.movies = moviesPrepService.movies; }]);Note: The example below shows the route resolve points to a named function, which is easier to debug and easier to handle dependency injection.
/* even better */

// route-config.js
angular.module('app')
.config(config);

function config($routeProvider) {
    $routeProvider
        .when('/avengers', {
            templateUrl: 'avengers.html',
            controller: 'Avengers',
            controllerAs: 'vm',
            resolve: {
                moviesPrepService: moviesPrepService
            }
        });
}

function moviesPrepService(movieService) {
    return movieService.getMovies();
}

// avengers.js
angular.module('app')
.controller('Avengers', ['moviesPrepService', function(moviesPrepService) {

      var vm = this;
      vm.movies = moviesPrepService.movies;
});
Note: The code example's dependency on
movieServiceis not minification safe on its own. For details on how to make this code minification safe, see the sections on dependency injection and on minification and annotation.
Manual Annotating for Dependency Injection
UnSafe from Minification
[Style Y090]
Avoid using the shortcut syntax of declaring dependencies without using a minification-safe approach.
Why?: The parameters to the component (e.g. controller, factory, etc) will be converted to mangled variables. For example,
commonanddataservicemay becomeaorband not be found by Angular./* avoid - not minification-safe*/ angular.module('app') .controller('Dashboard', function (common, dataservice) { });
```

This code may produce mangled variables when minified and thus cause runtime errors. f
/* avoid - not minification-safe*/
angular.module('app').controller('Dashboard', d);function d(a, b) { }
```
```javascript
/* recommended */
angular.module('app')
.controller('Dashboard',
['$location', '$routeParams', 'common', 'dataservice', function($location, $routeParams, common, dataservice) {
}]);
```
## Naming
### Naming Guidelines
###### [Style [Y120](#style-y120)]
- Use consistent names for all components following a pattern that describes the component's feature then (optionally) its type. My recommended pattern is `feature.js`. There are 2 names for most assets:
* the file name (`year-avengers.js`)
* the registered component name with Angular (`YearAvengersController`)
*Why?*: Naming conventions help provide a consistent way to find content at a glance. Consistency within the project is vital. Consistency with a team is important. Consistency across a company provides tremendous efficiency.
*Why?*: The naming conventions should simply help you find your code faster and make it easier to understand.
### Feature File Names
###### [Style [Y121](#style-y121)]
- Use consistent names for all components following a pattern that describes the component's feature then (optionally) its type. My recommended pattern is `feature-type.js`.
*Why?*: Provides a consistent way to quickly identify components.
*Why?*: Provides pattern matching for any automated tasks.
- Name controller files without the word `controller` in the file name such as `avengers.js` instead of `avengers-controller.js`. All other conventions still hold using a suffix of the type.
*Why?*: Controllers are the most common type of component so this just saves typing and is still easily identifiable.
```javascript
/**
* recommended
*/
// controllers
avengers.js
avengers.spec.js
// services/factories
logger-service.js
logger-service.spec.js
// constants
constants.js
```
### Controller Names
###### [Style [Y123](#style-y123)]
- Use consistent names for all controllers named after their feature. Use UpperCamelCase for controllers, as they are constructors.
*Why?*: Provides a consistent way to quickly identify and reference controllers.
*Why?*: UpperCamelCase is conventional for identifying object that can be instantiated using a constructor.
```javascript
/**
* recommended
*/
// avengers.controller.js
angular.module
.controller('HeroAvengersController', function() { });
```
### Controller Name Suffix
###### [Style [Y124](#style-y124)]
- Append the controller name with the suffix `Controller`.
*Why?*: The `Controller` suffix is more commonly used and is more explicitly descriptive.
```javascript
/**
* recommended
*/
// avengers.js
angular.module
.controller('AvengersController', function() { });
```
### Factory Names
###### [Style [Y125](#style-y125)]
- Use consistent names for all factories named after their feature. Use camel-casing for services and factories. Avoid prefixing factories and services with `$`.
*Why?*: Provides a consistent way to quickly identify and reference factories.
*Why?*: Avoids name collisions with built-in factories and services that use the `$` prefix.
```javascript
/**
* recommended
*/
// logger-service.js
angular.module
.factory('logger', function() { });
```
### Directive Component Names
###### [Style [Y126](#style-y126)]
- Use consistent names for all directives using camel-case. Use a short prefix to describe the area that the directives belong (some example are company prefix or project prefix).
*Why?*: Provides a consistent way to quickly identify and reference components.
```javascript
/**
* recommended
*/
// avenger-profile-directive.js
angular.module
.directive('xxAvengerProfile', function() { });
// usage is <xx-avenger-profile> </xx-avenger-profile>
```
## Application Structure LIFT Principle
### Folders-by-Feature Structure
###### [Style [Y152](#style-y152)]
- Create folders named for the feature they represent. When a folder grows to contain more than 7 files, start to consider creating a folder for them. Your threshold may be different, so adjust as needed.
*Why?*: A developer can locate the code, identify what each file represents at a glance, the structure is flat as can be, and there is no repetitive nor redundant names.
*Why?*: The LIFT guidelines are all covered.
*Why?*: Helps reduce the app from becoming cluttered through organizing the content and keeping them aligned with the LIFT guidelines.
*Why?*: When there are a lot of files (10+) locating them is easier with a consistent folder structures and more difficult in flat structures.
```javascript
/**
* recommended
*/
app/
app.module.js
app.config.js
components/
calendar-directive.js
calendar-directive.html
user-profile-directive.js
user-profile-directive.html
layout/
shell.html
shell.js
topnav.html
topnav.js
people/
attendees.html
attendees.js
people-routes.js
speakers.html
speakers.js
speaker-detail.html
speaker-detail.js
services/
data-service.js
localstorage-service.js
logger-service.js
spinner-service.js
sessions/
sessions.html
sessions.js
sessions-routes.js
session-detail.html
session-detail.js
```

Note: Do not structure your app using folders-by-type. This requires moving to multiple folders when working on a feature and gets unwieldy quickly as the app grows to 5, 10 or 25+ views and controllers (and other features), which makes it more difficult than folder-by-feature to locate files.
```javascript
/*
* avoid
* Alternative folders-by-type.
* I recommend "folders-by-feature", instead.
*/
app/
app.module.js
app.config.js
app.routes.js
directives.js
controllers/
attendees.js
session-detail.js
sessions.js
shell.js
speakers.js
speaker-detail.js
topnav.js
directives/
calendar.directive.js
calendar.directive.html
user-profile.directive.js
user-profile.directive.html
services/
dataservice.js
localstorage.js
logger.js
spinner.js
views/
attendees.html
session-detail.html
sessions.html
shell.html
speakers.html
speaker-detail.html
topnav.html
```
**[Back to top](#table-of-contents)**
##Modularity
### Module Dependencies
###### [Style [Y165](#style-y165)]
- The application root module depends on the app specific feature modules and any shared or reusable modules.

*Why?*: The main app module contains a quickly identifiable manifest of the application's features.
*Why?*: Each feature area contains a manifest of what it depends on, so it can be pulled in as a dependency in other applications and still work.
*Why?*: Intra-App features such as shared data services become easy to locate and share from within `app.core` (choose your favorite name for this module).
**[Back to top](#table-of-contents)**
## Startup Logic
### Run Blocks
###### [Style [Y171](#style-y171)]
- Any code that needs to run when an application starts should be declared in a factory, exposed via a function, and injected into the [run block](https://docs.angularjs.org/guide/module#module-loading-dependencies).
*Why?*: Code directly in a run block can be difficult to test. Placing in a factory makes it easier to abstract and mock.
```javascript
angular.module('app')
.run(['authenticator', 'translator', function (authenticator, translator) {
authenticator.initialize();
translator.initialize();
}]);Angular $ Wrapper Services
$document and $window
[Style Y180]
Use
$documentand$windowinstead ofdocumentandwindow.Why?: These services are wrapped by Angular and more easily testable than using document and window in tests. This helps you avoid having to mock document and window yourself.
$timeout and $interval
[Style Y181]
Use
$timeoutand$intervalinstead ofsetTimeoutandsetInterval.Why?: These services are wrapped by Angular and more easily testable and handle Angular's digest cycle thus keeping data binding in sync.
Animations
Usage
[Style Y210]
Use subtle animations with Angular to transition between states for views and primary visual elements. Include the ngAnimate module. The 3 keys are subtle, smooth, seamless.
Why?: Subtle animations can improve User Experience when used appropriately.
Why?: Subtle animations can improve perceived performance as views transition.
Sub Second
[Style Y211]
Use short durations for animations. I generally start with 300ms and adjust until appropriate.
Why?: Long animations can have the reverse affect on User Experience and perceived performance by giving the appearance of a slow application.
animate.css
[Style Y212]
Use animate.css for conventional animations.
Why?: The animations that animate.css provides are fast, smooth, and easy to add to your application.
Why?: Provides consistency in your animations.
Why?: animate.css is widely used and tested.
Note: See this great post by Matias Niemelä on Angular animations
[Style Y241]
Use constants for values that do not change and do not come from another service. When constants are used only for a module that may be reused in multiple applications, place constants in a file per module named after the module. Until this is required, keep constants in the main module in a
constants.jsfile.Why?: A value that may change, even infrequently, should be retrieved from a service so you do not have to change the source code. For example, a url for a data service could be placed in a constants but a better place would be to load it from a web service.
Why?: Constants can be injected into any angular component, including providers.
Why?: When an application is separated into modules that may be reused in other applications, each stand-alone module should be able to operate on its own including any dependent constants.
// Constants used by the entire app
angular.module('app.core')
.constant('moment', moment);

// Constants used only by the sales module
angular.module('app.sales')
.constant('events', {
    ORDER_CREATED: 'event_order_created',
    INVENTORY_DEPLETED: 'event_inventory_depleted'
});
Filters
[Style Y420]
Avoid using filters for scanning all properties of a complex object graph. Use filters for select properties.
Why?: Filters can easily be abused and negatively affect performance if not used wisely, for example when a filter hits a large and deep object graph.