@thehen/decentraland-unlock-integration v1.0.1

Overview
Create locks and place them anywhere you’d like to lock content. Users can purchase memberships as NFT keys that grant access to content inside Decentraland.
Live demo
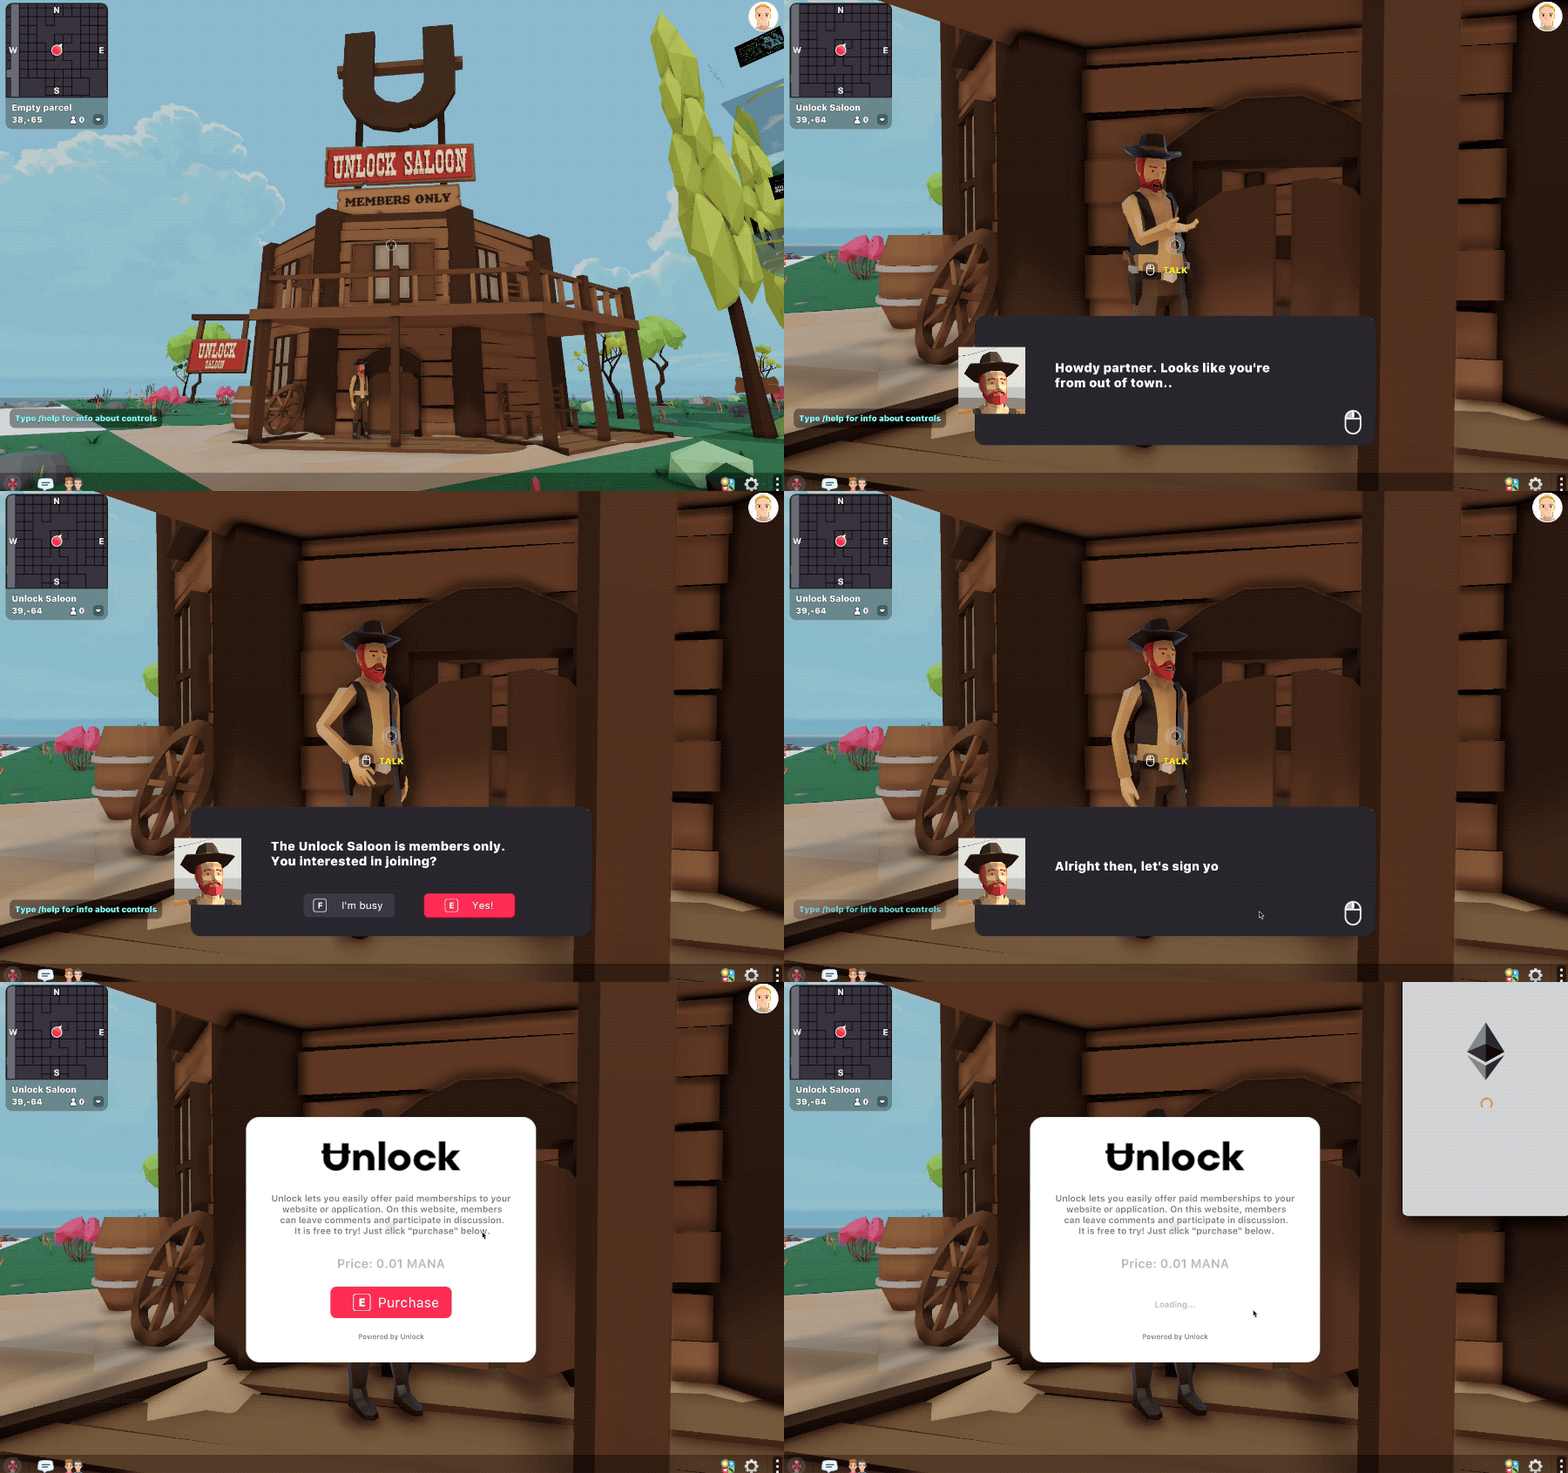
In the live demo, there's a members-only saloon with a cowboy outside who won't grant access unless you have a membership. Upon buying a membership with 0.1 MANA, you are allowed to enter the saloon.
Features
- Accept payment in MANA or any other ERC20 token
- Set a limited or unlimited number of keys
- Set duration for how long the keys last for
- Native UI utilising the Decentraland UI library
Create Locks
You can easily create and manage locks through the Unlock Dashboard. For more information, refer to the official Unlock Protocol documentation.
Adding the Unlock Library
- Install the Unlock Integration as an npm package. Run this command in your scene's project folder:
npm i @thehen/decentraland-unlock-integration @dcl/ecs-scene-utils @dcl/crypto-scene-utils @dcl/ui-scene-utils eth-connect -BNote: This command also installs the latest version of the @dcl/ecs-scene-utils, @dcl/crypto-scene-utils, @dcl/ui-scene-utils and eth-connect libraries, that are dependencies of this library
- Run
dcl startordcl buildso the dependencies are correctly installed.
Note: After running
dcl startyou must have Metamask or Dapper open and you must add the following string to the end of the URL:&ENABLE_WEB3
- Import the library into the scene's script. Add this line at the start of your
game.tsfile, or any other TypeScript files that require it:
import * as unlock from '@thehen/decentraland-unlock-integration'Adding Locks to Scenes
Instantiate a new Lock object as follows:
const decentralandLock = new unlock.Lock('0xF0cF2b4f9AfA8701Ca8d87502E14be5C855eA70e')Next we add a listener to the Unlock event manager which listens for the LockInitialised event:
unlock.eventManager.addListener(unlock.LockInitialised, "unlockInit", ({ lock, hasValidKey }) => {
    /// Lock initialised!
})
To test whether purchasing a lock works, we can call the purchaseMembership function after the lock is initialised:
unlock.eventManager.addListener(unlock.LockInitialised, "unlockInit", ({ lock, hasValidKey }) => {
    /// Lock initialised!
    decentralandLock.purchaseMembership()
})
Congratulations! You've added your first lock to Decentraland! Now let's add some UI.
Adding UI

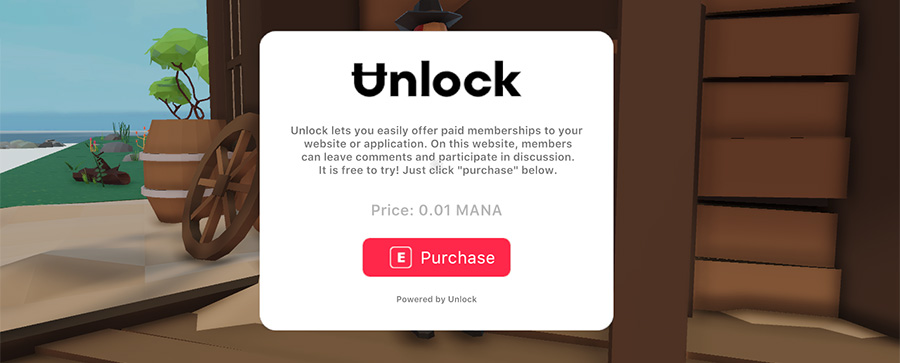
To show a popup UI, you first need to create an UnlockPurchaseUI object with the following properties:
lock: The lock object instancelogoUrl: The image url for the logo imagebodyText: The body text to display on the popup
unlockPurchaseUI = new unlock.UnlockPurchaseUI(
  decentralandLock,
  'https://raw.githubusercontent.com/thehen/decentraland-unlock-integration/master/images/unlock-logo-black.png',
  'Unlock lets you easily offer paid memberships to your \n website or application. On this website, members \n can leave comments and participate in discussion. \n It is free to try! Just click "purchase" below.'
)
To show and hide the UI, you can call the show and hide functions on the UnlockPurchaseUI object:
unlockPurchaseUI.show()unlockPurchaseUI.hide()Listening for events
After a purchase has begun, you can listen for custom events and have your scene respond accordingly. These are the events available:
LockInitialised: lock is initialisedPurchaseSuccess: purchase was completed successfullyPurchaseFail: purchase failedTransactionSuccess: transaction was successfulTransactionFail: transaction failed
// Events

unlock.eventManager.addListener(unlock.LockInitialised, "init", ({ lock, hasValidKey }) => {
    if (hasValidKey) {
        // already owns key
    } else {
        // doesn't own key
    }
})

unlock.eventManager.addListener(unlock.PurchaseSuccess, "purchase success", ({ lock }) => {
    // purchase successful
})

unlock.eventManager.addListener(unlock.PurchaseFail, "purchase fail", ({ lock }) => {
    // purchase fail
})

unlock.eventManager.addListener(unlock.TransactionSuccess, "transaction success", ({ lock }) => {
    // transaction success
})

unlock.eventManager.addListener(unlock.TransactionFail, "transaction fail", ({ lock }) => {
    // transaction fail
})
Complete example
import * as unlock from '@thehen/decentraland-unlock-integration'

// --- Unlock ---

// Add a lock
const decentralandLock = new unlock.Lock('0x9625Bc447d23117e22105B77FAC015F6B970f0C0')

// Lock initialised
unlock.eventManager.addListener(unlock.LockInitialised, "unlockInit", ({ lock, hasValidKey }) => {

  if (hasValidKey) {
    // already owns key
  } else {
    // doesn't own key

    // Instantiate Unlock UI object
    const unlockPurchaseUI = new unlock.UnlockPurchaseUI(
      decentralandLock,
      'https://raw.githubusercontent.com/thehen/decentraland-unlock-integration/master/images/unlock-logo-black.png',
      'Unlock lets you easily offer paid memberships to your \n website or application. On this website, members \n can leave comments and participate in discussion. \n It is free to try! Just click "purchase" below.'
    )

    // Show UI
    unlockPurchaseUI.show()

  }
})

// --- Events ---

unlock.eventManager.addListener(unlock.PurchaseSuccess, "purchase success", ({ lock }) => {
  log("Purchase success")
})

unlock.eventManager.addListener(unlock.PurchaseFail, "purchase fail", ({ lock }) => {
  log("Purchase failed")
})

unlock.eventManager.addListener(unlock.TransactionSuccess, "transaction success", ({ lock }) => {
  log("Transaction success")
})

unlock.eventManager.addListener(unlock.TransactionFail, "transaction fail", ({ lock }) => {
  log("Transaction failed")
})
Support
If you have any questions, feel free to join the Unlock Discord Server and I'll be happy to help.