aayega v1.0.0
aayega
aayega is a promises library compliant with promises / a+ spec
For those with no time to read.
git clone https://github.com/rishabhio/aayega.git
npm install
npm test
What is Aayega?
Aayega is a promises library which is compliant with promises / A+ spec.
What is the inspiration behind it?
- Aayega is meant for educational and learning purposes.
- Aayega means "it will come" in hindi language and it is a good term to represent the result of an async operation.
What are the goals?
- Goal is not to learn and implement the specification.
- Code readibility is the primary focus so new comers to A+ spec can use this as reference.
- Use of ES6 features.
All steps taken to reach the final outcome are listed below :::::
Step-1 Read the specification
It is advised to read the spec at least 5 times if you're like me :)
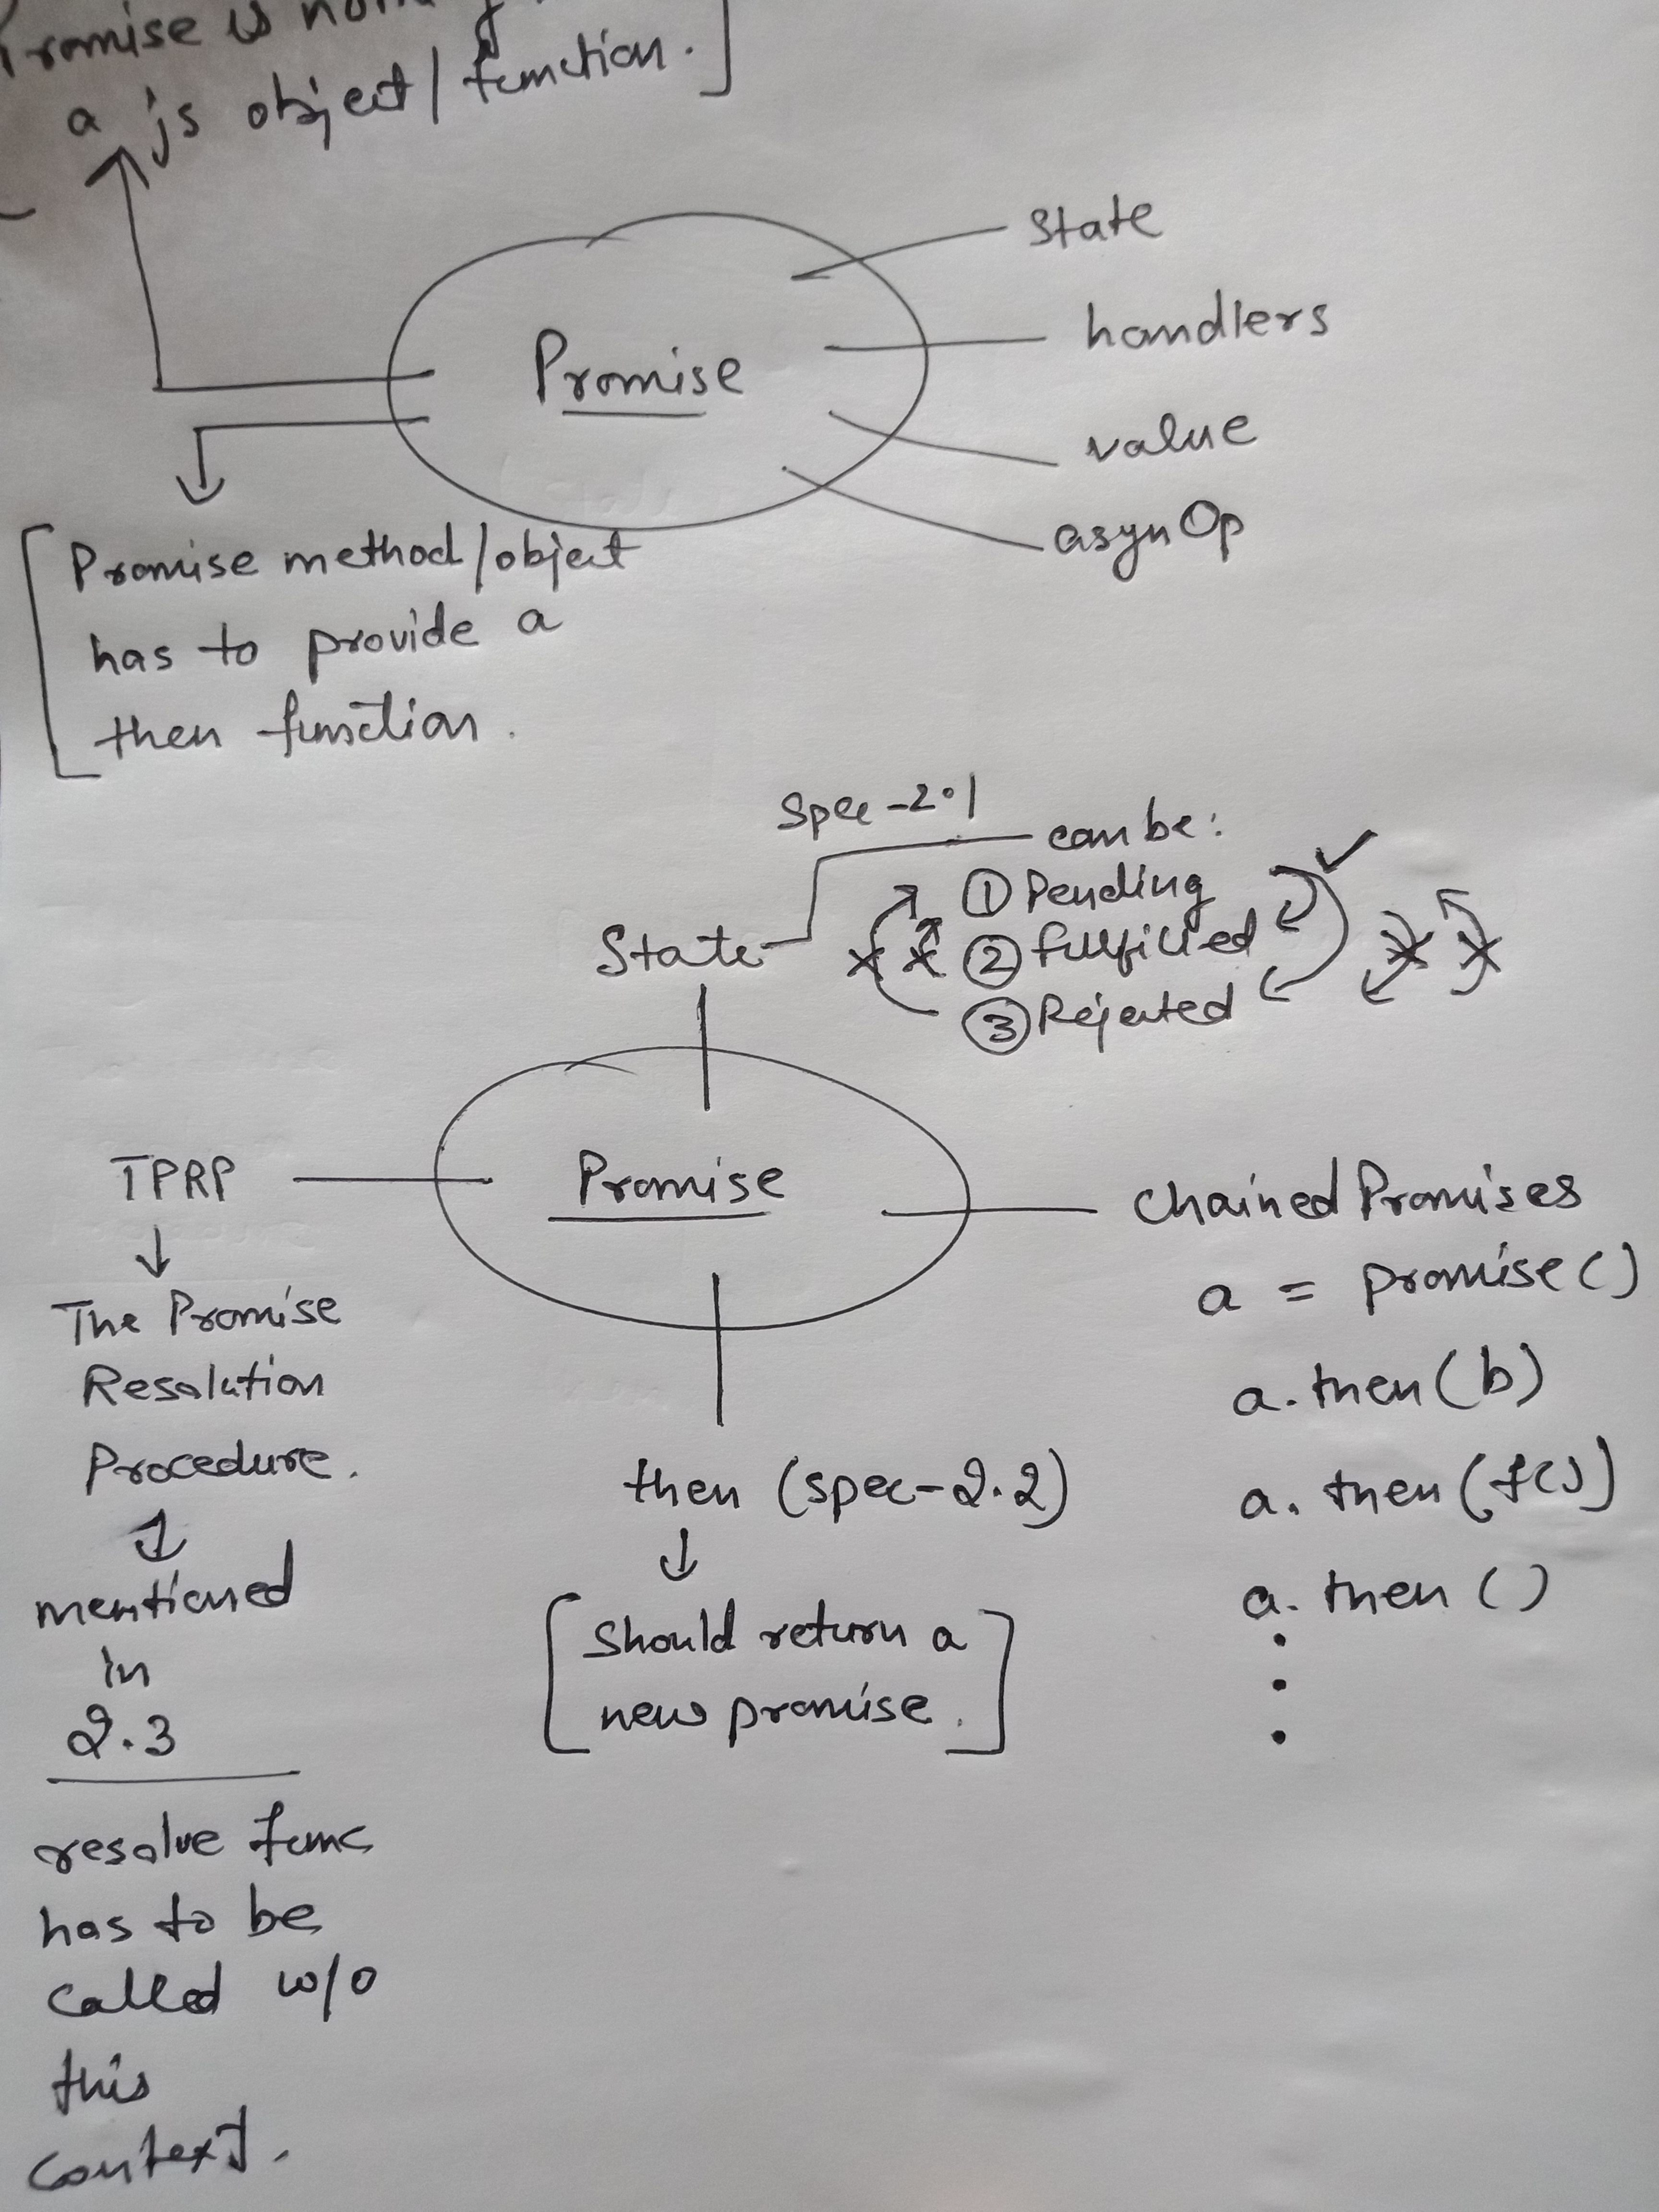
Following is what I got ater going through the spec for a few times.

By reading the spec a few times, we can easily draw the following inferences >>>
- Promise is nothing but a js object / functions which conforms to certain rules.
- Every promise has a then method
- Then method must return a new Promise
- then method takes 2 arguments
- There's a way called TPRP -> The Promise Resolution Procedure to be followed when resolving
- Every promise starts with a pending state
- Promise can move from pending -> fulfilled or pending -> rejected
- Once fulfilled / rejected, a promise can't change state.
- We need to provide an adapter for the testing to take place.
- We should install
promises-aplus-teststo run the tests.
Let's get in action.
Our mission is to document almost every step which we take to make our promises library.
Step-2 Initialize npm package
NOTE I'm writing these steps on the go so there can be a little up / down in the sequence , but the idea is to document most of the steps.
npm init Run the above command and provide all the details.
Step-3 Setup the code structure
libfolder to store the code for our librarytestsfolder to store the adapter we writeindex.jsfile is the entry point to the package
Step-4 Run the following command to install the compliance tests package
npm install --save-dev promises-aplus-testsStep-5 Provide the adapter as mentioned in the specification
Create the following file in the tests folder.
aayega-adapter.jsStep-6 Write the required functions in the adapter as follows
check file aayega-adapter.js for the relevant code.
Step-7 Add the test command in the package.json file
// package.json
. . .
        "test": "promises-aplus-tests tests/aayega-adapter"

. . .
First time you run npm test , it will give 'Cannot find Module' error because we've not yet set
up the aayega module. Let's do that next.
Step-8 In the lib directory, create a module
aayega.js // Initialize promise structure as per the spec
// Please read the inline comments in the code itself for better understanding. Step-9 write the Aayega class with all the basic attributes and methods
In short we've to fill in the following structure :::::
This is how an Aayega aka Promise looks like.
class Aayega {
    constructor(asyncOp) {
        const self = this;

        this.value = null;
        this.state = STATES.PENDING;
        this.queue = [];
        this.handlers = {
            fulfill: null,
            reject: null
        };
        if (asyncOp) {
            asyncOp((value) => {
                runPRP(self, value);
            }, (reason) => {
                self.reject(reason);
            });
        }
    }

    changeState(state, value) {
    }

    executeChain() {

    }
    reject(reason) {

    }
    fulfill(value) {

    }
    then(onFulfilled, onRejected) {

    }
}
Step-10 Implementing the PRP aka Promise Resolution Procedure
    Section 2.3 is all about this. Please read the inline comments in code function
        runPrp to get more details on it.
The then method
     then takes onFulfilled , onRejected an returns a new promise which goes through the PRP via
        the executeChain method in order to decide on how actually it needs to resolve.
Step-11 Making the software browser compatible
I've used a quick / dirty hack to ensure the software can be made useful in browser environment as well.
    if (typeof module !== 'undefined') {
        if (typeof module.exports !== 'undefined') {
            module.exports = Aayega;
        }
    } else {
        window.Aayega = Aayega;
    }
Step-12 Run the Test Cases again
npm test Step-13 The feeling of accomplishment

Step-14 Launching to NPM
    npm login
    npm publish
Step-15 Link to A+ compliant Aayega aka Promises lib on npm
7 years ago