aframe-video-controls v0.3.0
aframe-video-controls
A video control component for A-Frame. Demo here
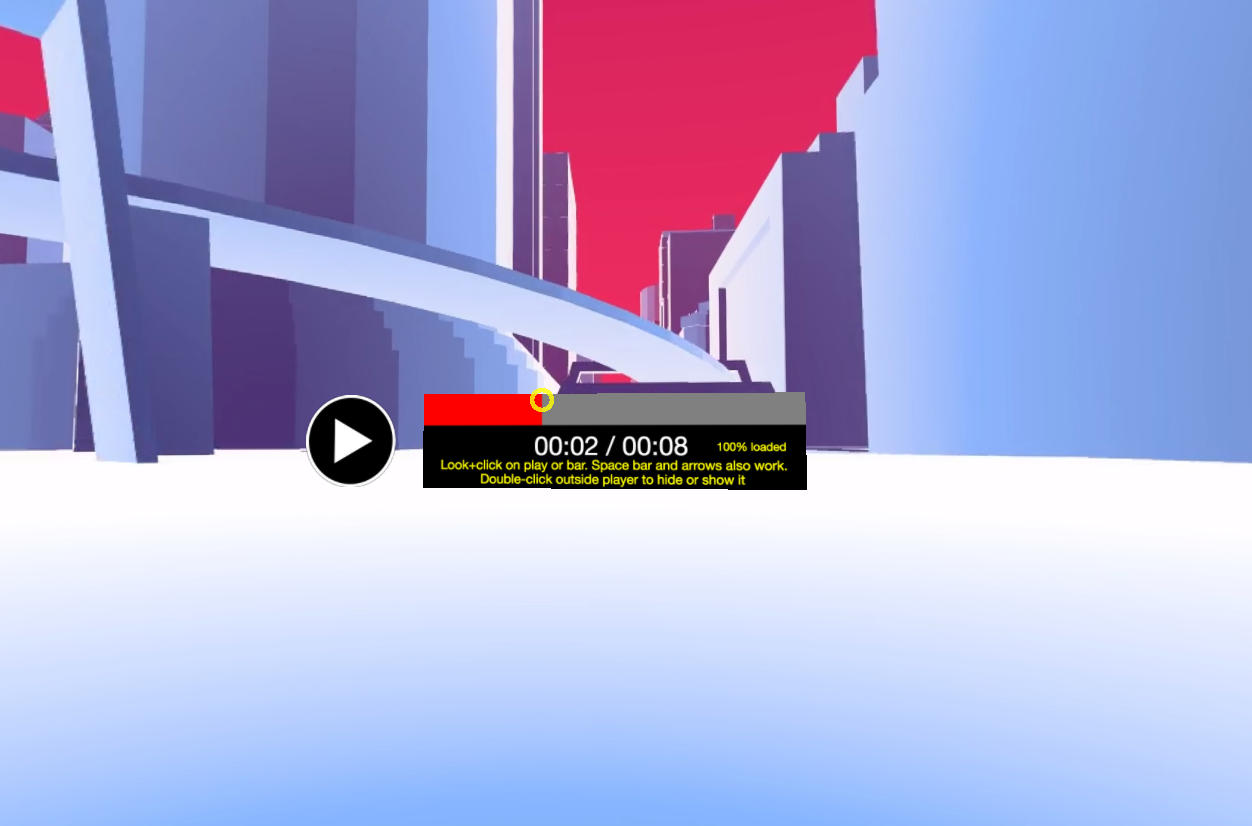
It attaches to a video asset so you can play/pause the video (assuing it is projected on a plane or sphere) by looking and clicking on the 'play' icon or transport bar.
You can also press the 'space bar' or the arrow keys to control the video if you are in a 'desktop' computer

Feedback is needed and very welcome, specially regarding User Experience!!!
I'm working on the following features, but feel free to suggest via Github Issues:
- 'Flat' component if on Desktop (i.e: not in the 3D space)
- Test on iPhone and Vive (at the moment I tested this in Android, Cardboard and Oculus Rift DK2)
- Test on much bigger files
- Volume controls
- Another control to jump between different files so you can 'browse' different videos
- 'Auto hide feature': If x seconds have passed after last interaction with player, hide the controls and A-Frame cursor
Demo
You can play with a live demo here
Properties
| Property | Description | Default Value |
|---|---|---|
| src | selector of the video asset | mandatory |
| size | horizontal size of the player in meters | 1.0 |
| distance | distance of the player from the camera in meters | 2.0 |
| backgroundColor | Color of the player background. | black |
| barColor | Color of the video progress bar. | red |
| textColor | Color of the text. | yellow |
| infoTextBottom | Bottom text to display under the bar to explain how to use it. | Double-click outside player... |
| infoTextTop | Top text to display under the bar to explain how to use it. | Look+click on play... |
| infoTextFont | Font for info text. | 35px Helvetica Neue |
| statusTextFont | Font for text to right of player. | 30px Helvetica Neue |
| timeTextFont | Font for time progress. | 70px Helvetica Neue |
Usage
Just include the component and put your video into the A-frame assets section.
Then just include an entity with the 'src' attribute 'pointing' to the video asset you want to control.
You can supply your own 'play' and 'pause' images for the player by including these lines into the assets of your scene:
    <a-assets>
        <img id="video-play-image" src="img/play.png">
        <img id="video-pause-image" src="img/pause.png">
     ...
Otherwise, the default 'play' and 'pause' images (CDN-hosted) will be used.
Browser Installation
Install and use by directly including the browser files:
This example projects a 360 video into a videosphere and attaches the controls to it.
<head>
  <title>My A-Frame Scene</title>
  <script src="https://aframe.io/releases/0.2.0/aframe.min.js"></script>
  <script src="https://rawgit.com/oscarmarinmiro/aframe-video-controls/master/dist/aframe-video-controls.min.js"></script>
</head>

 <body>
    <a-scene>
      <a-assets>
        <video id="video_1" src="https://ucarecdn.com/bcece0a8-86ce-460e-856b-40dac4875f15/"></video>
      </a-assets>

      <a-camera position="0 0 5">
          <a-cursor id="cursor" color="yellow"></a-cursor>
      </a-camera>

      <a-videosphere src="#video_1" rotation="0 180 0"></a-videosphere>

      <a-entity video-controls="src:#video_1"></a-entity>

    </a-scene>
  </body>
NPM Installation
Install via NPM:
npm install aframe-video-controlsThen register and use.
require('aframe');
require('aframe-video-controls');