1.1.2 • Published 5 years ago
cassata v1.1.2
CASSATA 🍥
A NODE JS express server proxy, that's set as easy as a cake.
Hosting your server in a different location and need to access the data is only available in your location, this is a goto solution if you want to set your proxies for *FREE ** ..
(* Free) ~ You have to use your resources to login to your server proxy room and set them up, and nothing much 😸.
A Quick overview
Releases
- v1.1.2 ~ stable pre-alpha
- Support for Arrays in getProxiedData()
IDEA :
- The main idea is to use your own device IP in the location you need and access the data, and proxy them back to the server at a different location.
- Secondly it uses your own resources for proxying the data, so no worries about data leaks, (note : YOUR DEVICE IP will not be altered, so they remain visible.)
WHY CASSATA ?

The main idea behind CASSATA is to wrap your sever with the IP of your local machine or mobile phone to access the data.
PROGRESS :
- Support for GET Requests
- Support for JSON
- getProxiedData() supports Array of urls
- Support for POST Requests

Depricated on Mobile
It is advised to access the proxy with a computer, as persisting sessions with mobile phones for prolonged periods are not advisible and feasible, The feature is present with the current version, and will be removed in future versions.
INSTALLATION 🍰
npm i --save cassata
Setting the PROXY (server) 👨💻
IMPORT the package.
let cassata = require('cassata');IMPORTANT ! 🔓
- Make sure you change the default proxy room auth details. By Default
- PROXY ID : 12345
- PASSWORD : admin
CHANGING PROXY AUTH
cassata.proxySettingscassata.proxySettings.roomId = "Your Room ID"; cassata.proxySettings.password = "Your Password";
- Make sure you change the default proxy room auth details. By Default
- PROXY ID : 12345
- PASSWORD : admin
Create your express server with all the required fields,
const express = require('express');
const app = express();
// ... your declarations
app.get('routes', async(req, res)=>{});
Accessing the data through proxy.
cassata.getProxiedData(url, timeout)!! Important Make sure you connect to the proxy before making API calls through
cassata.getProxiedData()Parameters
url : The. url can be a string or an Array of strings, the end URL when accessed must yield a JSON.
timeout *optional : number :: The timeout to wait for response from proxy client DEFAULT : 8000ms.
Returns Object {success, data}
success : true on success || false on error
data : Response from proxy on success || Error on failure
- You can wrap the method inside a get request and wait for it, or also have seperate method and call them.
Method 1
app.get("/samplRoute", async(req, res)=>{
    try{
        const response = await cassata.getProxiedData("the url that you want to hit");
        // process the response.
    } catch (error) {
        // Error handling, Cassata will return an error
    }
})
Method 2 (Feasible for accessing data on intervals)
//Creating an async function,
async function foo(){
        try{
        const response = await cassata.getProxiedData("the url that you want to hit");
        // process the response.
    } catch (error) {
        // Error handling, Cassata will return an error
    }
}

// Call the function foo(url) with a await call 'await foo(url)' at your will, and get the data.
Usage with loops, or continuous data fetch
Create an Array of url's and pass them to the getProxiedData function, and make sure to await for the results.
// Prepare the array of urls that you need to get the data from the proxy client
let urlsArr = ["https://", "https://"] //Array of urls

app.get("/vaccine", async (req, res) => {
    try {
        // Pass the Array in the method to get the results in the order you passed in
        let results = await cassata.getProxiedData(urlsArr)
        //Handle the results
        res.status(200).send(results)
    } catch (error) {
        console.log(error.message)
    }
})
Example of Failure condition from proxy :

Checking if proxy client is connected
cassata.isProxyConnected()Returns true/false on client connection status.
Final steps
*Make sure you add all the required data and set all the static files using express.static(), before calling this method.
cassata.createProxy(server)- #### server : The express app that you created, - #### Returns : Proxied server / false on error.const express = require('express'); const app = express(); // mention all middle wares app.use() // mention all your routes app.get() app.post() // mention all your static files app.use("/", express.static()) // **** Initialize the proxy server **** let proxyServer = cassata.createProxy(app) proxyServer.listen(PORT, ()=>{ console.log("Server started") // your initializations // !! Provide a buffer so you can get enough time to activate the proxy. })
Complete Example
//  Creating the express server
const express = require('express');
const app = express();

// Importing the Package
const cassata = require("cassata");
cassata.proxySettings.roomId = "@123$32";
cassata.proxySettings.password = "$ource#12";

// This will be your API end point that is only available in your location
const API_END_POINT = "https://*"

// Method 1 ~ Suitable for instant response.
app.get("/", async (req, res)=>{
    console.log("This is from your get request section")
    try {
        const response = await cassata.getProxiedData(API_END_POINT);
        // Process the response object here : {success : boolean, data : Response from API_END_POINT}
    } catch (error) {
        // Handle your errors here
    }
});
// Method 2 ~ Suitable for making multiple API calls
async function foo(url){
    try {
        const response = await cassata.getProxiedData(url);
        return response.data;
    } catch (error) {
        return error;
    }
}

//  ** Now you can call the function foo(url) with a await call 'await foo(url)', at any point and get the response.

// ** set your static files
app.use(express.static(**));

// After setting up all the static files, make sure you create the proxy server,
let proxyServer = cassata.createProxy(app);
proxyServer.listen(process.ENV.PORT || 5000, ()=>{
    console.log("Server started");
    // Your initializations
})
```
That's it you have your proxy server, and you can host it in any location. 🛰
Accessing the Proxy (Client) 🐱
Once you have hosted your server, you can visit the proxy server room by just adding
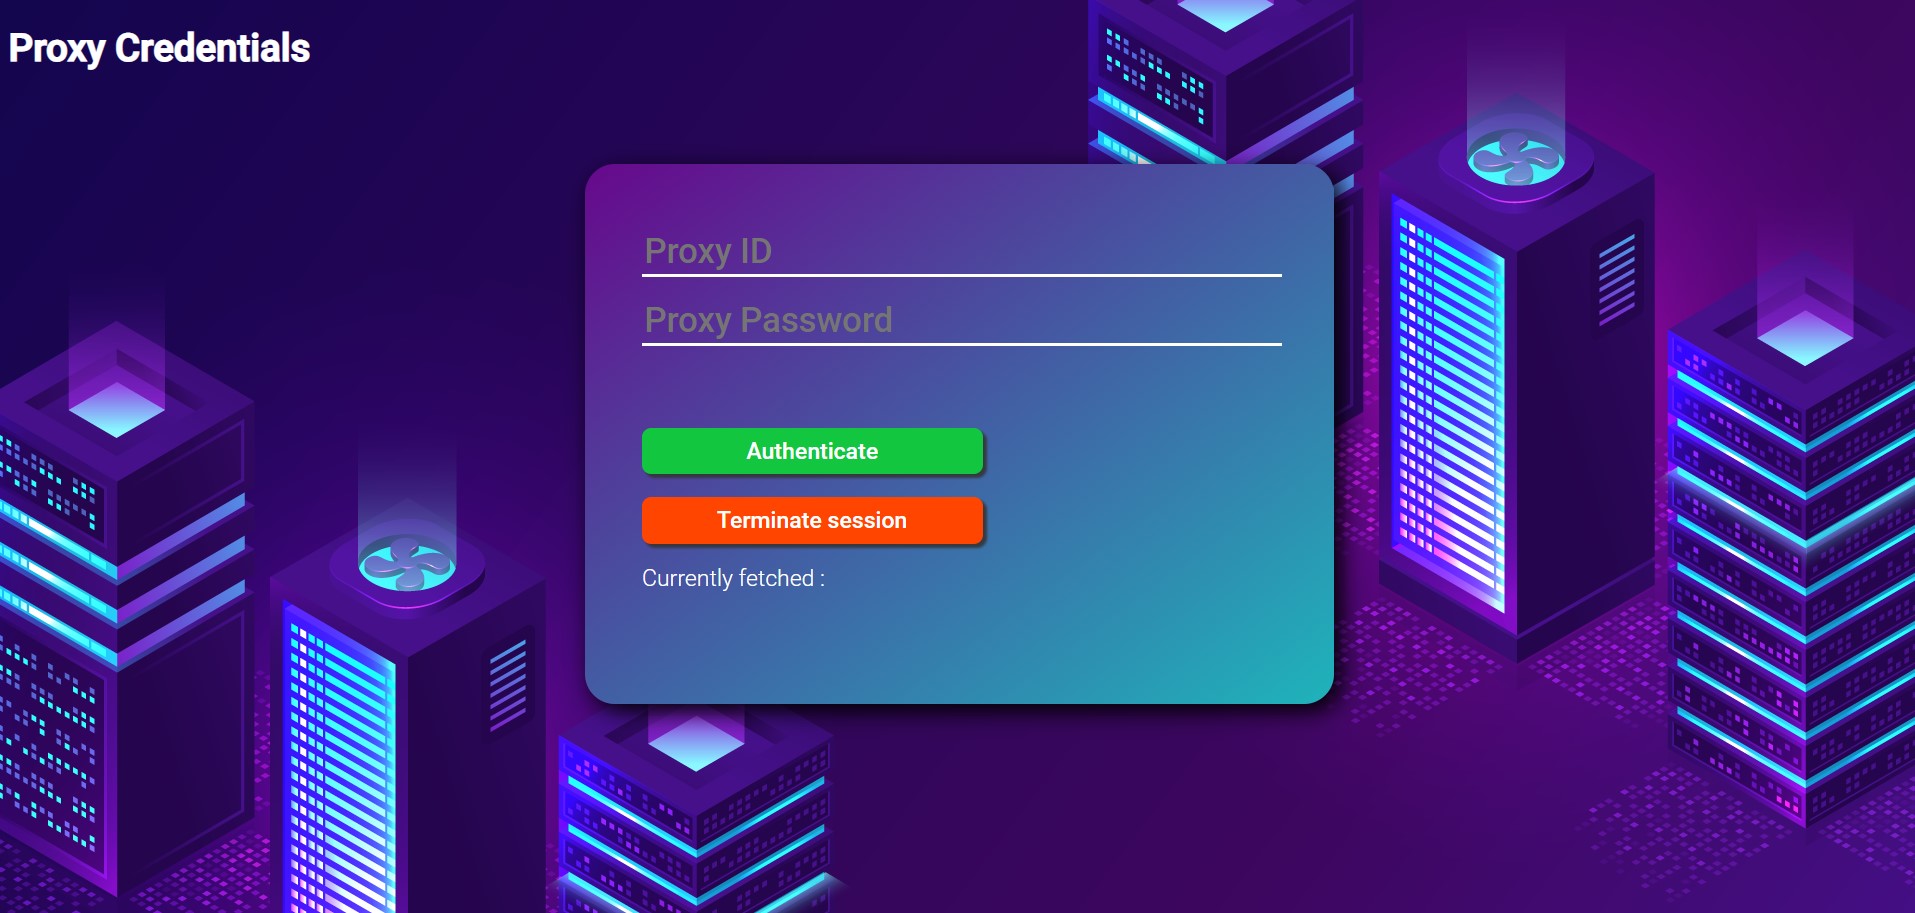
/proxyrouterto the url of your server. Once done, this is what you will see.CASSATA only allows one session per time, so once connected, another session of CASSATA will not be available until you terminate the session through RELOAD / Terminate Session.
Make sure you have your passwords safe, else you might want to change them in your server.
- This is what it looks like on computers.

The mobile version.
!!! Make sure you only reload when you want to terminate the session. !!!
Once in, provide your credentials that you gave during the setup of the server
PROXY ID : roomId
PROXY Password : password
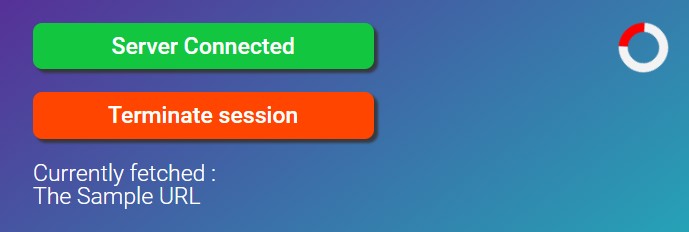
On successful connection with the server, you will get a circular indicator, stating the connection, IF(spin == true) : connection success 🎈.
- The circular indicator states the connection is success
On completion until here, now your server will access the data using your IP (the device that you gave the credentials in), from the method
cassata.getProxiedData()You will be updated live, regarding the requests that your server is making,
- The url will be displayed in the currently fetched section :

- The url will be displayed in the currently fetched section :
The session will be persistant until you wish to reload / Until your server is up / Or you wish to terminate the session though Terminate session.
background image of the proxyrouter : Designed by upklyak / Freepik
Kindly feel free to raise PR for new updates, and issues if any.
Thankyou 💚
1.1.2
5 years ago
1.1.1
5 years ago
1.1.0
5 years ago
1.0.16
5 years ago
1.0.15
5 years ago
1.0.14
5 years ago
1.0.13
5 years ago
1.0.12
5 years ago
1.0.11
5 years ago
1.0.10
5 years ago
1.0.9
5 years ago
1.0.8
5 years ago
1.0.7
5 years ago
1.0.6
5 years ago
1.0.5
5 years ago
1.0.4
5 years ago
1.0.2
5 years ago
1.0.1
5 years ago
1.0.3
5 years ago
1.0.0
5 years ago