docker-php-development v1.1.9
Docker PHP Development
Docker running Nginx, PHP-FPM, MariaDB and PHPMyAdmin.
A simple package that makes it easy to start a new local development environment.
Install
- Install docker/docker-compose
- Install docker-php-development
To install the docker-php-development package use npm or yarn.
NPM:
npm install -g docker-php-developmentYarn:
yarn global add docker-php-developmentNote: The package has to be installed globally
Basic Usage
After successfully installing docker-php-development you can use the dock command.
Use dock -h or dock --help to see all possible commands.
Output:
-i, --init        Install the dock into your project
-s, --start       Start the dock
-e, --stop        Stop the dock
-q, --stopall     Stop all running docks
-a, --showall     Show all existing docks
-f, --foreground  Start dock on foreground
-d, --dbdump      Dumps the database into a database.sql file in projectroot
-r, --dbrestore   Retores the database dump in projectroot folder
-l, --logs        Show logs
-h, --help        output usage information
Init the dock:
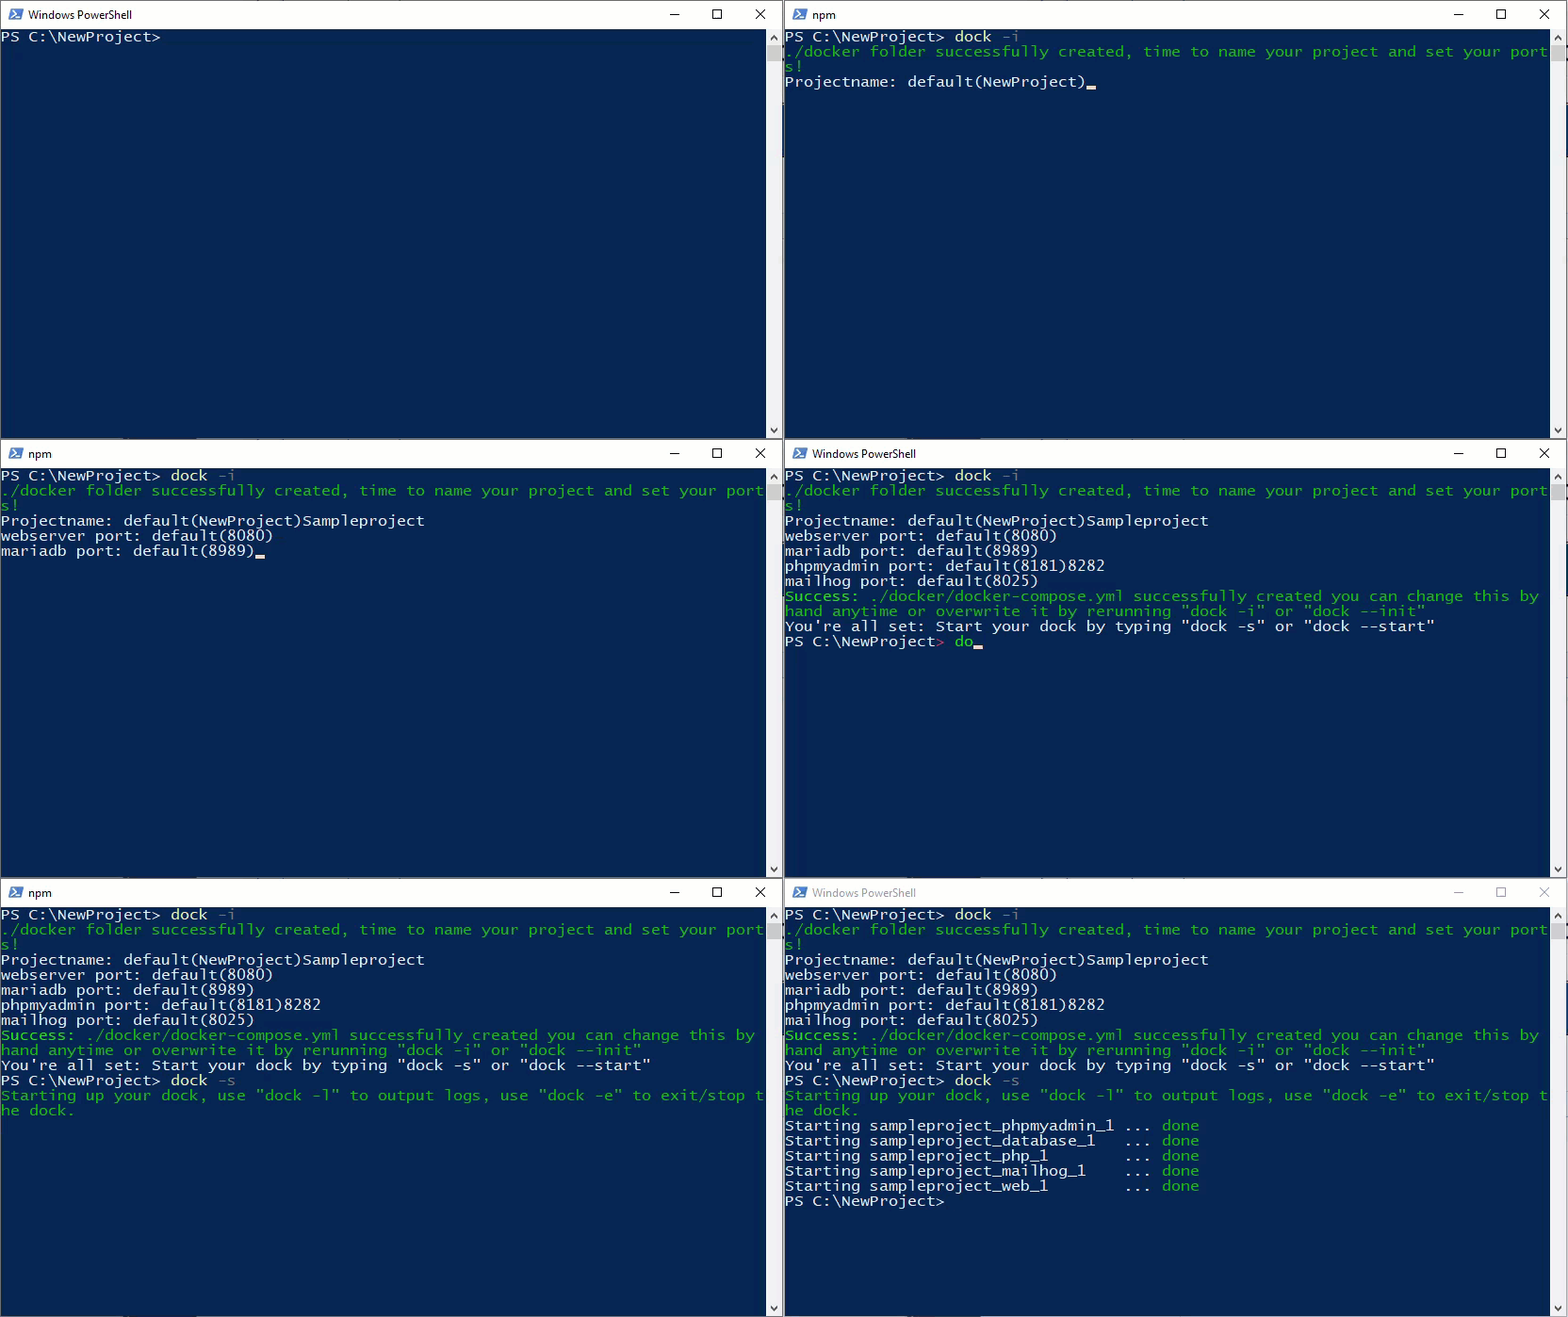
To start a local development environment use dock -i in your project root.
This will add a new folder into your project, ./docker this folder will hold the configuration files for your dock.
The init option will also ask you to name your containers and assign port numbers to them.
Note: Make sure the container names are unique otherwise docker won't be able to start them.

Start the dock:
To start the dock use dock -s or dock --start this will create the docker containers.
Go to localhost:YourWebserverPort to view the webserver, the index.html or index.php file in your projectroot will be displayed.
Go to localhost:YourPhpMyAdminPort to view the database, login with root/root or with devdb/devdb.
Note:
YourWebserverPort/YourPhpMyAdminPortports are set in the init process, if you forgot what the set ports are or want to change them go to the docker-compose.yml file in thedockerfolder inside your projectroot.The database user
devdband databasewordpressis created on the firstdock --startthis username, password & databasename can also be changed in the docker-compose.yml file in thedockerfolder inside your projectroot.
Stop the dock:
To stop the dock use dock -e or dock --stop this will stop the docker containers.
Output logs to the shell:
To output logs use dock -l or dock --logs this will continuesly output the logs from the containers.
Note: This can also be achieved with the
dock --foregroundcommand, this will start the containers and directly output the logs.
Dump DB:
To dump the database use dock -d or dock --dbdump this will dump the database to the root of your project.
Note: This database.sql file won't automatically get restored on a
dock --start, when the containers are stopped they still contain all your data so we won't need to restore the database, but if somehow your container gets destroyed it's nice to have the latest database file.This can also be usefull for cloning your project, to restore the database simply run
dock -rordock --dbrestore.
Additional info
The docker folder in your project root holds all the files to edit the configuration, to change php.ini values simply go to the ./docker/php.ini file and add any overwrite you need.
The ./docker/Dockerfile contains the PHP-FPM config, it'll use the original latest php:7-fpm image and install some additional packages using apt-get, docker-php-ext & pecl.
The ./docker/nginx.conf contains the nginx config, the basic configuration is probably enough for most PHP projects but you can change this anyway you'd like.
The ./docker/docker-compose.yml contains the docker-compose config, on dock --start this file gets read and will be used to start the containers.
Edit this file to change your ports, database_username or database_password
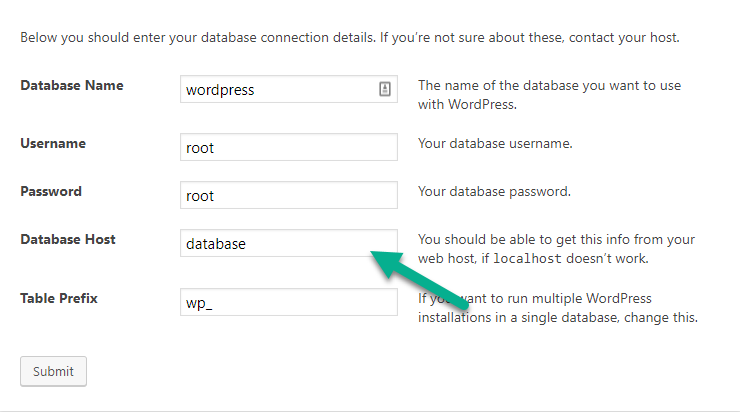
In Projects where you need to use the Database use keyword "database" as the hostname, docker will use the name to lookup the ip:port.

5 years ago
6 years ago
6 years ago
7 years ago
7 years ago
8 years ago
8 years ago
8 years ago
8 years ago
8 years ago
8 years ago
8 years ago
8 years ago
8 years ago
8 years ago
8 years ago
8 years ago
8 years ago
8 years ago
8 years ago
8 years ago
8 years ago