exquisite-sst v1.6.0
Exquisite-sst
Easy Screenshot testing.
Screenshot testing is a kind of end-to-end testing where all the parts of your application are being tested. Exquisite takes a screenshot of your webpage and compares it pixel by pixel against a reference image in a short amount of time.
Screenshot testing is useful in some environments where snapshot-testing or even selenium cannot be used easily.
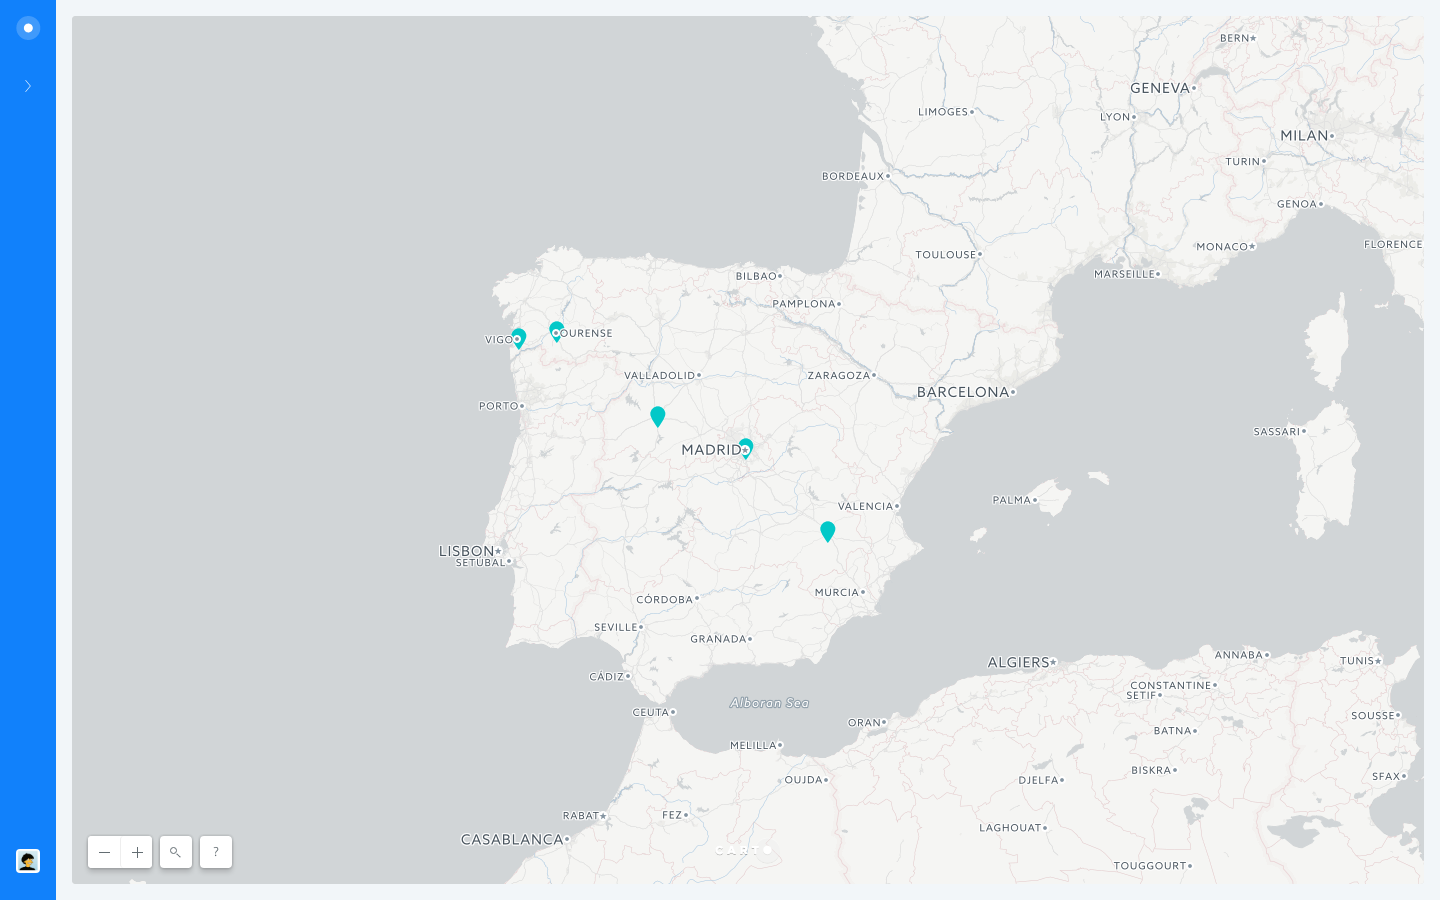
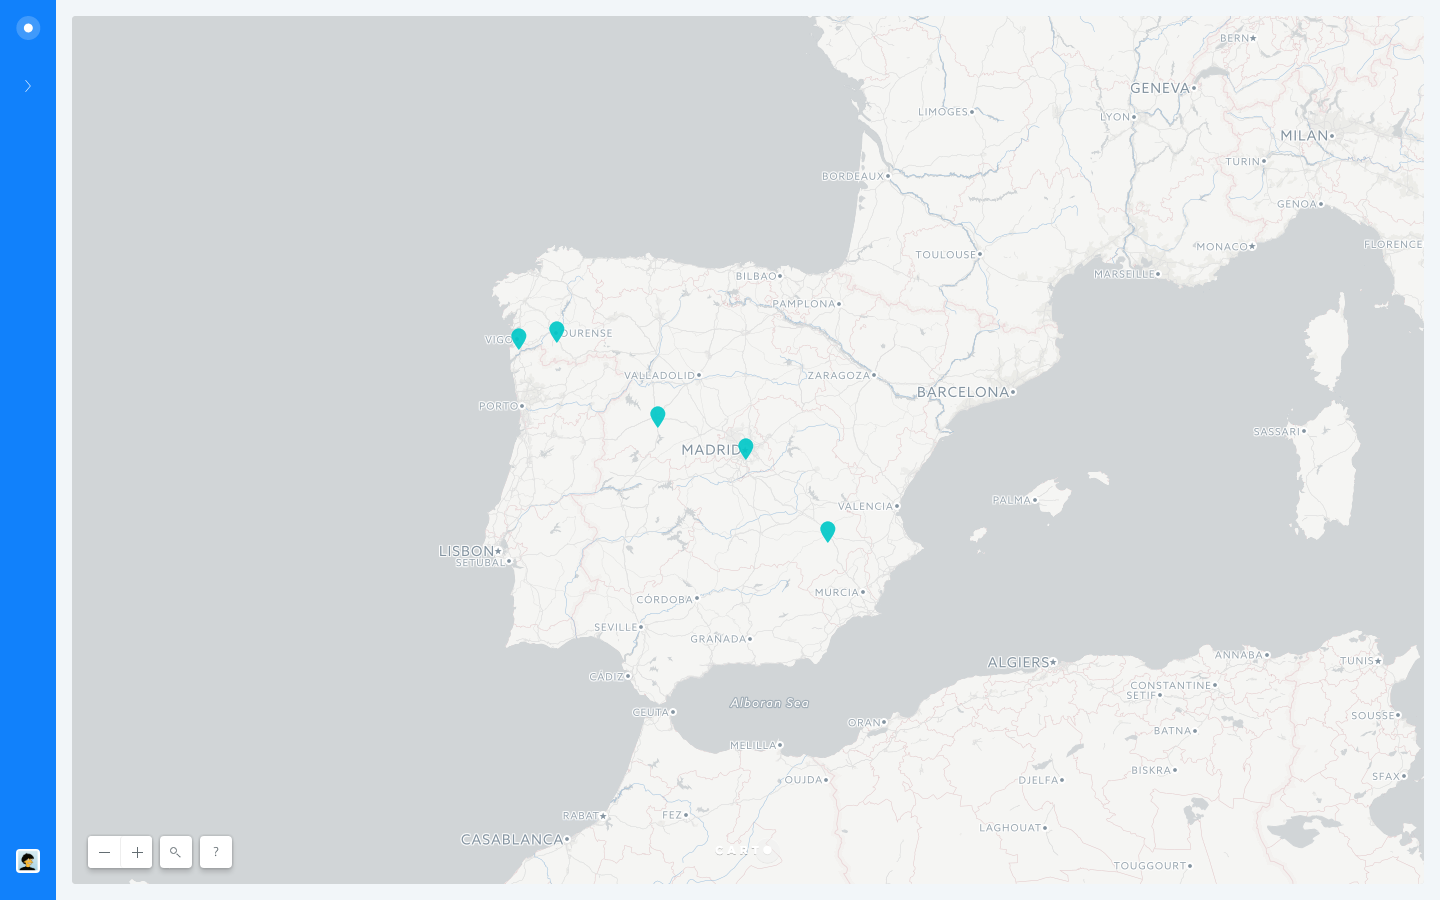
Think about checking if a map is well painted where most of the components are fragments of images (tiles) mixed with vector graphics
where selenium only sees a canvasElement. The only way to know if the content is correct is the human eye.
| expected | actual |
|---|---|
 |  |
Can you spot the differences in those two maps? Exquisite can (in less than 3 seconds!)
Instaling
Exquisite needs "node": ">=6.9.0"
Install the app as a regular node module, using yarn or npm install.
yarn add exquisite-sstAPI
exquisite.test(params)
Compare a screenshot against a reference image.
- params.url: Url to take the screenshot from. Default:
undefined. Required. - params.input: Path to the reference image. Default:
original.png - params.output: Path where the screenshot is saved. Default:
output.png - params.delay: Milliseconds to wait between the page-loaded event and the screenshot. Default:
0 - params.viewportWidth: With of the browser screen. Default:
1440 - params.viewportHeight: Height of the browser screen. Default:
900 - params.deviceScaleFactor: Specify device pixel ratio. Default:
1 - params.headless: Use a headless browser. Default:
false - params.threshold: Image diff threshold. Default:
0.1 - params.waitForFn: The screenshot will be taken only when this function returns true. Default:
undefined- This can be a
functionor astringcontaining the function code. - When this is parameter is given the delay is ignored.
- This can be a
- params.consoleFn: The output of the chrome console will be redirected to this funcion. Default:
undefined- Callback is called with consoleMessages
- This can only be a
functionso it cannot be used from the command line
- params.pageEvents: You can add handlers for events Puppeteer's Page object. This is useful to detect errors within the page. Default:
{
    error: console.error,
    pageerror: console.error,
    requestfailed: console.error,
}
exquisite.getReference(params)
Take a screenshot and save it as a reference image.
- params.url: Url to take the screenshot from. Default:
undefined. Required. - params.output: Path where the screenshot is saved. Default:
output.png - params.delay: Milliseconds to wait between the page-loaded event and the screenshot. Default:
0 - params.viewportWidth: With of the browser screen. Default:
1440 - params.viewportHeight: Height of the browser screen. Default:
900 - params.headless: Use a headless browser. Default:
false - params.waitForFn: The screenshot will be taken only when this function returns true. Default:
undefined- This can be a
functionor astringcontaining the function code. - When this is parameter is given the delay is ignored.
- This can be a
- params.consoleFn: The output of the chrome console will be redirected to this funcion. Default:
undefined- Callback is called with consoleMessages
- This can only be a
functionso it cannot be used from the command line
- params.pageEvents: You can add handlers for events Puppeteer's Page object. This is useful to detect errors within the page. Default:
{
    error: console.error,
    pageerror: console.error,
    requestfailed: console.error,
}
Example
Get a reference image
const path = require('path');
// Require the package
const exquisite = require('exquisite-sst');

// Path where the reference screenshot will be stored.
const output = path.resolve(__dirname, 'google.png');
// Url to take the screenshot from
const url = 'https://google.com';
// Get the reference
exquisite.getReference({ url, output }).then(console.log).catch(console.error);
Compare the screenshot against a reference.
const path = require('path');
const fs = require('fs');

// Require the package
const exquisite = require('exquisite-sst');
// Wait 2000 ms after the loaded event to take the screenshot
const delay = 2000;
// Reference image
const input = path.resolve(__dirname, 'reference.png');
// Path where the screenshot will be saved
const output = path.resolve(__dirname, 'map.png');
// Url to take the screenshot from
const url = 'https://google.com';
// Take the screenshot and compare it against the reference image.
exquisite.test({ input, output, url, delay }).then(differentPixels => {
    // Delete the screenshot
    fs.unlinkSync(output);
    // Log the result
    console.log(`Images are ${differentPixels === 0 ? 'equal' : 'different'}`);
});
CLI
Yo can use exquisite from the command line using the same parameters described in the API
Add the --reference flag to take the reference screenshot.
# Install exquisite-sst globally
npm install -g exquisite-sst
# Generate the reference image for google
exquisite-sst --reference --url http://www.example.com --output reference.png --delay 200
# Compare the reference image against a new screenshot
exquisite-sst --url http://www.google.com --input reference.png
# Compare the reference image against a new screenshot waiting 200 ms to take the screenshot
exquisite-sst --url http://www.example.com --input reference.png --delay 200
# Compare the reference image against a new screenshot waiting the background to be red
exquisite-sst --url http://www.example.com --input reference.png --waitForFn "document.body.style.background === 'red'"
Using cloudinary for debugging.
When using exquisite in a CI environment like travis it could be useful to watch the screenshots of the failed tests.
You can use the cloudinary api to save and compare the taken screenshots.
const exquisite = require('exquisite-sst');
const path = require('path');
const fs = require('fs');
const delay = 2000;


// Use cloudinary to upload screenshots for manual debugging
const cloudinary = require('cloudinary');
// Configure cloudinary using env vars to prevent exposing private credentials.
cloudinary.config({
    cloud_name: process.env.CLOUD,
    api_key: process.env.API_KEY,
    api_secret: process.env.API_SECRET
});

// Example using mocha
describe('Image comparing', () => {
    it('Should return true when the reference and the url screenshot are equal', () => {
        const input = path.resolve(__dirname, 'reference/i1.png');
        const output = path.resolve(__dirname, 'reference/i1_out.png');
        const url = 'https://iago-carto.carto.com/builder/fe05bdc5-af40-4227-9944-ba31e3493728/embed';
        return exquisite.test({ input, output, url, delay }).then(differentPixels => {
             // Delete the taken screenshot
            fs.unlinkSync(output);
            // If the result is not the expected, upload the screenshots and make the test fail
            if (differentPixels > 0) {
                cloudinary.uploader.upload(input);
                cloudinary.uploader.upload(output);
                throw new Error(`${url}: Screenshot doesn't match!`);
            }
        });
    });
});
Testing
The tests are build to run on travis, dont worry if failing on your machine!
yarn test