gz-exobit v1.3.0
\<gz-exobit>
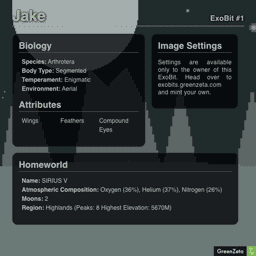
ExoBits are unique procedurally generated characters created with a pseudo random key. ExoBit keys are stored in the Ethereum blockchain and distributed as a Non Fungible Token (NFT). This web component loads ExoBit NFT metadata and renders an interactive card with image and information about the character.
Visit the ExoBits website for more information on ExoBits and mint your own NFT.


Using This Project
Scripts
npm run build- Builds the web component javascript file, output to a/distdirectory.
Setup
There are two methods for making the web component available in your project: installing from npm, or using a <script> tag. This section will explain both methods.
Using npm
- From your project, install the package:
npm install gz-exobit - Add an import statement to your project:
import 'gz-exobit'; - This will automatically register the component and make it available for use.
Using a script tag
- First clone or download this project. From within this project, run
npm installto set up development dependencies. - Run the build script to generate the component javascript file:
npm run build - This will create a directory
/dist. Within this directory you'll find a javascript file following the naming conventiongz-exobit-x.x.x.js - Copy the built javascript file into your project. Add a script tag that points to the file.
ex:
<script src="gz-exobit-1.0.0.js"></script> - Once loaded, the script will automatically register the component and make it available for use.
The Component Element
With the component script set up, you can add the component element to your project HTML. Adding the component is as simple as adding a gz-exobit element to your page wherever you want the component to display. To test your component, you can add a data-key="demo" attribute
<gz-exobit data-key="demo"></gz-exobit>Linking To Your NFT
Unless in demo mode, the component requires one attribute data-uri. This is set to a uri pointing to ExoBit metadata. You can get the uri for your ExoBit from the ExoBits website.
- Visit the ExoBits website and connect your wallet.
- Click the "My Exobits" navigation link at the top.
- Choose the ExoBit you wish to add to your project. Below it there are several controls.
The leftmost control is an input field containing the ipfs address for your ExoBit NFT metadata. If you have an ipfs capable browser, you can use this address to directly load your NFT metadata. However, most web browsers do not recognise the ipfs protocol. Therefore, you must use an http gateway to retrieve the metadata. Fortunately, one is provided.
- Next to the ipfs address is a button labeled
{...}. This button will open a popup window that displays your metadata. ExoBits uses the Pinata gateway. If you are fimilar with ipfs gateways and how they work, you're welcome to substitute your own. - Copy the web address from the popup window, add a
data-uriattribute to your<gz-exobit>element and set it to the address.
<gz-exobit data-uri="https://gateway.pinata.cloud/ipfs/QmPfKjX14CDY5VfsebwMJfGjujSJtGzASbcCRgEZ5x2yuw"></gz-exobit>Optional Attributes
data-size -
<gz-exobit data-size="512">The size in pixels to set the component height and width. While any size will work, the image will work best with a number that is an even multiple of 128 ( 128, 256, 1024, etc ). The default value is "512" and ExoBits were designed to be viewed at this size.data-slowmo -
<gz-exobit data-slowmo="2">The speed in miliseconds to pause between each canvas draw operation when drawing in slow motion. Default value is "0".data-key -
<gz-exobit data-key="demo">Use in place of data-uri to test the component in demo mode. If you own an ExoBit NFT and have access to its MetaData, you can use thekeyvalue here in place of thedata-uriattrubute and eliminate the need for the network request. IMPORTANT: owner features are not available when usingdata-keyunless it's set to "demo".
Owner Features
In order to expose owner features, the component needs to communicate with the Ethereum contract. It is capable of doing this with the help of the web3 javascript library. Due to its size, the web3 library is not included in the component or this project.
Visit the web3.js project page for more information on the library and setting it up in your project.
This component expects an instance of a Web3 object assigned to a web3instance property of the window. ex: window.web3instance = new Web3('ws://localhost:8546');
This property must be set before the component element is added to the DOM. It also must have its active account set to the same address as the owner of the NFT matching the metadata provided via the component data-uri attribute.
window.web3instance Must be set before the component mounts. Once set, the <gz-exobit> element may be added to the dom. If it detects a valid Web3 object in window.web3instance the component will automatically call out to the Ethereum contract and validate the NFT owner against the active account in the Web3 instance.