highradius-summer-internship-2020-dialogflow-backend v1.0.0
Chatbot Backend
Setting up Dialogflow
Head over to the Dialogflow website and sign up for a free account.
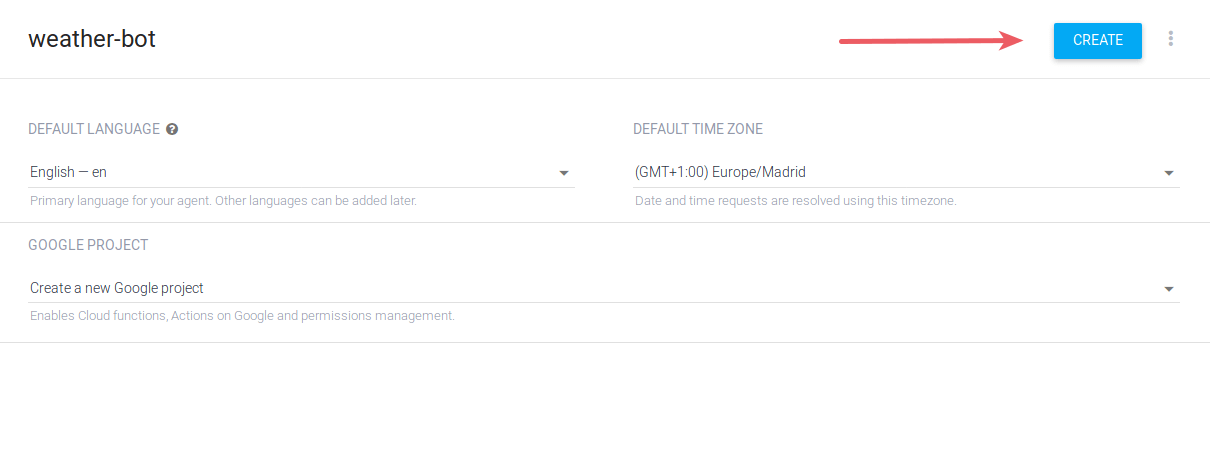
Click on the Create Agent button. Give your agent a name (image below shows agent with name "weather-bot") and fill in the remaining fields, then hit the CREATE button. You will be redirected to the main page of the agent. Image Below

Open the file
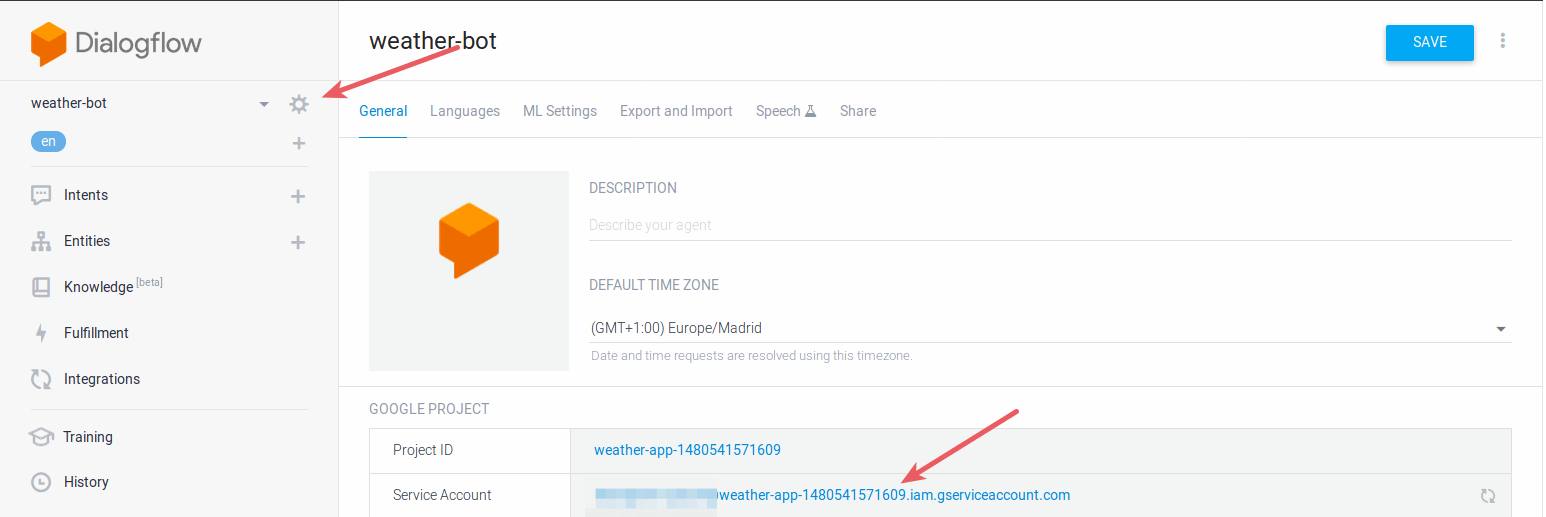
variables.envwith your favourite text editor.Go to Dialogflow and to your agent’s settings. Copy
Project IDand paste it invaribales.envalongDIALOGFLOW_PROJECT_ID. At this point, yourvariables.envfile would look something like below :
//variables.env

DIALOGFLOW_PRIVATE_KEY="-----BEGIN PRIVATE KEY-----\n<__KEY__>\n-----END PRIVATE KEY-----\n"
DIALOGFLOW_CLIENT_EMAIL=foobar@<PROJECT_ID>.iam.gserviceaccount.com
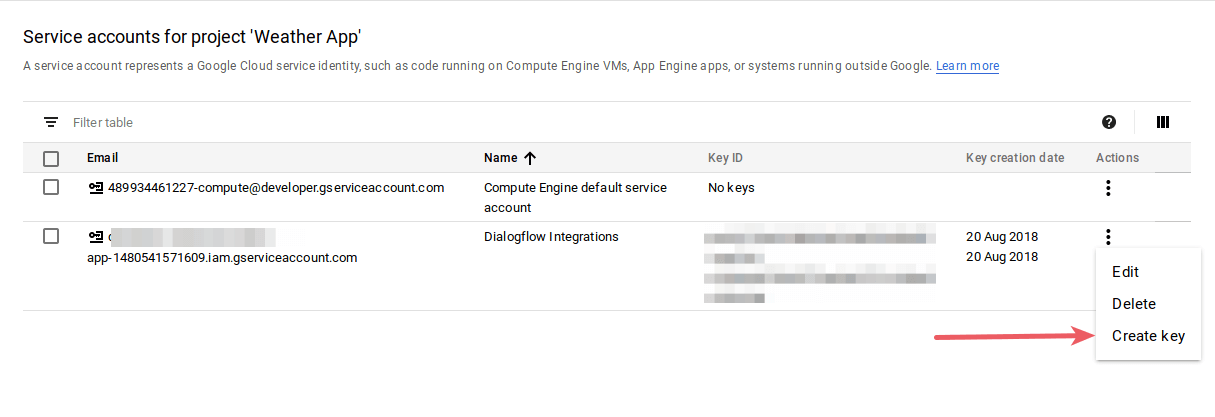
DIALOGFLOW_PROJECT_ID="EXAMPLE-123"- Back in settings, under Google Project, click on the service account name. This will open your Google Cloud Platform service account’s page. Image Below

- You should see a Dialogflow Integration service account in the list of accounts. Click on the three dots menu on the right and select Create Key. Leave the file format as JSON and click Create. This will download a JSON file to your computer.

Open the JSON file with your favorite text editor. You only need two of the values:
private_keyandclient_email.Open the file
variables.env.- Paste the value of
private_keyalongDIALOGFLOW_PRIVATE_KEY. - Paste the value of
client_emailalongDIALOGFLOW_CLIENT_EMAIL. - Maintain
""as in examples.
- Paste the value of
Your
variables.envfile should look something like below :
//variables.env

DIALOGFLOW_PRIVATE_KEY="-----BEGIN PRIVATE KEY-----\nexample12345\n-----END PRIVATE KEY-----\n"
DIALOGFLOW_CLIENT_EMAIL=example@<EXAMPLE-123>.iam.gserviceaccount.com
DIALOGFLOW_PROJECT_ID="EXAMPLE_!23"- Save the file
Enable Small Talk
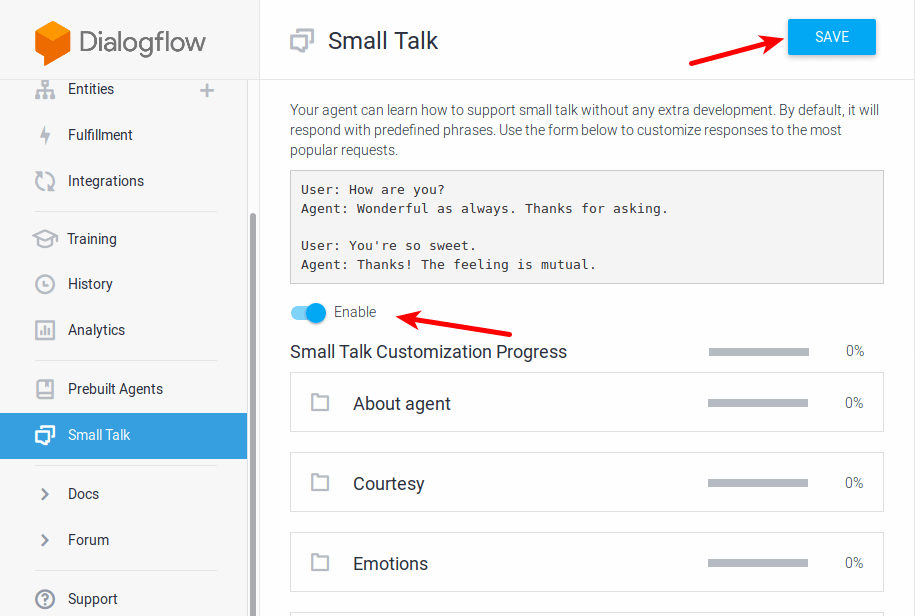
Dialogflow provides a neat feature that allows any bot to have simple conversations with users without writing any code. To enable this feature, click Small Talk on the sidebar and toggle it on.

Setting Up the Server
Run the below code to install dependencies :
npm iAfter the above has completed execution, run
npm startThis will start the server on PORT 4000 .
6 years ago