ls_react-native-livechat v2.0.0-13
LiveChat for React Native
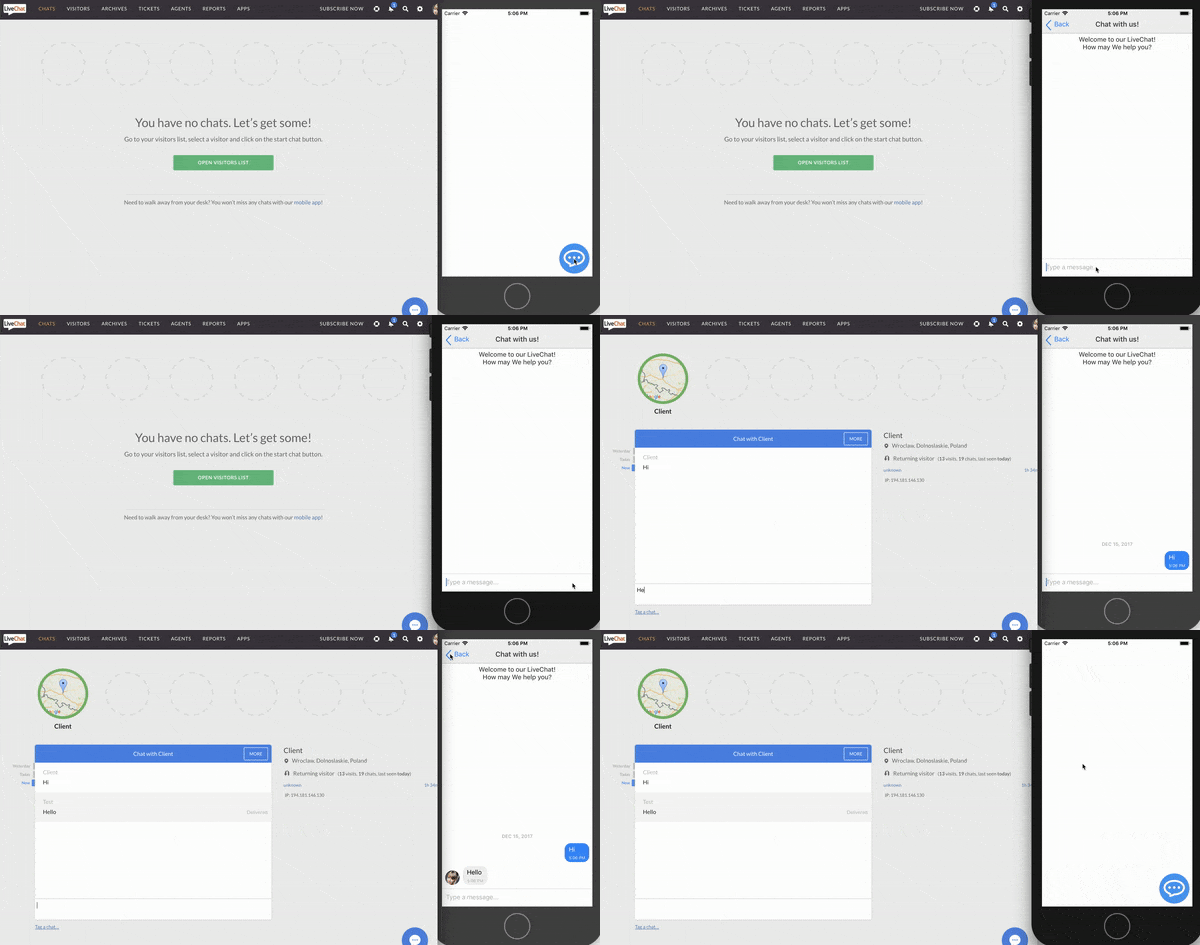
This is a React Native component to easily add LiveChat widget to your application.
It works for both iOS and Android.

Getting Started
Prerequisites
To use LiveChat in your React application, you will need the LiveChat license ID.
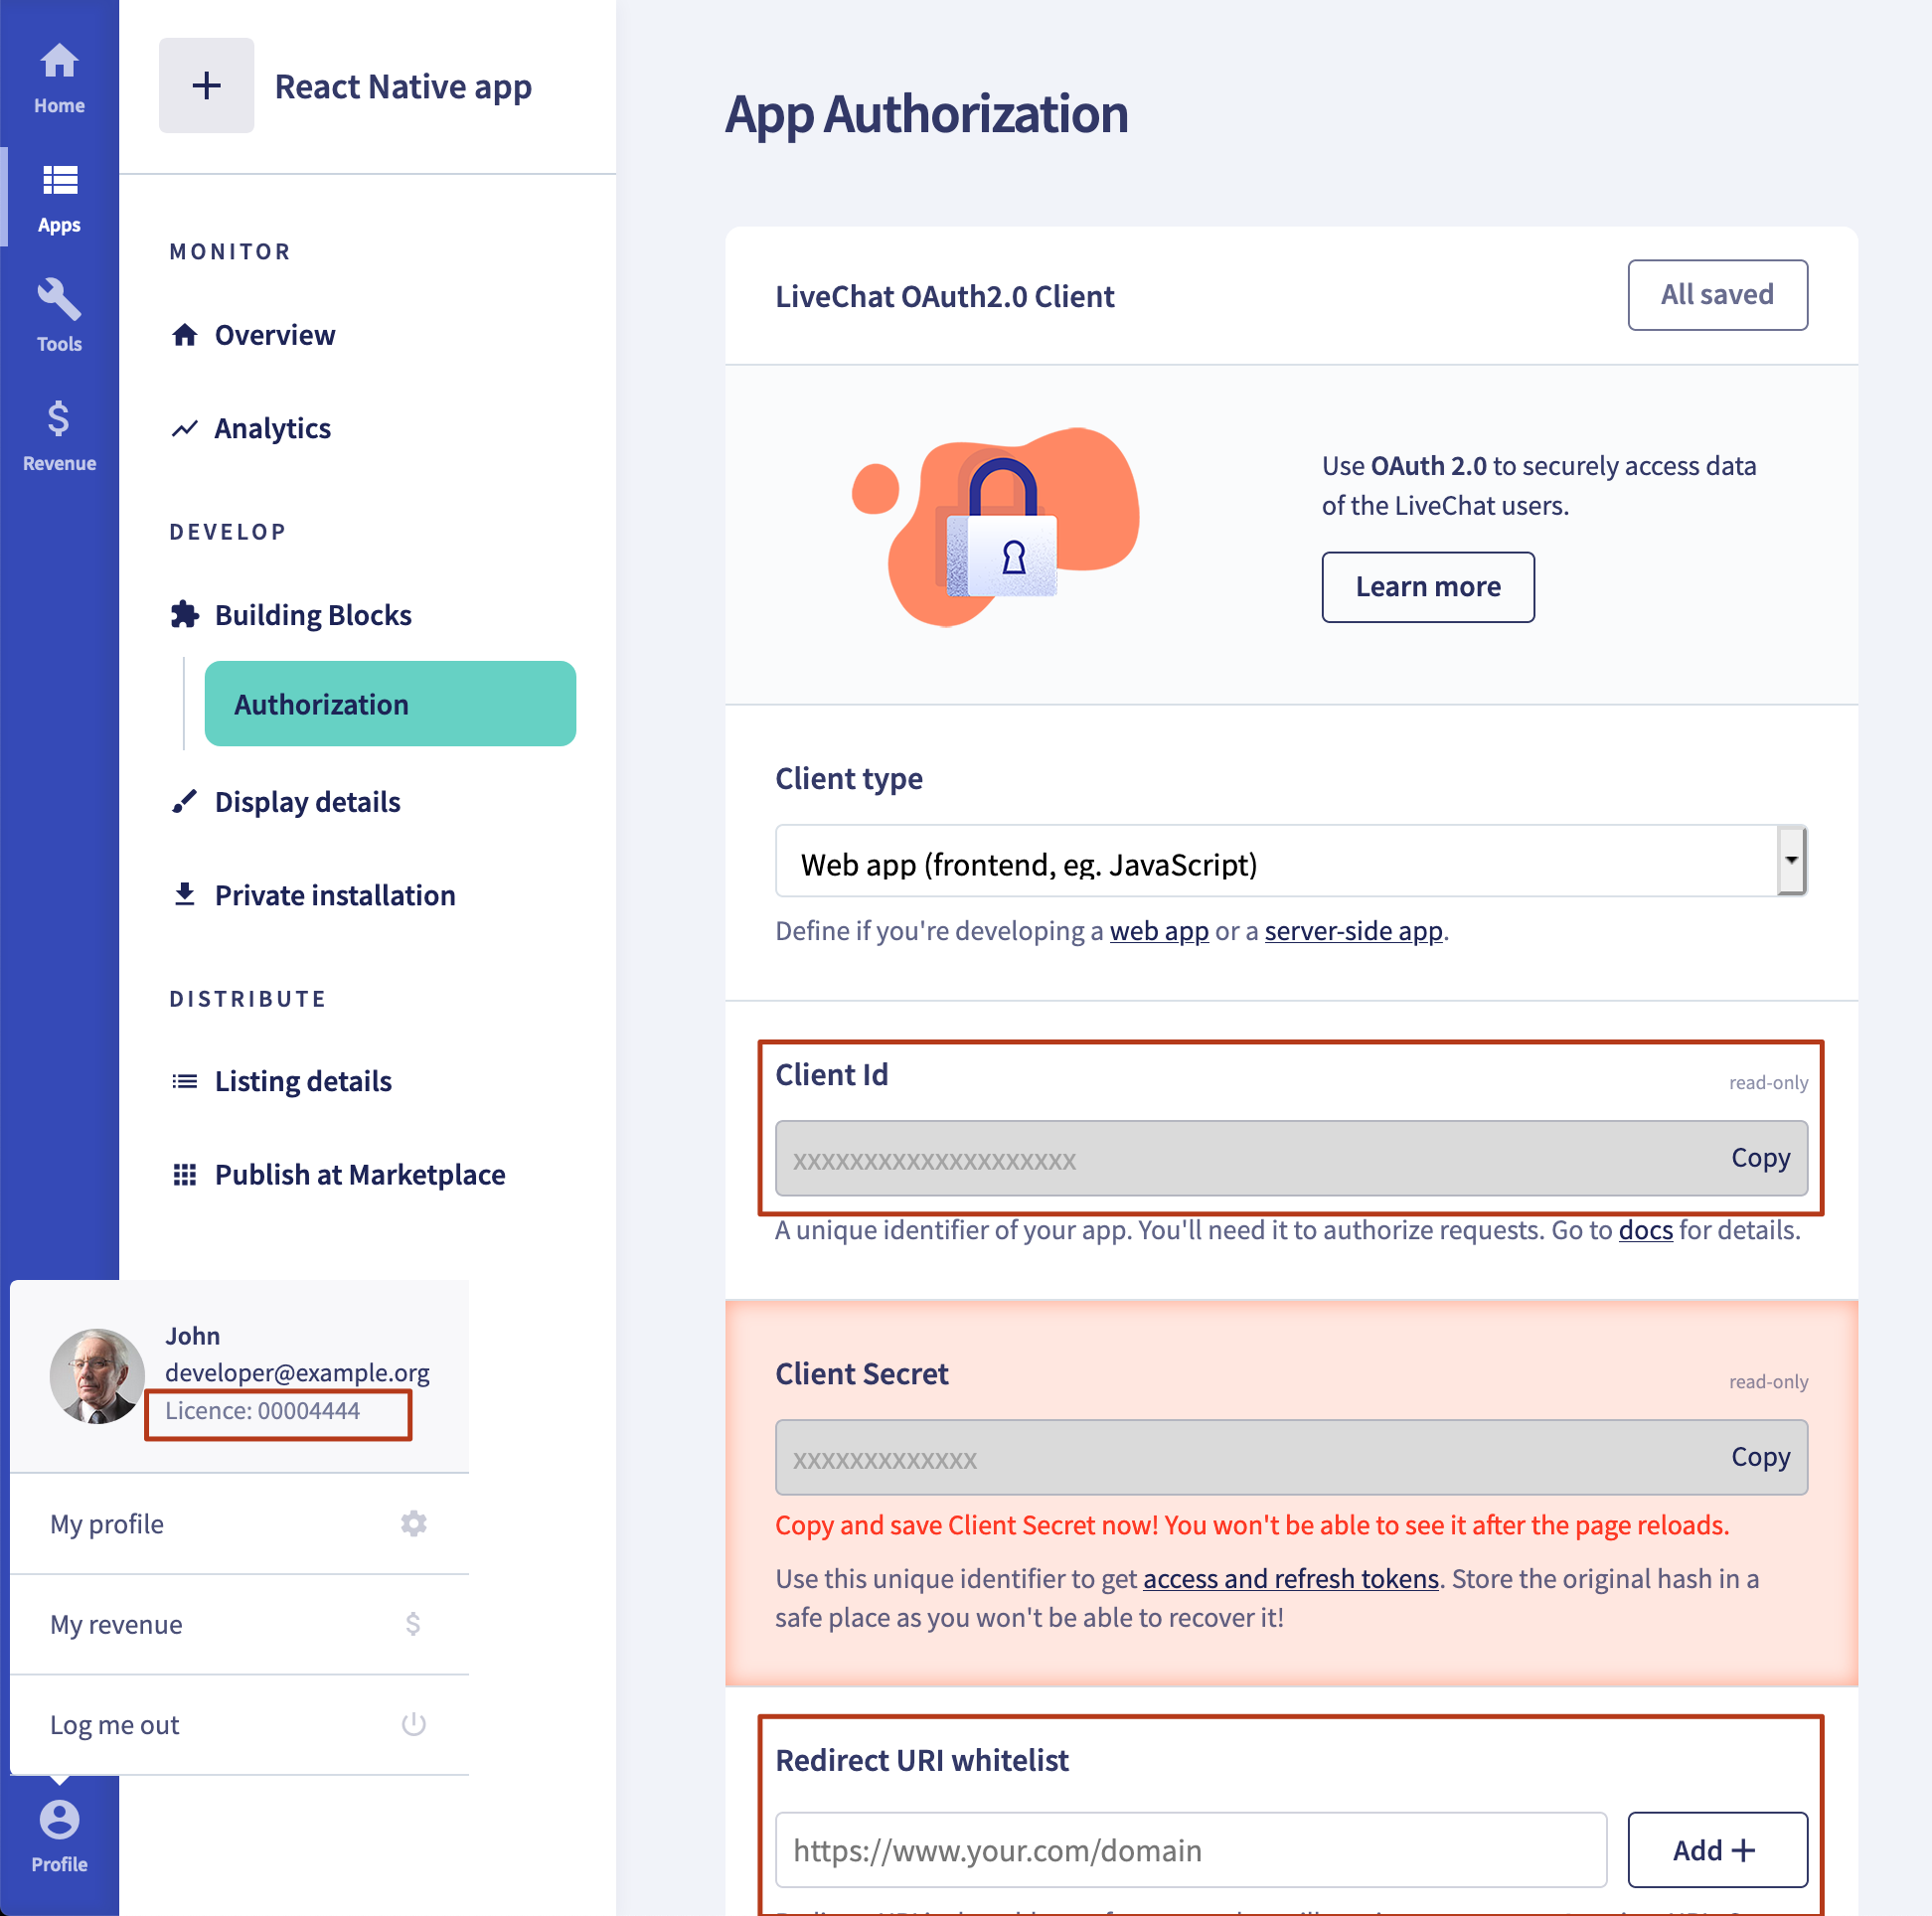
To obtain authorization data (redirect_uri and client_id), you need to create a new LiveChat app. See our Creating LiveChat apps documentation.
client_id- identifies the application, you will receive it after creating a new application in Developer Consoleredirect_uri- it must be one of the URLs that you entered when creating the new app in the Developer Console

If you don't have an account, you can create one here.
Installation
To import LiveChat for React Native, run the following command to install required dependency (react-native-webview) and react-native-livechat library:
npm install react-native-webview react-native-livechat --saveSupported LiveChat features
- chatting
- sneak-peek
- rich messages: single cards with images, title, subtitle and quick replies
- agent's attachments
- system messages
Unsupported LiveChat features
- pre-chat and post-chat forms
- rating
- transcript
- ticket forms
- queues
- translations
- card masking
- chat boosters
- customer's attachments
- sound notfifications
- updating customer info
If you would like to use unsupported features in your React Native app, read about the Alternative React Native installation method.
Alternative React Native installation method
This project implements basic LiveChat features using React Native technology. If you need to use more advanced LiveChat features, you can use Webview to embed web LiveChat widget using a direct chat link.
To do it, use react-native-webview library and add Webview component with your licenses direct chat link, replacing <LICENSE_ID> string with you LiveChat's license id.
<WebView
  source={{
    uri: 'https://secure.livechatinc.com/licence/<LICENSE_ID>/v2/open_chat.cgi',
  }}
/>
User Guide
Start
Having imported LiveChat for React Native, put it in your render method:
import LiveChat from 'react-native-livechat'

...

<LiveChat license="<LICENSE_ID>" redirectUri="https://example.org" clientId="<APP_CLIENT_ID>" />
You can also pass 'group' as a prop, to assign chat to chosen LiveChat group.
<LiveChat
  group={2}
  license="<LICENSE_ID>"
  redirectUri="https://example.org"
  clientId="<APP_CLIENT_ID>"
/>
Customization
Chat bubble
The chat bubble is the round icon (chat trigger) in the bottom right corner of the screen.
Position
You can control the position of the bubble with bubbleStyles prop:
const styles = StyleSheet.create({
  bubbleStyles: {
    position: 'absolute',
    left: 24,
    bottom: 24,
  },
})

;<LiveChat
  license="<LICENSE_ID>"
  redirectUri="https://example.org"
  clientId="<APP_CLIENT_ID>"
  bubbleStyles={styles.bubbleStyles}
/>
Color
You can change the color of the bubble by passing bubbleColor prop:
<LiveChat
  bubbleColor="red"
  license="<LICENSE_ID>"
  redirectUri="https://example.org"
  clientId="<APP_CLIENT_ID>"
/>
Custom bubble
If you don't like the default bubble, you can send bubble prop with your own component:
<LiveChat
  license="<LICENSE_ID>"
  redirectUri="https://example.org"
  clientId="<APP_CLIENT_ID>"
  bubble={<View style={{ width: 60, height: 60, backgroundColor: 'green' }} />}
/>
Chat widget
This module uses react-native-gifted-chat for chat UI.
You can customise your chat widget by sending props to LiveChat component (like you would normally do with GiftedChat component).
For example, if you want onPressAvatar to show agent's details, you can do it like this:
<LiveChat license="<LICENSE_ID>" onPressAvatar={(info) => console.warn(info)} />You can find all props in the official react-native-gifted-chat documentation.
Support
If you need any help, you can chat with us here.
I hope you will find this module useful. Happy coding!
5 years ago