chat-ui-react
![]()
![]()
![]()

chat-ui-react is an npm package for building conversational web UIs. This package offers the following:
- React component
- Chat message
- Message input form
- Class that controls the display of components
You can incorporate this into your online chats and chatbots.
Currently, the component uses React's UI framework Material-UI. If you want a component other than Material-UI, you can replace it with the original component and use it.
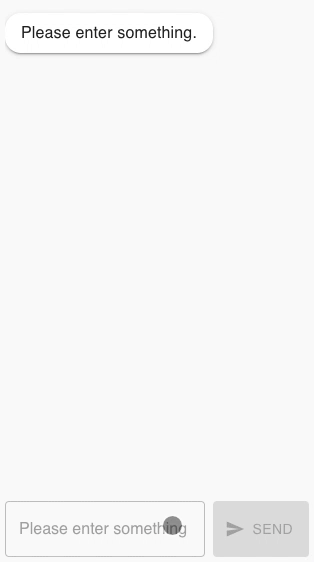
Demo
See the demo site.
Example
See the example directory.
- echo-bot: A chatbot that echoes user input.
- cdn: An easy way to get started quickly.
Installation
Node.js
With npm:
npm install chat-ui-react react react-dom @material-ui/coreWith yarn:
yarn add chat-ui-react react react-dom @material-ui/coreCDN
<script
  crossorigin="anonymous"
  src="https://unpkg.com/react@16/umd/react.development.js"
></script>
<script
  crossorigin="anonymous"
  src="https://unpkg.com/react-dom@16/umd/react-dom.development.js"
></script>
<script
  crossorigin="anonymous"
  src="https://unpkg.com/@material-ui/core@4/umd/material-ui.development.js"
></script>
<script
  crossorigin="anonymous"
  src="https://unpkg.com/chat-ui-react@latest/dist/browser/chat-ui-react.umd.polyfill.js"
></script>
<script
  crossorigin="anonymous"
  src="https://unpkg.com/@babel/standalone@7/babel.min.js"
></script>
Usage
This package consists of a MuiChat component that displays the chat and a ChatController class that controls the display of the chat. The figure below shows each relationship.
+------------+           +------------------+           +-----------+
|            |   Call    |                  |   Call    |           |
|            |           |                  |           |           |
|  Your App  |  +----->  |  ChatController  |  +----->  |  MuiChat  |
|            |           |                  |           |           |
|            |           |                  |           |           |
+------------+           +------------------+           +-----------+
This structure allows us to focus solely on passing the chat display to the ChatController. You don't have to worry about display control of components.
If you don't like what you see, you can replace MuiChat with another component. There is no change in the app due to replacement.
Here's a simple example to understand how to use it.
function App(): React.ReactElement {
  const [chatCtl] = React.useState(new ChatController());

  React.useMemo(async () => {
    // Chat content is displayed using ChatController
    await chatCtl.addMessage({
      type: 'text',
      content: `Hello, What's your name.`,
      self: false,
    });
    const name = await chatCtl.setActionRequest({ type: 'text' });
  }, [chatCtl]);

  // Only one component used for display
  return <MuiChat chatController={chatCtl} />;
}
In the following, we will explain how to use ChatController.
Message
To display the chat message, use the addMessage method.
In the self option, specify whether it is your own message or someone else's message.
await chatCtl.addMessage({
  type: 'text',
  content: `Hello, What's your name.`,
  self: false,
});
Action
Use the setActionRequest method to prompt the user for a message.
Number of actions
There are two ways to request an action: one-time action and always request action.
One-time action
Specify false for the always option to request a one-time action from the user.
The return value of the method is a Promise that returns the user input.
const response = await chatCtl.setActionRequest({
  type: 'text',
  datatype: 'text' | 'number' | 'password'
  always: false,
});
console.log(response.value);
Always action
To always request an action from the user, specify true in the always option.
Specify the callback function that receives the input because it is input multiple times by the user.
To cancel the input request from the user, call the cancelActionRequest method.
chatCtl.setActionRequest({ type: 'text', always: true }, (response) => {
  console.log(response.value);
});
chatCtl.cancelActionRequest();
Action type
There are several types of actions such as text and selection.
Text
This action inputs a string.
Specify text for type.
The return value of the method is the message entered by the user.
const response = await chatCtl.setActionRequest({ type: 'text' });
console.log(response.value);
Single selection
This action selects one from the options.
Specify select for type. Specify the options in options. value is used for html attributes and text is used for screen display.
The return value of the method is the element of the options selected by the user.
const response = await chatCtl.setActionRequest({
  type: 'select',
  options: [
    {
      value: 'a',
      text: 'A',
    },
    {
      value: 'b',
      text: 'B',
    },
  ],
});
console.log(response.option);
// If A is selected
// { value: 'a', text: 'A' }
Multiple selection
This action selects multiple options.
Specify multi-select for type. Specify the options in options. value is used for html attributes and text is used for display. The return value of the method is the selected options.
const response = await chatCtl.setActionRequest({
  type: 'multi-select',
  options: [
    {
      value: 'a',
      text: 'A',
    },
    {
      value: 'b',
      text: 'B',
    },
  ],
});
console.log(response.options);
//  If A and B are selected
// [{ value: 'a', text: 'A' }, { value: 'b', text: 'B' }]
File
This action inputs a file.
Specify file for type. You can specify accept and multiple as attributes of the input tag. The return value of the method is an array of files entered by the user.
const response = await chatCtl.setActionRequest({
  type: 'file',
  accept: 'image/*',
  multiple: true,
});
console.log(response.files);
Audio
This action inputs audio.
Specify audio for type. The return value of the method is the Blob of the audio input by the user. If the audio input fails, the Reject rejected Promise is returned.
try {
  const response = await chatCtl.setActionRequest({
    type: 'audio',
  });
  console.log(response.audio);
} catch (e) {
  console.log(e);
}
Custom
This action uses your custom component as input.
Specify custom for type. Specify your component in Component.
Custom components follow the React conventions to create input forms as usual.
It receives chatController and actionRequest as properties. This is automatically set by chat-ui-react.
Then, set the input received from the user to the setActionResponse method of the ChatController class.
This can be received by the application as the return value of setActionRequest.
function GoodInput({
  chatController,
  actionRequest,
}: {
  chatController: ChatController;
  actionRequest: ActionRequest;
}) {
  const chatCtl = chatController;

  const setResponse = React.useCallback((): void => {
    const res = { type: 'custom', value: 'Good!' };
    chatCtl.setActionResponse(actionRequest, res);
  }, [actionRequest, chatCtl]);

  return (
    <Button
      type="button"
      onClick={setResponse}
      variant="contained"
      color="primary"
    >
      Good!
    </Button>
  );
}

const custom = await chatCtl.setActionRequest({
  type: 'custom',
  Component: GoodInput,
});
console.log(custom.value);
License
Copyright (c) 2020 twihike. All rights reserved.
This project is licensed under the terms of the MIT license.