ngb-table v1.4.3
NgbTable
Bootstrap table for Angular
Install
Install ngb-table
npm install --save ngb-tableIf you haven't installed bootstrap yet, run this command:
npm install --save bootstrapthen add Bootstrap styles to your global
style.scssfile:@import '~bootstrap/dist/css/bootstrap.min.css';
Now you are ready to use the ngbTable.
Basic Usage
I will follow you through the default generated Angular app.
Firstly add NgbTableModule to your module:
// app.module.ts
import { BrowserModule } from '@angular/platform-browser';
import { NgModule } from '@angular/core';
+ import { NgbTableModule } from 'ngb-table';
import { AppComponent } from './app.component';

@NgModule({
  declarations: [
    AppComponent
  ],
  imports: [
    BrowserModule,
+   NgbTableModule,
  ],
  providers: [],
  bootstrap: [AppComponent]
})
export class AppModule { }
Then you can use ngb-table in your components
// app.component.ts
import { Component } from '@angular/core';

@Component({
  selector: 'app-root',
  templateUrl: './app.component.html',
  styleUrls: ['./app.component.scss']
})
export class AppComponent {
+  data = [
+    { id: 123, name: 'Hot chocolate', price: 1.99, availability: 'Available' },
+    { id: 456, name: 'Slivovitz', price: 25, availability: 'Available' },
+    { id: 789, name: 'Hot chocolate festival ticket', price: 120, availability: 'Sold Out' },
+  ];
}
// app.component.html
+ <ngb-table [rows]="data">
+
+ <ng-template ngbTableHead>
+ <th>Name</th>
+ <th>Price</th>
+ <th>Availability</th>
+ </ng-template>
+
+ <ng-template ngbTableBodyRow let-row>
+ <td>{{ row.name }}</td>
+ <td>USD {{ row.price }}</td>
+ <td>{{ row.availability }}</td>
+ </ng-template>
+
+ </ngb-table>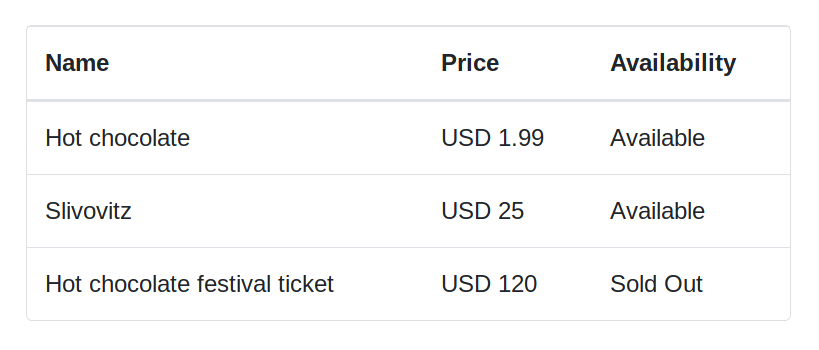
Maybe the above example is not so advanced but it is very simple and self-explanatory.
The only thing that needs clarification is that the ngbTableBodyRow template takes the context for each row of the table in the implicit row variable.
Now let's add more stuff.
Templates
Header
<ngb-table [rows]="data">

+ <ng-template ngbTableHeader>
+   Product quantity: {{ data.length }}
+ </ng-template>

  <ng-template ngbTableHead>
    <th>Name</th>
    <th>Price</th>
    <th>Availability</th>
  </ng-template>

  <ng-template ngbTableBodyRow let-row>
    <td>{{ row.name }}</td>
    <td>USD {{ row.price }}</td>
    <td>{{ row.availability }}</td>
  </ng-template>

</ngb-table>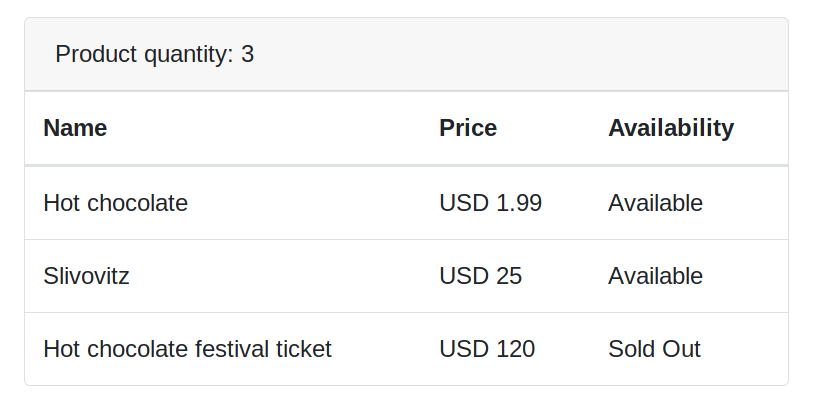
Footer
<ngb-table [rows]="data">

  <ng-template ngbTableHeader>
    Product quantity: {{ data.length }}
  </ng-template>

  <ng-template ngbTableHead>
    <th>Name</th>
    <th>Price</th>
    <th>Availability</th>
  </ng-template>

  <ng-template ngbTableBodyRow let-row>
    <td>{{ row.name }}</td>
    <td>USD {{ row.price }}</td>
    <td>{{ row.availability }}</td>
  </ng-template>

+ <ng-template ngbTableFooter>
+   For more information, please contact us directly...
+ </ng-template>

</ngb-table>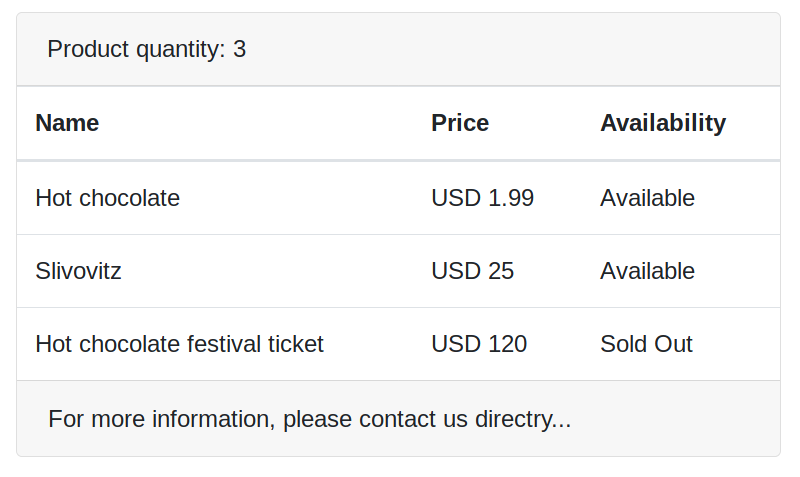
Row footer
<ngb-table [rows]="data">

  <ng-template ngbTableHeader>
    Product quantity: {{ data.length }}
  </ng-template>

  <ng-template ngbTableHead>
    <th>Name</th>
    <th>Price</th>
    <th>Availability</th>
  </ng-template>

  <ng-template ngbTableBodyRow let-row>
    <td>{{ row.name }}</td>
    <td>USD {{ row.price }}</td>
    <td>{{ row.availability }}</td>
  </ng-template>

+ <ng-template ngbTableFooterRow>
+   <td class="text-right">Total:</td>
+   <td colspan="2">USD 146.99</td> <!-- total is not computed dinamically for example's simplicity -->
+ </ng-template>

  <ng-template ngbTableFooter>
    For more information, please contact us directly...
  </ng-template>

</ngb-table>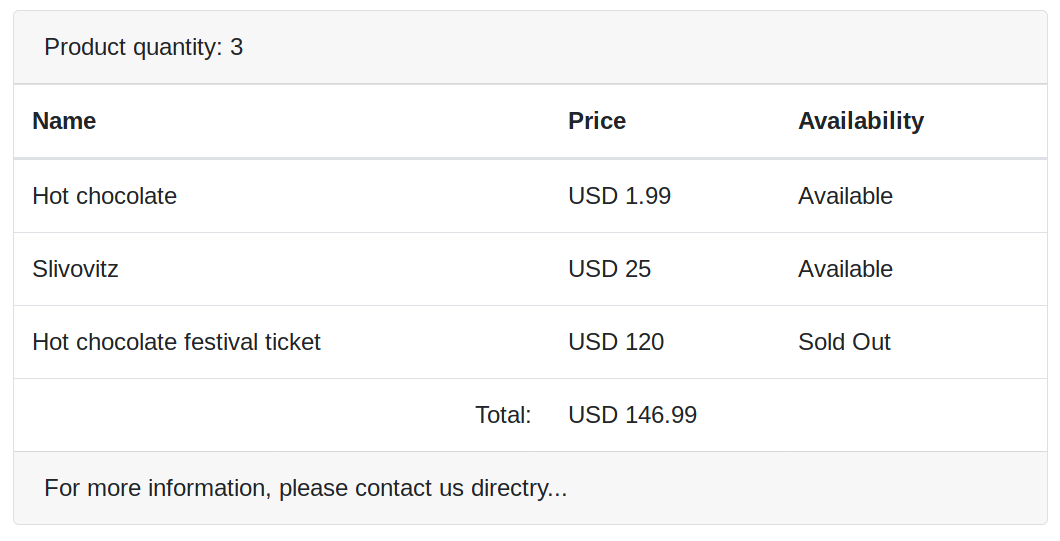
You can create multiple footer rows:
<ngb-table [rows]="data">

  <ng-template ngbTableHeader>
    Product quantity: {{ data.length }}
  </ng-template>

  <ng-template ngbTableHead>
    <th>Name</th>
    <th>Price</th>
    <th>Availability</th>
  </ng-template>

  <ng-template ngbTableBodyRow let-row>
    <td>{{ row.name }}</td>
    <td>USD {{ row.price }}</td>
    <td>{{ row.availability }}</td>
  </ng-template>

  <ng-template ngbTableFooterRow>
    <td class="text-right">Total:</td>
    <td colspan="2">USD 146.99</td>
  </ng-template>

+ <ng-template ngbTableFooterRow>
+   <td class="text-right">Available products total:</td>
+   <td colspan="2">USD 26.99</td> <!-- total is not computed dinamically for example's simplicity -->
+ </ng-template>

  <ng-template ngbTableFooter>
    For more information, please contact us directly...
  </ng-template>

</ngb-table>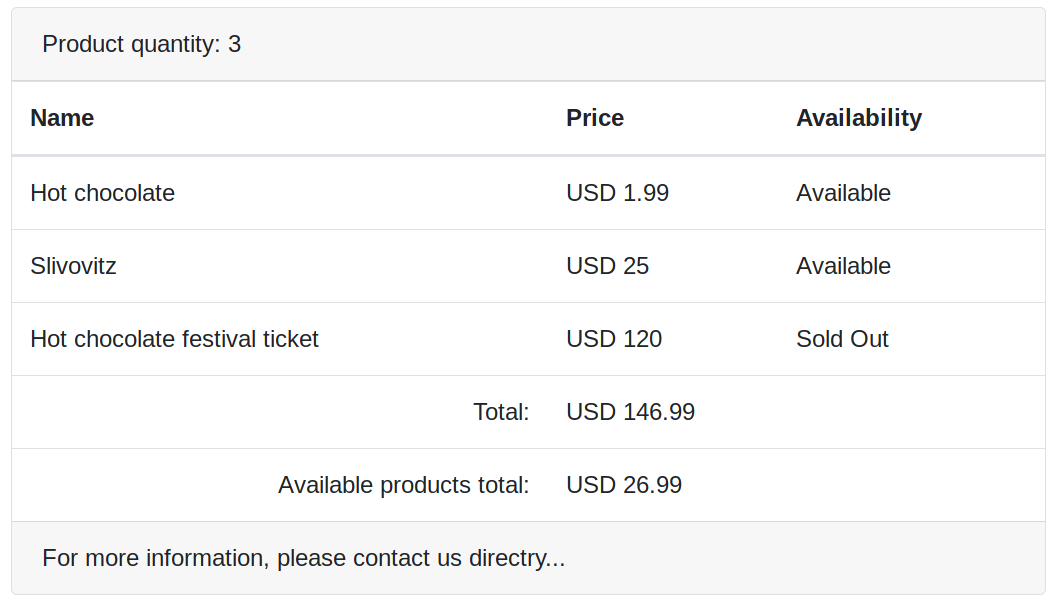
Selected rows' action header
<ngb-table [rows]="data">

  <ng-template ngbTableHeader>
    Product quantity: {{ data.length }}
  </ng-template>

+ <ng-template ngbTableSelectActionsHeader>
+   Selected products count: {{ selectedRowsIds.length }}
+ </ng-template>

  <ng-template ngbTableHead>
    <th>Name</th>
    <th>Price</th>
    <th>Availability</th>
  </ng-template>

  <ng-template ngbTableBodyRow let-row>
    <td>{{ row.name }}</td>
    <td>USD {{ row.price }}</td>
    <td>{{ row.availability }}</td>
  </ng-template>

  <ng-template ngbTableFooterRow>
    <td class="text-right">Total:</td>
    <td colspan="2">USD 146.99</td>
  </ng-template>

  <ng-template ngbTableFooterRow>
    <td class="text-right">Available products total:</td>
    <td colspan="2">USD 26.99</td>
  </ng-template>

  <ng-template ngbTableFooter>
    For more information, please contact us directly...
  </ng-template>

</ngb-table>
(see row selection below)
Row selection
For ability to select rows we need three things:
- enable
ngb-tablerow selection - array with selected rows IDs
- method for updating selected rows IDs array
// app.component.ts
...
export class AppComponent {
  data = [
    { id: 123, name: 'Hot chocolate', price: 1.99, availability: 'Available' },
    { id: 456, name: 'Slivovitz', price: 25, availability: 'Available' },
    { id: 789, name: 'Hot chocolate festival ticket', price: 120, availability: 'Sold Out' },
  ];
+ selectedRowsIds = [];
+
+ updateSelectedRows(rowsIds: string[]) {
+   this.selectedRowsIds = rowsIds;
+ }
}
...
// app.component.html
<ngb-table
[rows]="data"
+ [selectable]="true"
+ [selectedRowsIds]="selectedRowsIds"
+ (selectedRowsIdsChange)="updateSelectedRows($event)"
>
...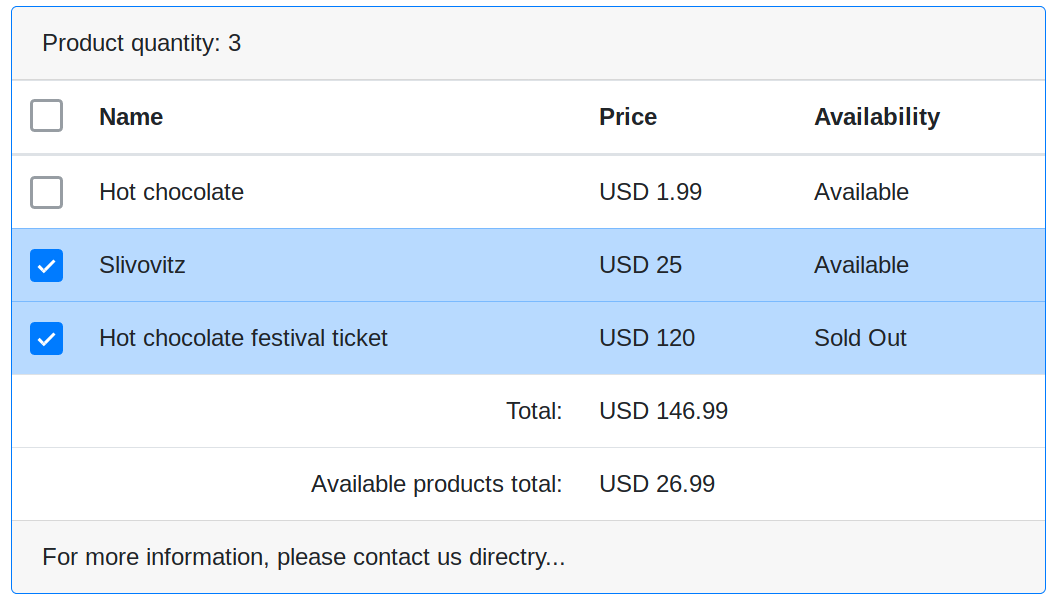
Note that empty cells in footer rows have been added automatically
By default ngb-table row id property name is implicitly just id.
If your data structure has different id filed name, specify it as ngb-table's rowIdColumnName input property, e.g:
<ngb-table
  [rows]="rows"
+ [rowIdColumnName]="'productId'"
...
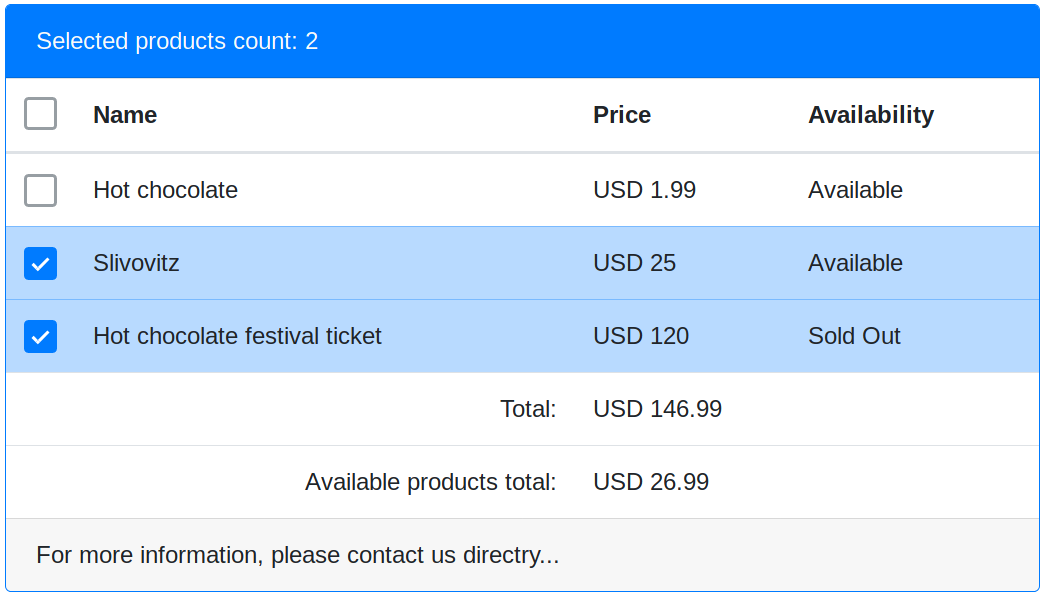
If ngbTableSelectActionsHeader template is provided then when you select something, the ngbTableHeader will be replaced with ngbTableSelectActionsHeader
Aditional templates
Subheader
Appears under ngbTableHeader. Is not replaced by ngbTableSelectActionsHeader when when rows are selected. Can be used multiple times.
<ng-template ngbTableSubheader>
  SubHeader
</ng-template>
Predicates
You can specify what row can be selected by using canSelectRowPredicate.
If specific row does not pass this predicate it can't be selected and its checkbox will be disabled.
<ngb-table
  [rows]="rows"
  [selectable]="true"
  [selectedRowsIds]="selectedRowsIds"
+ [canSelectRowPredicate]="onlyNameBarPredicate"
  (selectedRowsIdsChange)="updateSelectedRows($event)"
>
...
import { Predicate } from '@angular/core';
...
// your component's class property:
onlyNameBarPredicate: Predicate<YourRowDataType> = (row) => {
return row.status === 'available';
}