node-auth-base-js v1.0.5
NodeAuthBase-JS
NodeAuthBase-JS is an authentication library designed for Node.js, offering streamlined implementation of authentication functionalities within Express applications. This library simplifies tasks such as managing Sequelize models, creating Express routes, configuring email settings, and setting up Swagger documentation to enhance the authentication process in your Node.js projects.
Installation
npx NodeAuthBase-JS <project-name>Manual Installation
Clone the repo:
git clone --depth 1 https://github.com/hiral-makwana/NodeAuthBase-JS.git
cd <project-name>
npx rimraf ./.git
Environment variables
File path: ./config/config.json:
   "PORT": 8000,

   #JWT comfiguration details
   "JWT_SECRET": jwtSecretkey,
   "JWT_EXPIRATION_TIME": Expiration time of jwt. Example - "1h",

   #APIs prefix route to access swagger
   "API_BASE_PREFIX": "/"

   #Base url of server to access static files
   "API_BASE_URL": "localhost:",

   #To manage delete APIs functionality. Hard delete or soft delete
   "HARD_DELETE": false,

   #To add/ manage custome templete for email Templetes in request data
   "CUSTOM_TEMPLATE": true,

   #To define static path of directory to uploads profile pictures or any media
   "UPLOAD_DIR": "src/uploads/",

   #Database configuration - MySQL, Sequelize
   "DATABASE": {
      "host": "localhost",
      "name": "database_name",
      "username": "root",
      "password": ""
   },

   #To manage send mail using SMTP or sendmail()
   "SMTP": true,

   # SMTP configuration options for the email service
   # For testing, you can use a fake SMTP service like Ethereal: https://ethereal.email/create
   "SMTP_CONFIG": {
      "host": "email-server",
      "port": 587,
      "username": "email-server-username",
      "password": "email-server-password"
   }
Usage
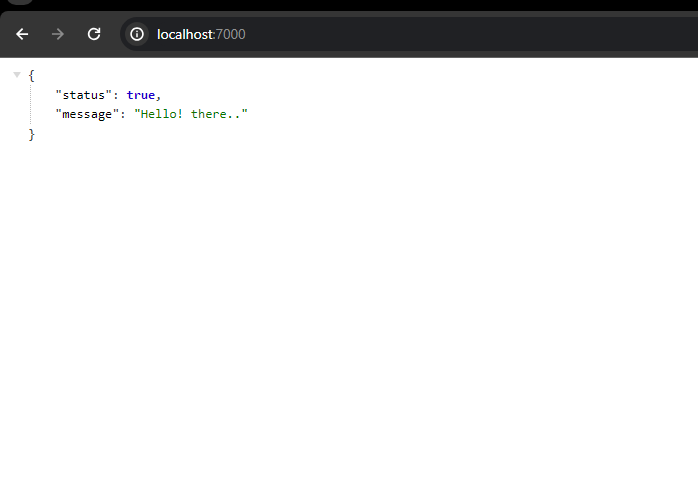
1. Start the server
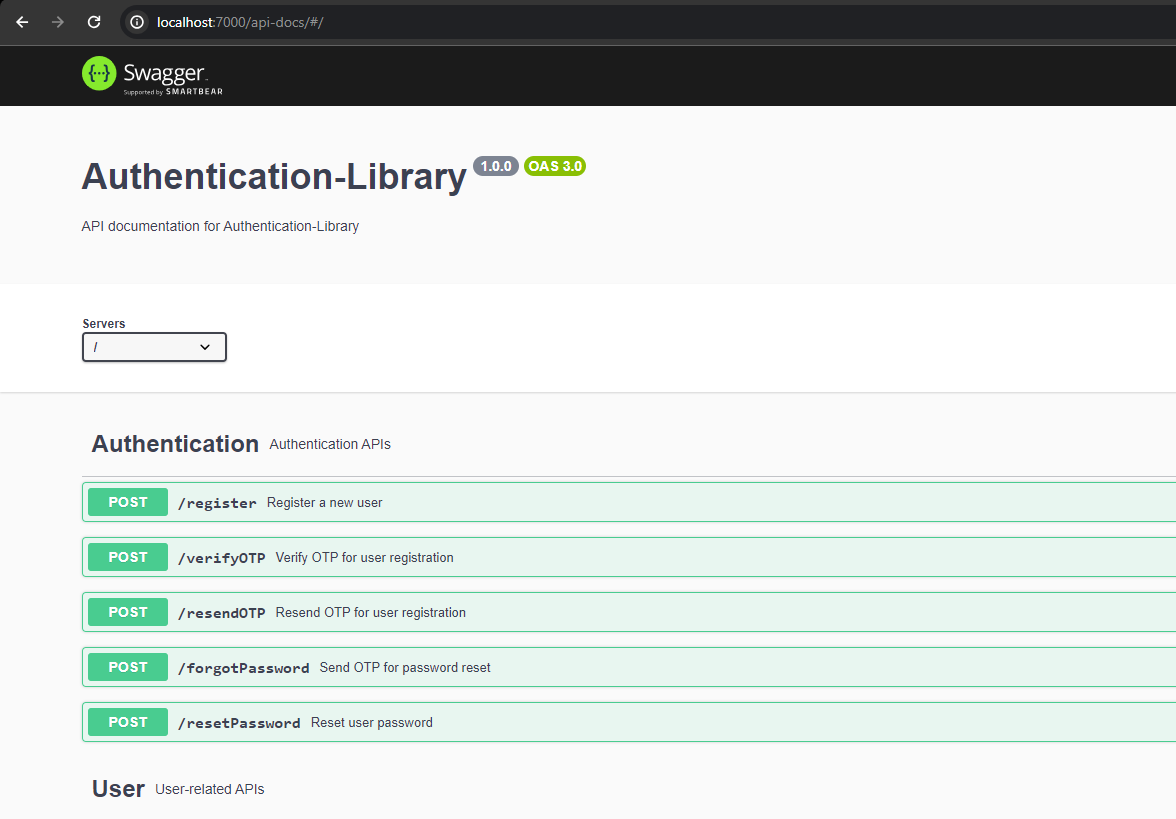
npm start2. Expected result
1. local server

2. Swagger APIs

Project Structure
.
├── src
│   ├── server.js
│   ├── bin
│   ├── config
│   ├── controllers
│   ├── docs
│   ├── email_templates
│   ├── helper
│   ├── locales
│   ├── middeleware
│   ├── models
│   ├── routers
│   ├── uploads
│   ├── validator
│   └── routes
├── test
├── package.json
└── README.md
API Documentation
To view the list of available APIs and their specifications, run the server and go to http://localhost:7000/api-docs in your browser. This documentation page is automatically generated using the swagger definitions written as comments in the route files.
API Endpoints
List of available routes:
Auth routes:\
POST /register - register\
POST /verify-otp - verifyOtp\
POST /resend-otp - resend Otp\
POST /forgot-password - send Otp mail\
POST /reset-password - reset user password
User routes:\
POST /login - login user\
GET /list - get all users\
POST /change-password - change password after login\
POST /check-validation - check value in Database is available or not\
DELETE /delete-user/{userId} - delete user\
POST /profile-upload/{userId} - upload avatar for user profile
HTML routes:\
POST /html-to-string - convert HTML to string\
Validation
Request data is validated using celebrate. Check the documentation for more details on how to write Celebrate-Joi validation schemas.
The validation schemas are defined in the src/validator directory and are used in the routes by providing them as parameters to the validate middleware.
const { Router } = require('express');
const userController = require('../controller/user.controller');
const userValidator = require('../validator/user.validator');

const router = Router();

router.post('/register', userValidator.registerUser(), userController.registerUser);
Authentication
To require authentication for certain routes, you can use the userAuth middleware.
const express = require('express');
const app = express();
const { userAuth } = require('./middleware/auth');

app.all('/v1/private/*', userAuth)
These routes require a valid JWT access token in the Authorization request header using the Bearer schema. If the request does not contain a valid access token, an Unauthorized (401) error is thrown.
Generating Access Tokens:
An access token can be generated by making a successful call to the register (POST /register) and login (POST /login) endpoints.
Custom Email Template
To add custom email Template for /register and /forgot-password APIs need to define in request body data. We can not send HTML data direct to request using JSON so need to convert it in to the string using /html-to-string API.
{
    "firstName": "John",
    "email": "john.doe@example.com",
    "password": "Password@123",
    "customOtpHtmlTemplate": "<html lang=\"en\"> <head> <meta charset=\"UTF-8\"> <meta name=\"viewport\" content=\"width=device-width, initial-scale=1.0\"> <title>OTP Email</title> <style> body { font-family: Arial, sans-serif; margin: 0; padding: 0; background-color: #f4f4f4; } .container { max-width: 600px; margin: 20px auto; background-color: #fff; padding: 20px; border-radius: 8px; box-shadow: 0 0 10px rgba(0, 0, 0, 0.1); } h2 { text-align: center; color: #333; } p { color: #555; } .otp-container { text-align: center; padding: 20px; background-color: #f9f9f9; border-radius: 4px; } .footer { margin-top: 20px; text-align: center; color: #888; } </style>\r</head> <body> <div class=\"container\"> <h2>OTP Email</h2> <p>Dear {{username}},</p> <p>Your One-Time Password (OTP) is:</p> <div class=\"otp-container\"> <h3 style=\"color: #4caf50; font-size: 36px;\">{{otpCode}}</h3> </div> <p>Please use this OTP to complete your action.</p> <div class=\"footer\"> <p>Thank you for using our service.</p> <p>Copyright © 2023 Your Company</p> </div> </div> </body> </html>"
}
Custom Validation message
To add custom validation message for any field add messages property into request data. For details of validations key check below Additional Details section.
{
    "messages": {
        "email": {
            "any.required": "email is required"
        }
    },
    "firstName": "Test",
    "emails": 211,
    "password": "String@123"
}
Additional Details
Types of validations (Use to add custom error message for validation in APIs)
| Type | Description |
|---|---|
| string.base | Specifies that the value must be a string. |
| number.base | Specifies that the value must be a number. |
| boolean.base | Specifies that the value must be a boolean. |
| object.base | Specifies that the value must be an object. |
| array.base | Specifies that the value must be an array. |
| date.base | Specifies that the value must be a date. |
| alternatives | Specifies multiple valid alternatives for the value. |
| any.required | Specifies that the property is required. |
| any.optional | Specifies that the property is optional. |
| any.forbidden | Specifies that the property is forbidden. |
| any.allow | Specifies the allowed values for the property. |
| any.valid | Specifies the valid values for the property. |
| any.invalid | Specifies the invalid values for the property. |
| any.default | Specifies the default value for the property. |
| string.email | Specifies that the string must be a valid email. |
| string.min | Specifies the minimum length of the string. |
| string.max | Specifies the maximum length of the string. |
| number.min | Specifies the minimum value for the number. |
| number.max | Specifies the maximum value for the number. |
| date.min | Specifies the minimum date for the date. |
| date.max | Specifies the maximum date for the date. |
| string.pattern | Specifies a regular expression pattern for the string. |
| any.when | Specifies conditional validation based on another property. |
| any.error | Specifies custom error messages for the property. |
| any.label | Specifies a custom label for the property in error messages. |
| any.messages | Specifies custom validation error messages. |