node-red-contrib-endiio v1.0.4
node-red-contrib-endiio
This extension provides nodes to interact with endiio protocol devices using UART.
The endiio-connection node can receive data packets from an endiio dongle or gateway over USB / UART and deserialize the received sensor data to enable further processing. This node also accepts incoming messages which are then forwarded to the endiio dongle / gateway as a command packet. The endiio-command node can be used to create commands to send via the endiio-connection node. Additionally sensor data messages can be filtered and unpacked via the endiio-filter node to extract the relevant data.
Installation
Install node red by following the setup instructions at Installing Node.js via package manager.
Run the following command in the Node-RED user directory (~/.node-red) to install the node-red-contrib-endiio package:
npm install node-red-contrib-endiioCommunication
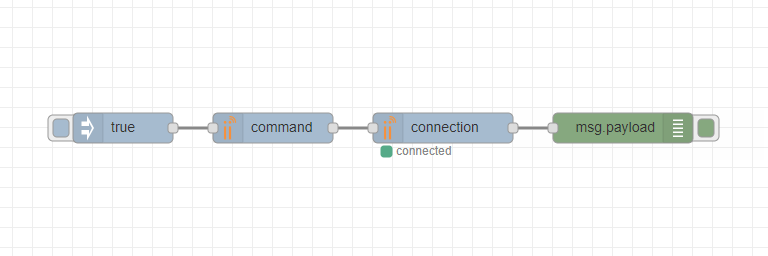
After the installation of the node-red-contrib-endiio package the node-red server is ready for use. Add the endiio-connection node to the current flow to communicate with an endiio dongle / gateway. Commands can be issued by attaching one or more endiio-command nodes to the left side of the node. The output of the dongle is available by attaching nodes to the right side of the endiio-connection node.

Adding sensor units
To add sensor units to the network the dongle needs to be set into pairing mode.
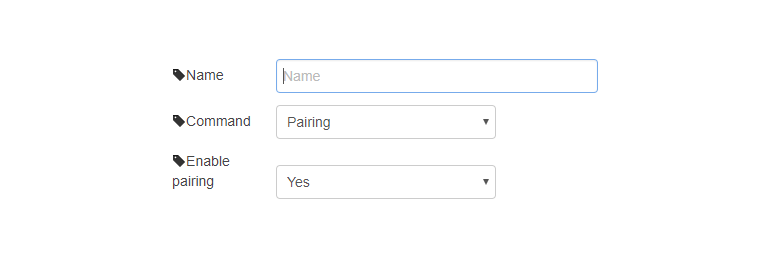
For this add a trigger node and an endiio-command node to the current flow.
The boolean value true or any other value is sufficient as output of the trigger node since it is only used as a trigger for the pairing command.
To monitor the status of the pairing process a debug node should be appended to the right side of the endiio-connection node.
The debug output can be seen by switching to the debug tab (small bug icon) on the right side of the user interface.


When clicking on the trigger button the command is confirmed by an EN-SPAIRING=OK message seen below.
{
  "type": "raw",
  "value": "EN-SPAIRING=OK"
}
Now set the desired sensor unit into pairing mode to add it to the network. Please consult the user manual for setup instructions. The newly registered sensor unit should now be listed in the debug output with an assigned sensor unit id. When attaching additional sensor units to the endiio sensor network both devices (the new sensor unit and the dongle / gateway) have to be set into pairing mode.
{
  "type": "paired",
  "source": 4118160908
}
Depending on the number of attached sensors the output will be splitted into multiple sensor data messages. Each message contains the source id of the sensor unit and the name of the attached sensor. The values and units objects contained in the payload structure hold the measured sensor data and can be processed by additional nodes.
{
  "type": "sensor-data",
  "source": 4118160908,
  "id": 252,
  "name": "Battery",
  "timestamp": 1526309649634,
  "values": {
    "voltage": 3.5747478008270264
  },
  "units": {
    "voltage": "V"
  }
}
Bug reports and contact
E-Mail: info@endiio.com