react-dos-terminal v0.2.4
react-dos-terminal
A collection of React Components to mock a DOS command line interface.
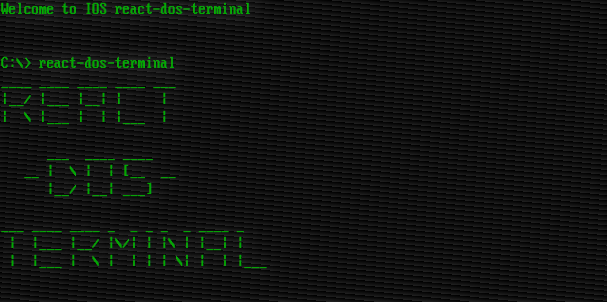
It was created using React and Typescript. It also uses styled-components and Lodash...
Table of contents
Installation
In a React project, run the following command:
npm install react-dos-terminalThis component has peer dependencies of lodash and styled-components. If you get some error, please check if your project have those installed.
Usage
To start using it you must import the Terminal component:
import React from 'react'
import { Terminal } from 'react-dos-terminal'

const App = () => {
    return (
        <div style={{ width: '600px', height: '400px' }}>
            <Terminal id="myCustomTerminal" />
        </div>
    )
}

export default App
Then,
npm run startIt will fake some installation and in a few seconds you should see something like this:
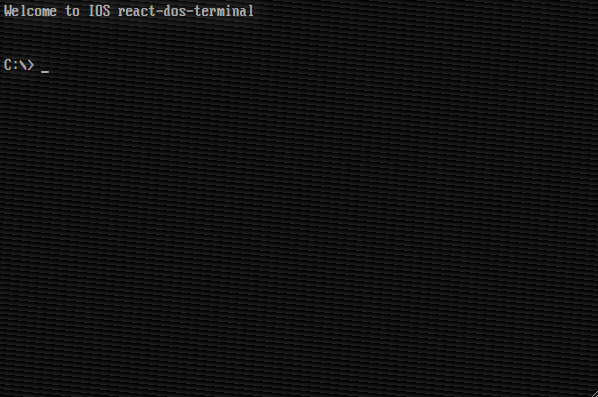
And that's all you need to have a running terminal!!
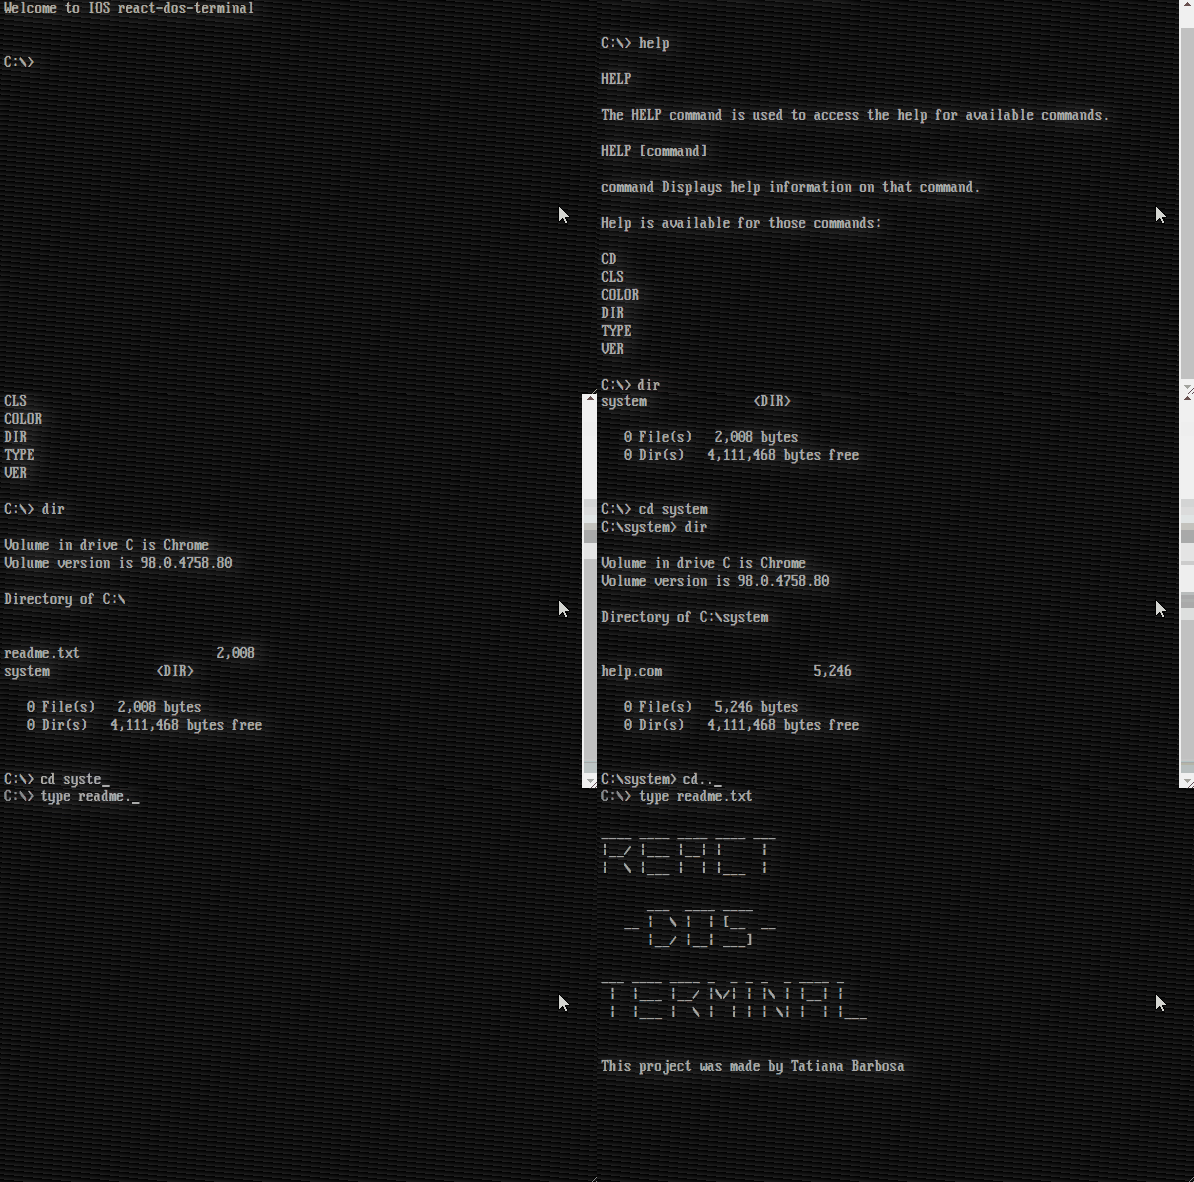
Configuration
Terminal component accepts two props, a required id string and an optional config object. In this config object you can define custom commands, files and directories and some other attributes. All attributes are optional:
{
    terminal: {
        colors: {
            background: AllowedColors,
            color: AllowedColors,
        },
        autoFocus: boolean,
        showOldScreenEffect: boolean,
        initialOutput: string | string[],
        defaultPrompt: string,
        promptCallback: ((prompt: string) => string) | undefined,
        shouldTypewrite: boolean,
    },
    commands: {
        customCommands: FakeCommand[],
        excludeInternalCommands: string[] | 'all' | 'dev',
        shouldAllowHelp: boolean,
        messages: {
            toBeImplemented: string,
            notFound: string,
            cantBeExecuted: string,
            helpNotAvailable: string,
            isAlreadyRunning: string,
        },
    },
    fileSystem: {
        useFakeFileSystem: boolean,
        customFiles: FakeFile[],
        excludeInternalFiles: boolean,
        initialDir: string,
        systemPaths: string[],
    },
    loadingScreen: {
        showLoadingScreen: 'first-time' | 'always' | 'never',
        messageOrElement: string | string[] | JSX.Element,
        loadingTime: number, // in miliseconds
    },
    shouldPersisteUserData: boolean,
}
Terminal component makes use of the prop id to identify persisted data in localStorage, so it is important to choose a constant id that can be used to distinguish between different instances of the component.
| Property | Attribute | Description | Default |
|---|---|---|---|
| terminal | colors | Set default colors | {background:'#000000',color: '#aaaaaa' `}` |
| terminal | autoFocus | Enable / disable auto focus | true |
| terminal | showOldScreenEffect | Enable / disable background noise | true |
| terminal | initialOutput | Set text that shows before prompt when terminal is loaded. An empty array []means that prompt will be displayed in the first line of the terminal. An empty string '' means that prompt will be displayed after an empty line. | ['Welcome to IOS react-dos-terminal', '', ''] |
| terminal | defaultPrompt | Set prompt text (see prompt command) | '\$p\$g' |
| terminal | promptCallback | Run a callback function before output prompt(see prompt command) | undefined |
| terminal | shouldTypewrite | Enable / disable typewriting effect when printing to output | true |
| commands | customCommands | Set custom commands to terminal | [] |
| commands | excludeInternalCommands | Array of commands names to exclude or 'all', to exclude all commands (except non fileSystem related), or 'dev' to exclude dev commands (see commands) | process.env.NODE_ENV === 'development' ? [] : 'dev' |
| commands | shouldAllowHelp | Enable / disable 'help' command and '/?' help shortcut | true |
| commands | messages | Set text that is printed by the helper commands (see more). '%n' or '%N' will be replaced by the command name in lowercase or uppercase, respectively | {toBeImplemented: 'Error: "%n" command hasn't been implemented.',notFound: 'Error: "%n" is not a valid command.',cantBeExecuted: 'Error: "%n" can't be executed.',helpNotAvailable: 'Error: there isn't any help available for command "%n".',isAlreadyRunning: 'Error: "%n" is already running.'} |
| fileSystem | useFakeFileSystem | Enable / disable fileSystem files and also related commands | true |
| fileSystem | customFiles | Set custom files and directories to terminal | [] |
| fileSystem | excludeInternalFiles | Enable / disable terminal default files (see more) | false |
| fileSystem | initialDir | Set initial path when terminal loads | '' (empty string means root dir) |
| fileSystem | systemPaths | Set paths to look for executable files. Empty string '' means root dir. ‼ Be Careful if you are using internal files the help command is an executable file, so if you change this option be sure you add system to the list. | ['', 'system'] |
| loadingScreen | showLoadingScreen | Enable / disable a loading screen before starting terminal. It has 3 options: always, never, first-time (this last option means that when user loads terminal for the first time it will show the loading screen, and the information about that will be saved in localStorage, the next time user loads it terminal knows that and won´t show loading screen) | 'first-time' |
| loadingScreen | messageOrElement | Set message to show on loading screen. If you pass a string or a string[] it will be displayed flashing and with a typewriter effect. If you pass a JSX.Element it will be rendered (see more). | [ 'Installing IOS react-dos-terminal','','Please wait...','' ], |
| loadingScreen | loadingTime | Set for how long, in miliseconds, the loading screen should be displayed | 5000 |
| shouldPersisteUserData | Enable / disable persistency of user data (currentDir) and configuration (colors and prompt) | true |
Basics of Custom Commands
Each custom command is a FakeCommand object with the following properties:
interface FakeCommand {
    name: string
    alias?: string[]
    action?: (props: CommandProps) => Command | Promise<Command>
    async?: {
        waitingMessage?: string[]
    }
    help?: (() => string | string[]) | string | string[]
    beforeFinishMiddleware?: (
        props: CommandProps,
        command: Command | Promise<Command>
    ) => Command | Promise<Command>
}
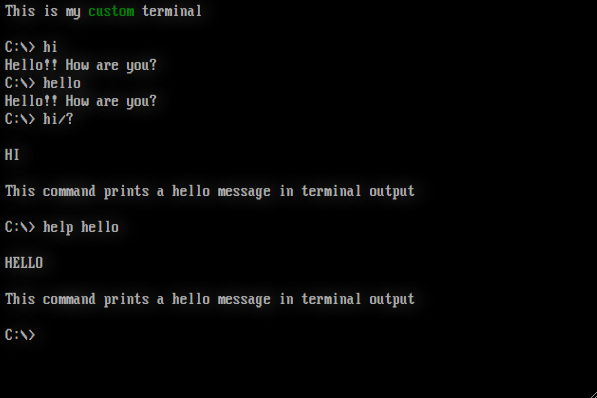
Take this FakeCommand as an example, action is a method that returns a Command object. In this case we are just telling terminal that we want to add to output some text...
{
    name: 'hi',
    alias: ['hello'],
    action: () => {
        return {
            output: [
                { action: 'add', value: 'Hello!! How are you?' }
            ],
        }
    },
    help: 'This command prints a hello message in terminal output'
}
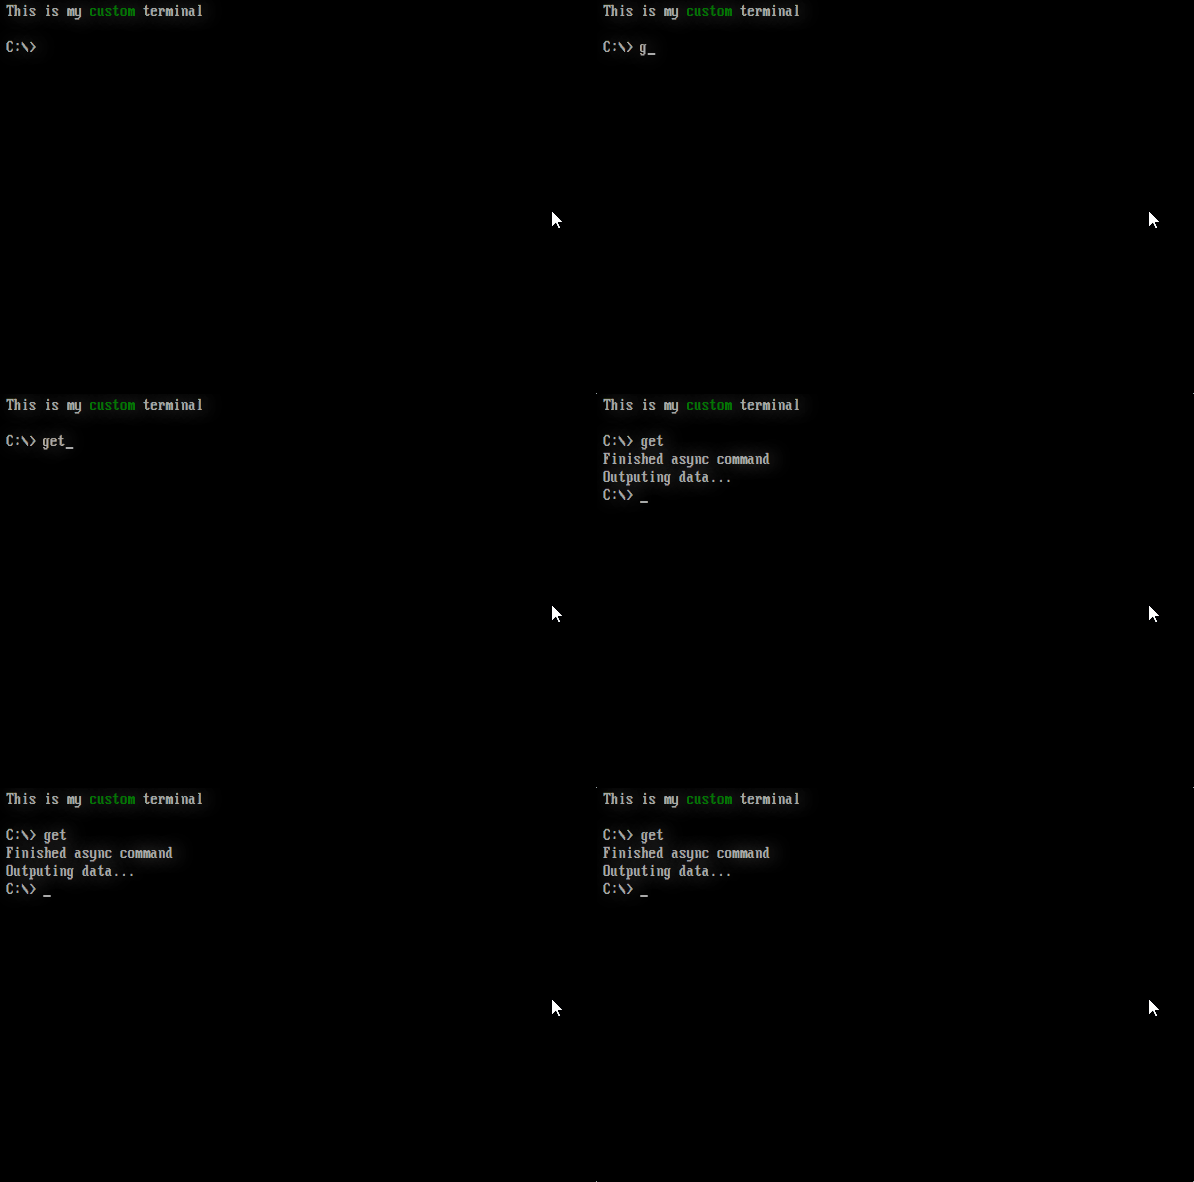
In case you have to do some async operation, you should use the async attribute to indicate to terminal that it has to wait for the command to complete.
{
    name: 'get',
    action: async (): Promise<Command> => {
        // ...
        const response = await someAsync()
        // ...
        return {
            output: [
                { action: 'remove', value: 1 }, // removes 1 line from output array
                // if you want you can completely clear the output with { action: 'clear' },
                { action: 'add', value: ['Finished async command', 'Outputing data...'] },
            ],
        }
    },
    async: { waitingMessage: ['Getting something that takes some time...'] } // you can just pass async: {} and no waitingMessage will be output
}
Basics of Custom Files
Each custom file is a FakeFile object with the following properties:
interface FakeFile {
    name: string
    type: FakeFileType
    content: FakeFile[] | FakeFileCommand
    attributes: FakeAttribute
    size?: number
}

interface FakeFileCommand {
    text?: string | string[]
    action?: (props: CommandProps) => Command | Promise<Command>
    async?: {
        waitingMessage?: string[]
    }
    help?: (() => string | string[]) | string | string[]
}

type FakeAttribute = 'r' | 'rh' | 'w' | 'wh' | 'p' | 'ph'
type FakeFileType =
    | 'text/plain'
    | 'directory'
    | 'application/executable'
    | 'application/system'
    | 'application/bat'
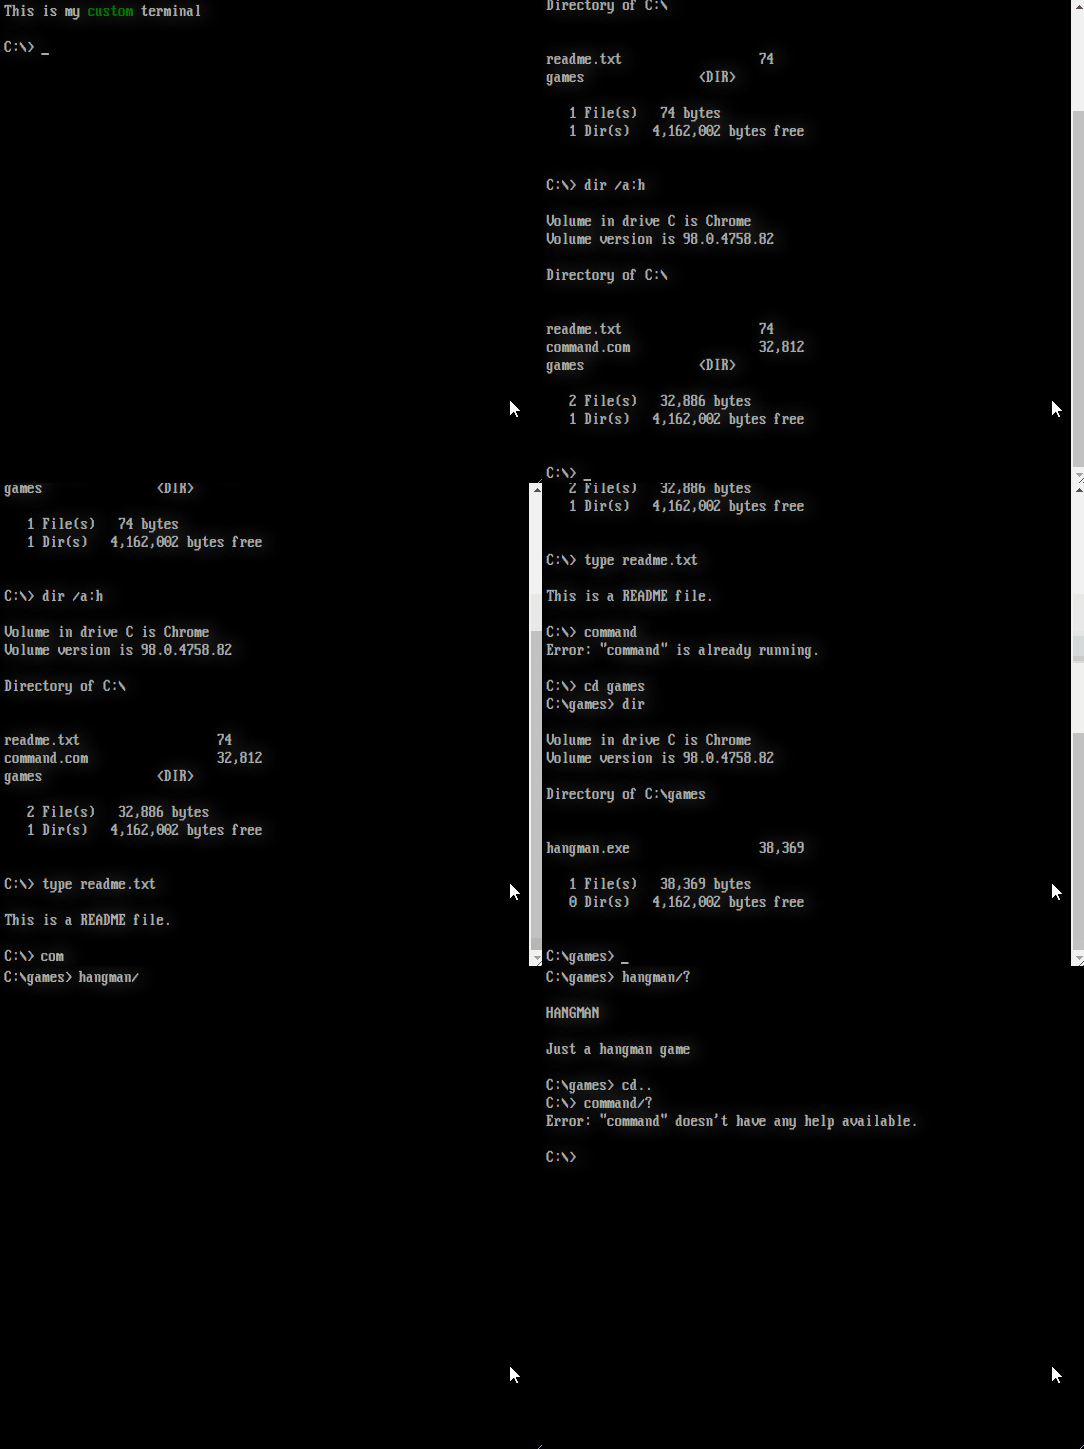
Take this FakeFile[] as an example:
[
    {
        name: 'readme.txt',
        type: 'text/plain', // type 'text' can be printed to output with command "type <filename>"
        content: {text: 'This is a README file.'},
        attributes: 'p', // attribute 'p' means that the file is protected, it can't be modified by user
        // if you don't provide a size, terminal will calculate it based on content
    },
    {
        name: 'command.com',
        type: 'application/system', // type 'application/system' can be executed, it's content must be a FakeCommand
        attributes: 'ph', // attribute 'h' means that file is hidden and won't be visible by default with command 'dir', but will be visible with 'dir /a:h'
        size: 32302,
        content: commandsHelper.isAlreadyRunning, // 'isAlreadyRunning' is a FakeCommand that you can use for some default responses
    }
    {
        name: 'games',
        type: 'directory', // type 'directory' must have as content a FakeFile[], also directory size will be calculated as a sum of it's contents
        attributes: 'p',
        content: [
            {
                name: 'hangman.exe',
                type: 'application/executable', // type 'application/executable' simulates a program, it's content must be a FakeCommand
                content: {
                    action: hangman, // here hangman is a method that returns a Command
                    help: ['Just a hangman game']
                },
                attributes: 'p',
                size: 38000 // in "bytes"
            },
        ],
    },
]
!! FileSystem is not fully implemented yet, it means users can´t create, update or delete 'files', unless you implement those commands by yourself.
Loading Screen
Example 1
The following code will display this loading screen:
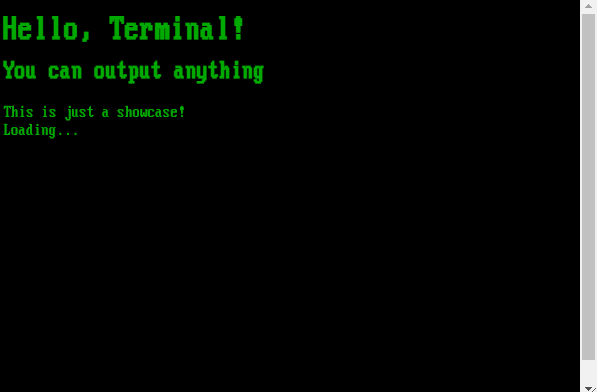
const LoadingScreenExample1 = () => {
    return (
        <div style={{margin: '8px'}}>
            <h1>Hello, Terminal!</h1>
            <h2>You can output anything</h2>
            <div> This is just a showcase! </div>
            <div> Loading...</div>
        </div>
    )
}

// your code here
...

// and in config object
loadingScreen: {
    showLoadingScreen: 'always',
    messageOrElement: <LoadingScreenExample1 />,
    loadingTime: 5000,
},
Example 2
You can also make use of some components and hooks from react-dos-terminal. In this example we made use of useOutputHandler, to make easier to manage typewriting, and also of <CommandScreen>, <Output>, <Output.Print> and <Output.Typewriter>:
const LoadingScreenExample2 = () => {
    const outputHandler = useOutputHandler({
        initialOutput: '<h1>Hello, Terminal!</h1>',
        shouldTypewrite: true
    })

    useEffect(() => {
        outputHandler.typewriter.changeTypeInterval(120)
        outputHandler.addToQueue([
            {action: 'add', value:'<h2>You can output anything</h2>'},
            {action: 'add', value:'This is just a showcase!'},
            {action: 'remove', value: 2}
        ])
    }, [])

    return (
        <CommandScreen fullscreen={true} colors={{
                    background: '#0000aa',
                    color: '#ffffff',
                }}>
            <Output>
                <Output.Typewriter output={outputHandler} />
                {!outputHandler.typewriter.isTypewriting &&
                    <Output.Print output={'Loading...'} flashing={true}/>
                }
            </Output>
        </CommandScreen>
    )
}

// your code here
...

// and in config object
loadingScreen: {
    showLoadingScreen: 'always',
    messageOrElement: <LoadingScreenExample2 />,
    loadingTime: 10000,
},
And that is the result:
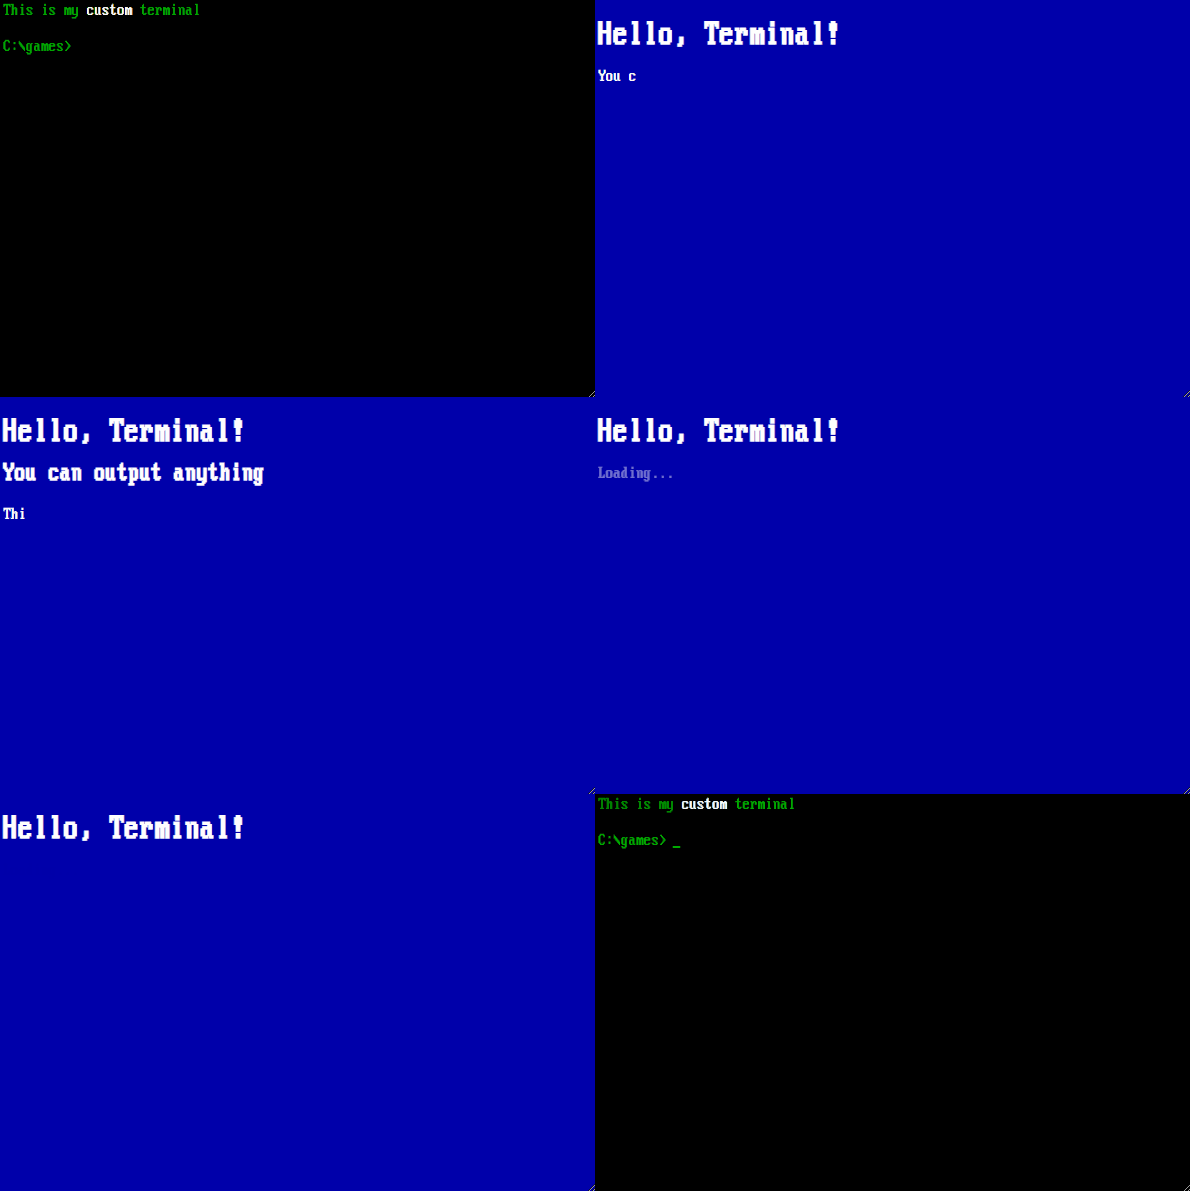
!! Please notice that typewrite effect completelly ignores HTML while typing. Maybe I can change that someday...
Components
<Terminal />This is the main component.
props:
- config (see Configuration)
<CommandScreen>Creates an environment to run dynamic commands or loading screen.
props:
- colors?: TerminalColors
- oldEffect?: boolean
- fullscreen?: boolean
- ...div props
<Output>Is a wrapper to all others Output Components.
props:
- colors?: TerminalColors
- ...div props
<Output.Print />This is a component for outputting without typewriter effect.
props:
- output: string | string[]
- flashing?: boolean
- colors?: TerminalColors
- ...div props
<Output.Typewriter />This is a component for outputting with typewriter effect.
props:
- output: UseOutputHandler (see useOutputHandler)
- flashing?: boolean
- colors?: TerminalColors
- ...div props
<Input />This component creates an input prompt to interact with users in dynamic commands.
props:
- onClick?: (e: React.MouseEvent) => void
- onInput?: (e: React.FormEvent) => void
- onKeyUp?: (e: React.KeyboardEvent) => void
- onKeyDown?: (e: React.KeyboardEvent) => void
- onKeyPress?: (e: React.KeyboardEvent) => void
- id: string
- ref: (see useInput)
- prompt?: string
- colors?: TerminalColors
- caretColors?: TerminalColors
- ...div props
Hooks
🚧 this section is under construction 🚧
When running dynamic commands (see Commands) you might want to use some of the provided hooks:
useTerminal()Attributes/Methods Description output: UseOutputHandlersee useOutputHandler isRunningCommand: booleanreturn if a command is running endRunningCommand: () => voidset isRunningCommand to false setColors: (value: TerminalColors) => voidset terminal colors setPrompt: (value: string) => voidset terminal prompt setFiles: (files: FakeFileSystem) => voidset files setCurrentDir: (files: FakeFileSystem) => voidset current Path useOutputHandler()useInput()useCommandsHistory()useStateMachine()
Helper Methods
🚧 this section is under construction 🚧
colorsHelpercommandsHelperfileSystemHelper
Commands
🚧 this section is under construction 🚧
Interfaces
CommandProps
When a command action is executed it receives aCommandPropsobject from terminal:
interface CommandProps {
    name: string // command name
    args: string // command arguments
    colors: TerminalColors // terminal current colors
    currentDir: string // current Path
    files: FakeFile[] // all files registered in terminal
    totalSize: number // all files total fake size
    systemPaths: string[] // all system paths registered in terminal
    allCommands: FakeCommand[] // all commands registered in terminal
    messages: CommandsMessages // all default messages registered in terminal
}
Command
When a command action is executed it must return a
Commandor aPromise<Command>.This means that a command can output something, or it can change some terminal state or it can call another component that does something (for example, interacts with user).
I am still working in an interface to allow fileSystem CRUD functionality, so it's not available yet.
interface Command {
    output?: CommandToOutput[]
    configTerminal?: CommandToConfigTerminal
    dynamic?: {
        element: JSX.Element
        options?: {
            shouldHideTerminalOutput?: boolean
        }
    }
}
Where, CommandToOutput must be one of the following:
type CommandToOutput =
    | { action: 'clear' }
    | { action: 'add'; value: string | string[] }
    | { action: 'remove'; value: number }
And, CommandToConfigTerminal must be one of the following:
type CommandToConfigTerminal =
    | { config: 'setColors'; value: TerminalColors }
    | { config: 'setCurrentDir'; value: string }
    | { config: 'setPrompt'; value: string }
Internal Commands
clscolorhelppromptverreact-dos-terminal😎
Development Commands
test-statictest-asynctest-dynamic
FileSystem
🚧 this section is under construction 🚧
Internal Files
\
|---command.com
|---io.sys
|-- msdos.sys
|-- system\
        |-- readme.txt
        |-- doskey.exe
        |-- help.com
FileSystem related commands
cddirtype
Special Thanks
Thanks to "VileR" from THE OLDSCHOOL PC FONT RESOURCE, for adapting and providing various oldschool fonts. WebPlus_IBM_VGA_9x16.woff was the chosen font for this project.