react-native-paper-phone-number-input v1.3.1
React Native Paper Phone Number Input
🔥 A material design Phone number input component for React Native Paper that has a country code picker with emoji flags for speed and low footprint. Performant and beautiful!
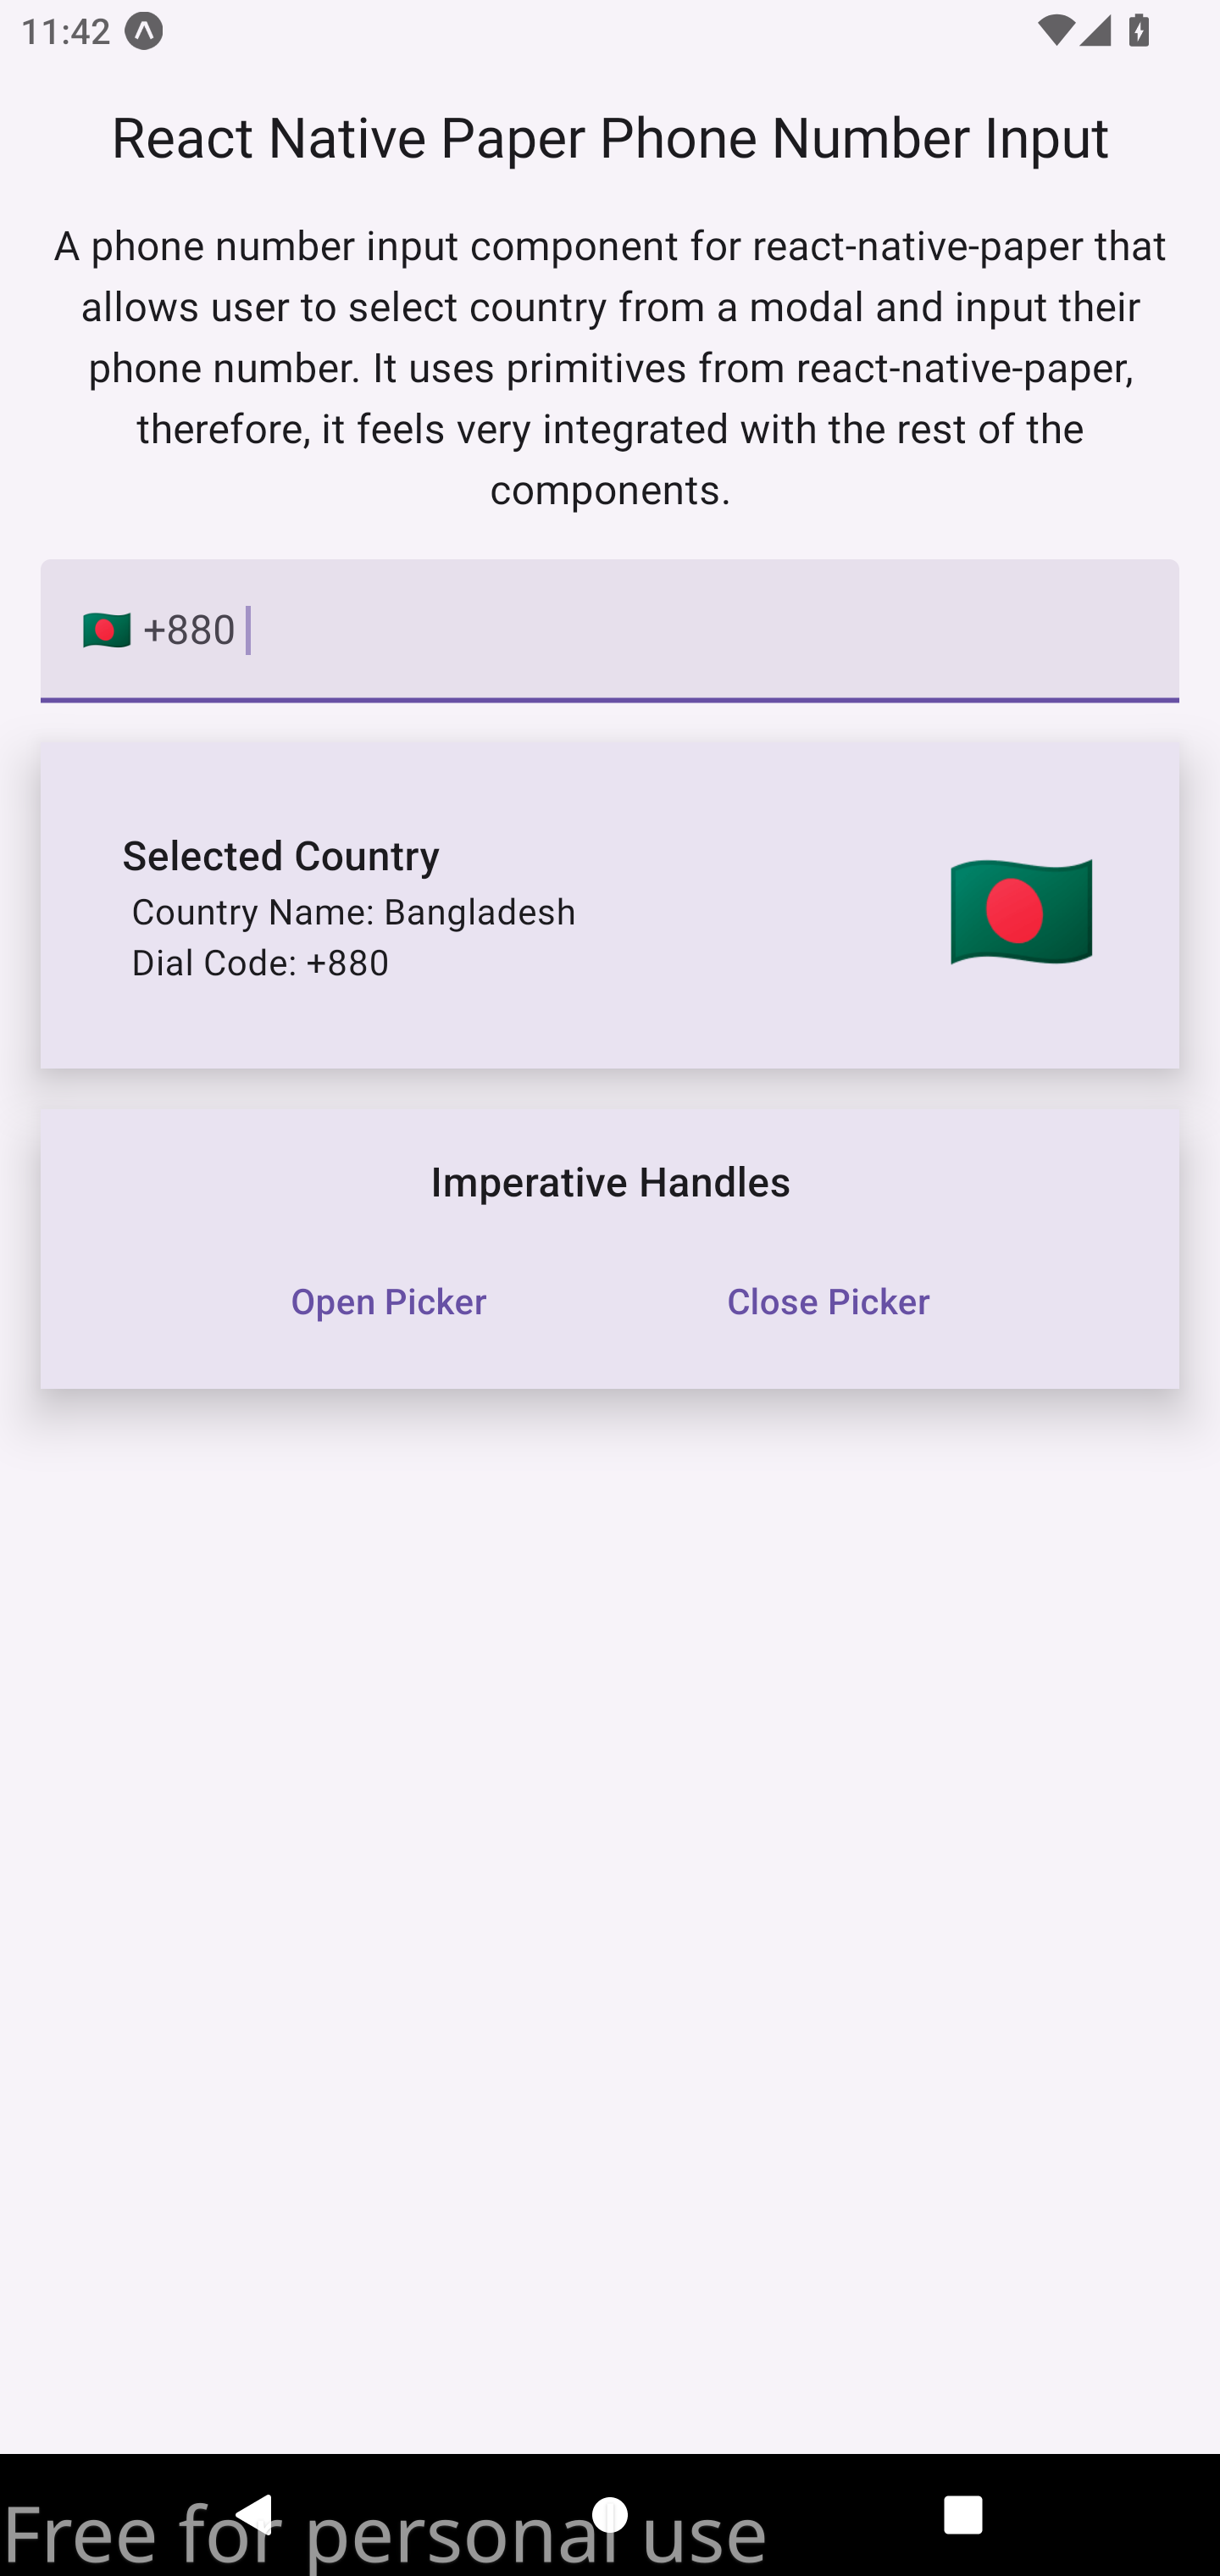
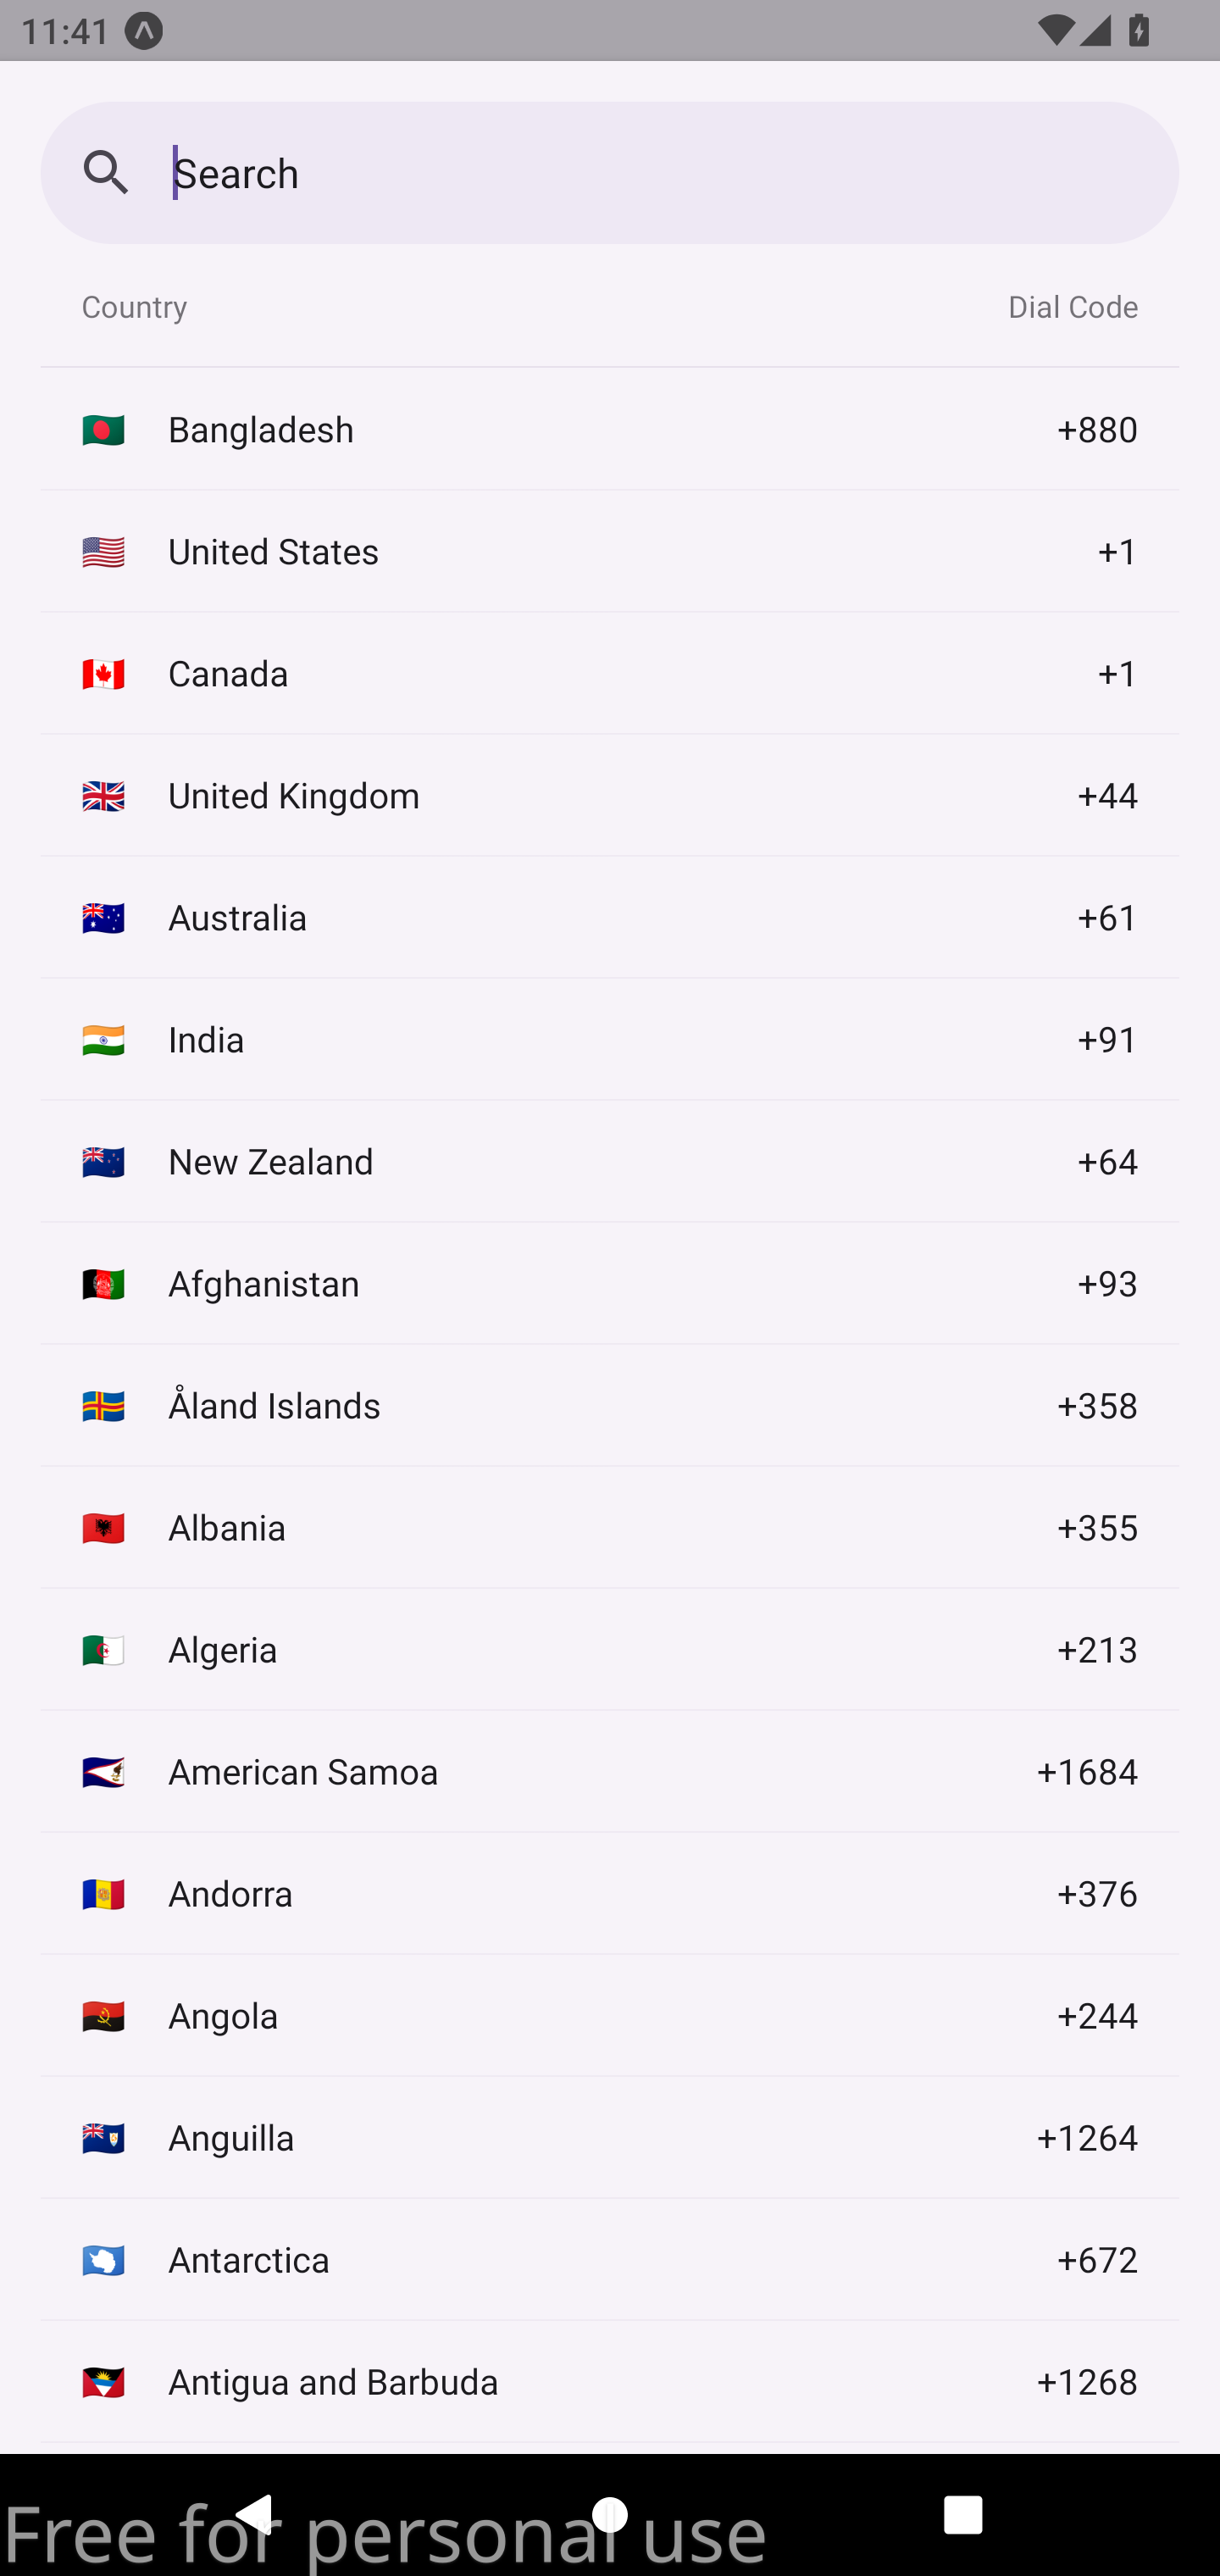
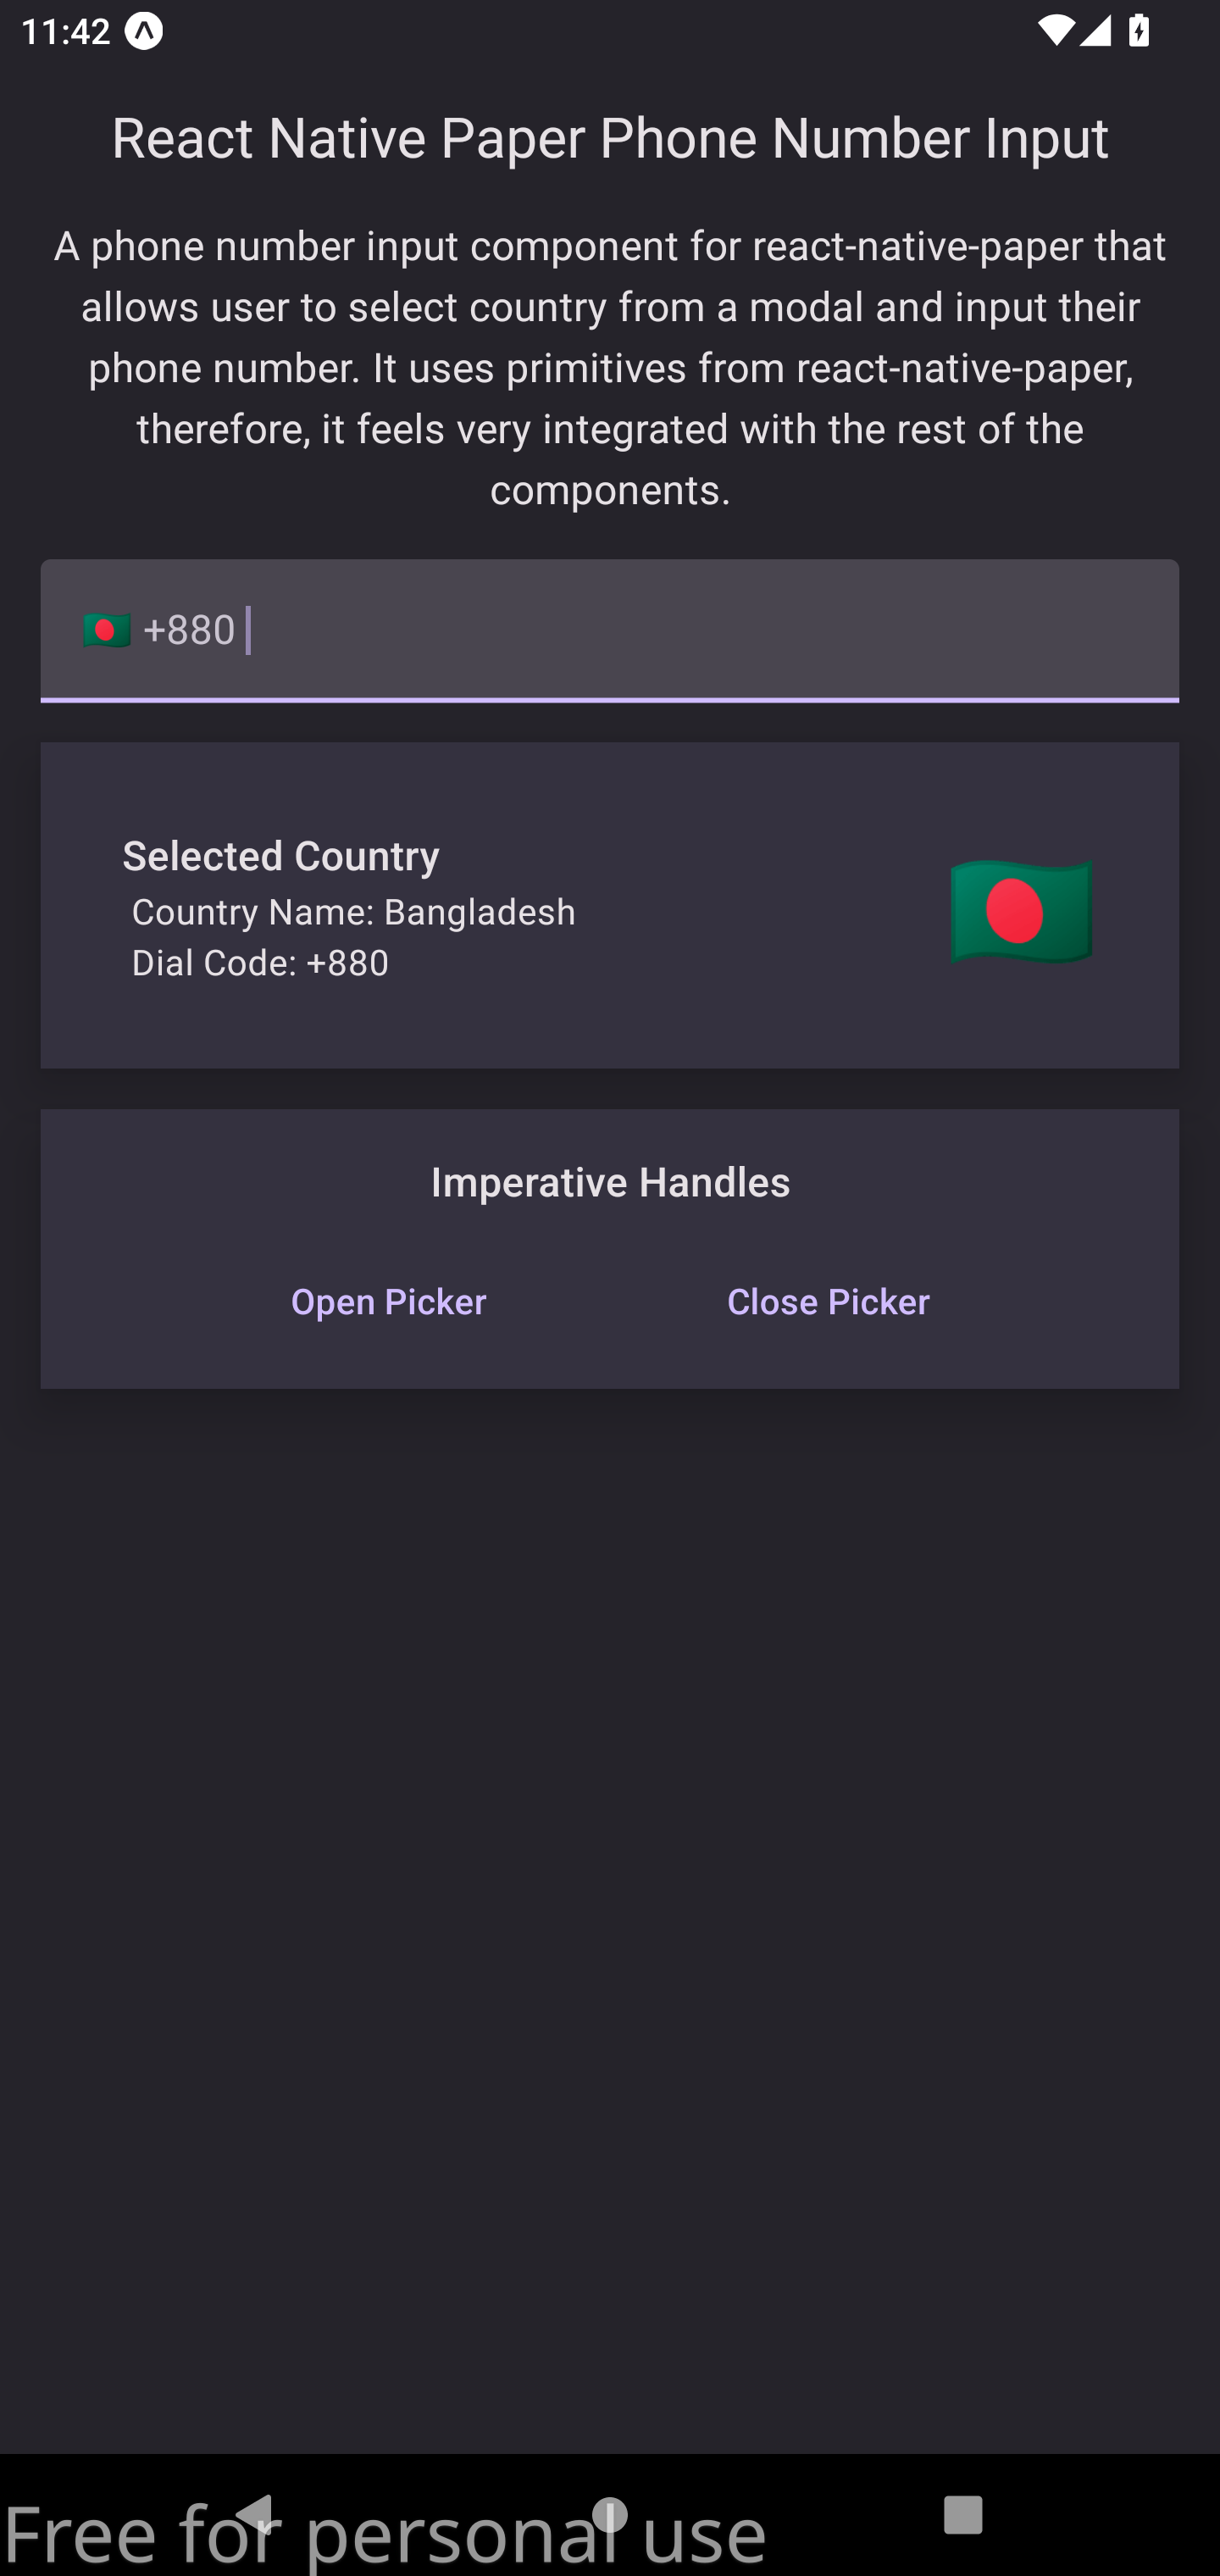
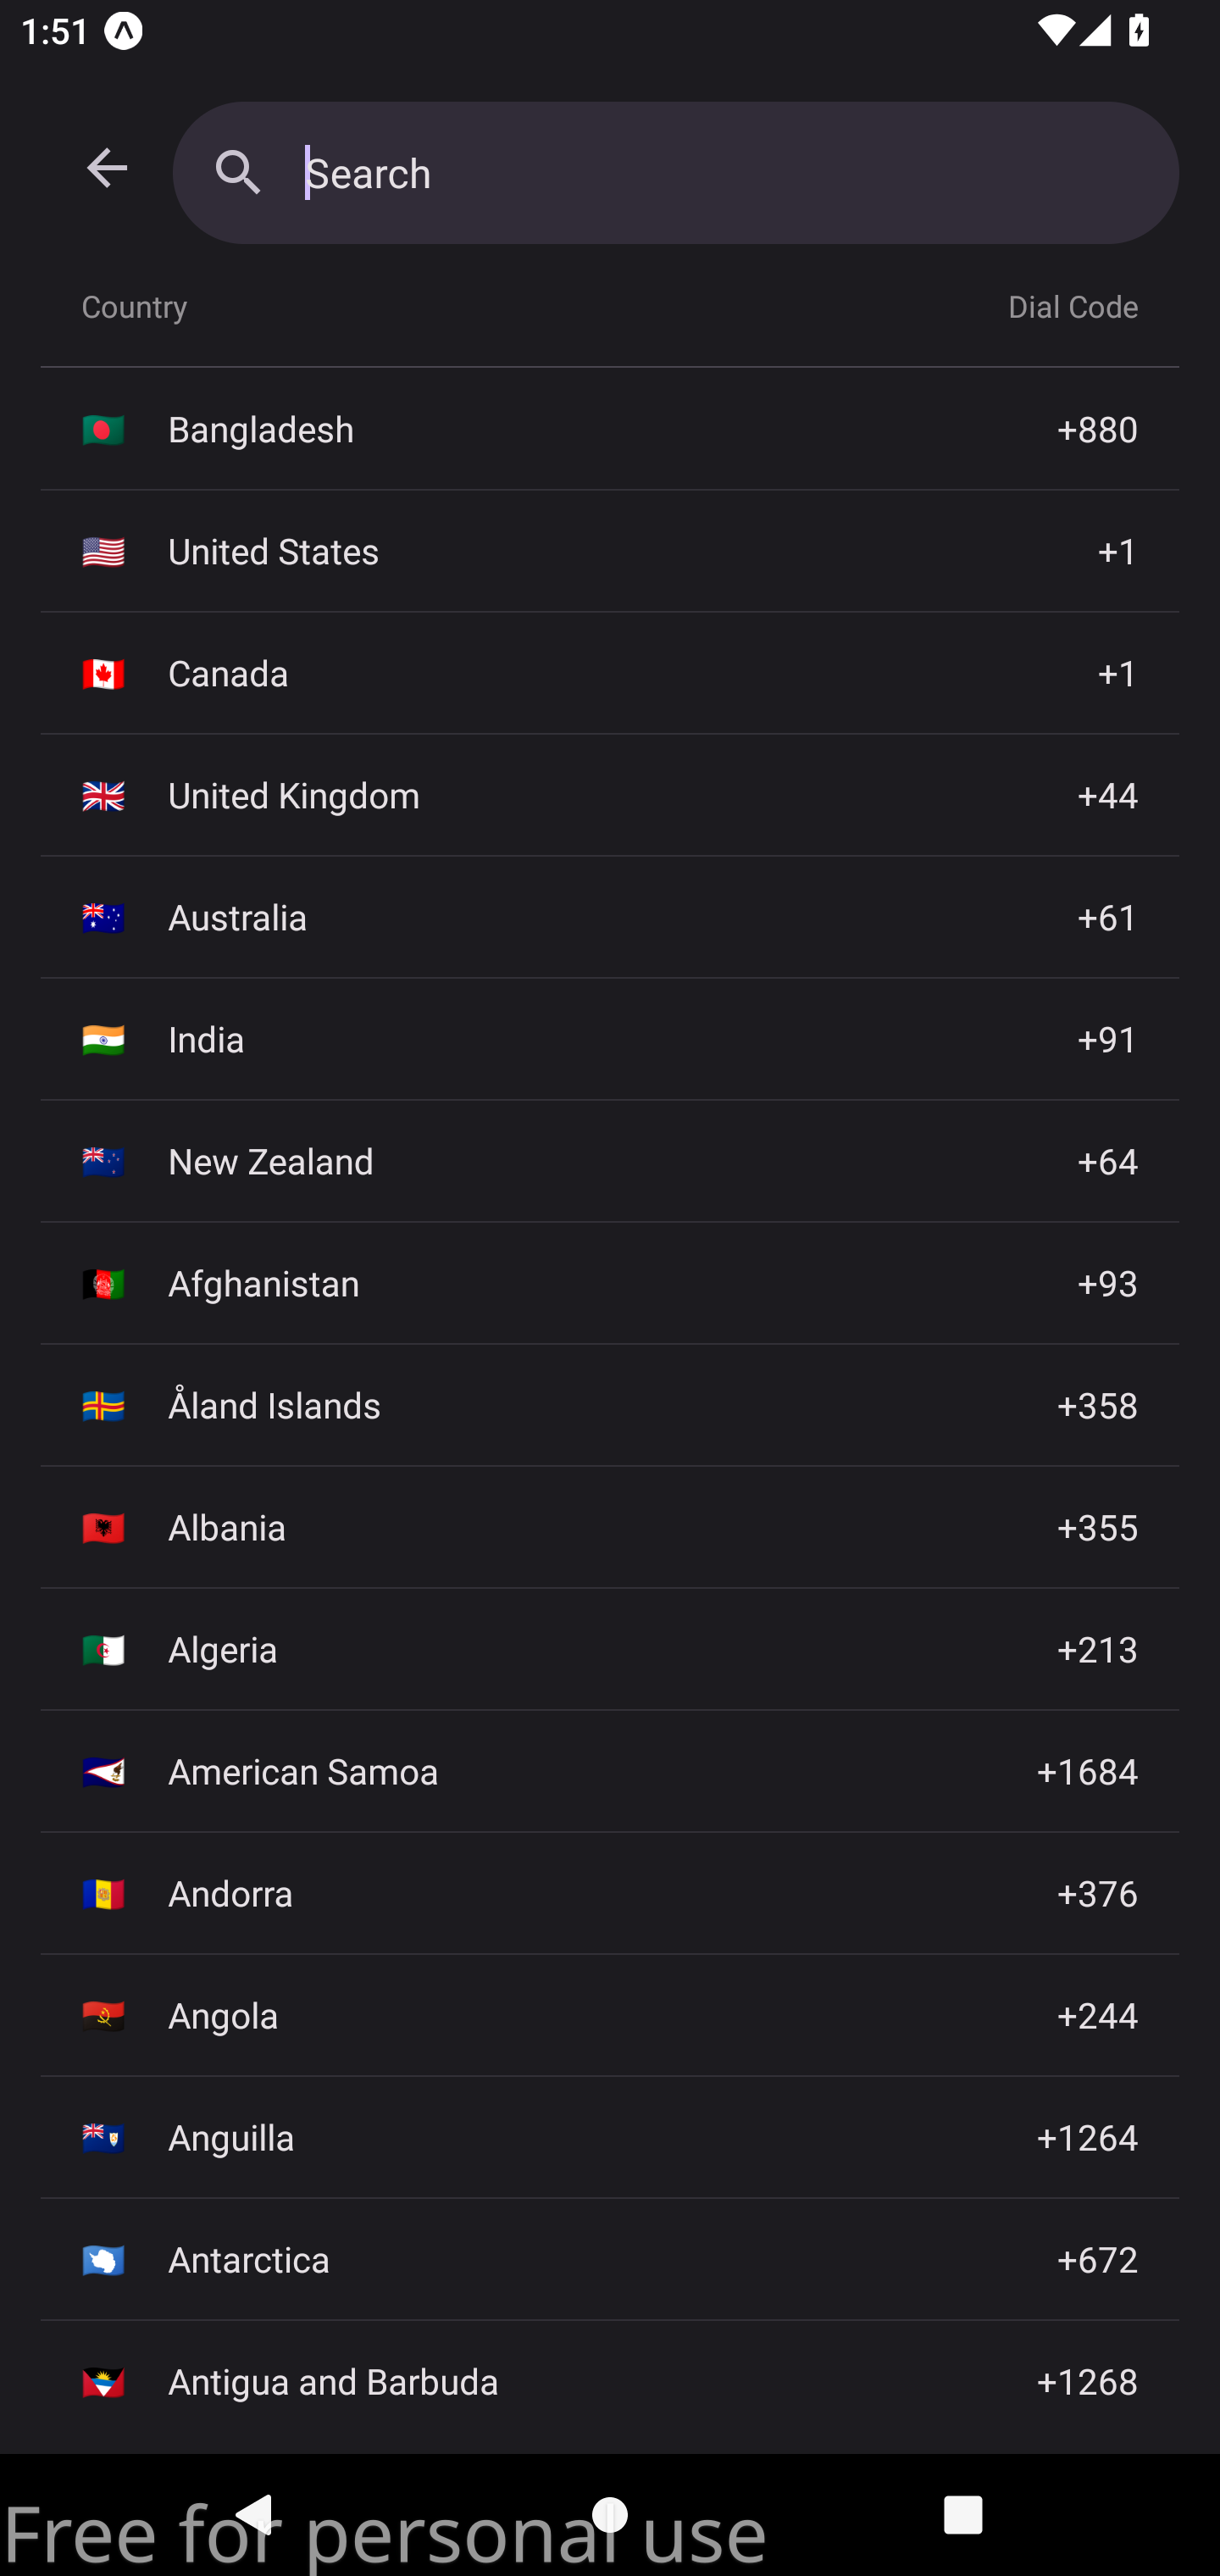
Screenshots
| Theme | Number Input | Country Picker |
|---|---|---|
| Light |  |  |
| Dark |  |  |
Features
- Country code picker with emoji flags.
- Allows searching for country.
- Looks and feels consistent with React Native Paper.
- Allows specifying default country.
- Allows specifying a list of countries to show on top of the list.
- Allows user to specify which countries to show or hide in the list.
- Exposes imperative methods to open and close the country code picker.
- Supports light and dark themes.
- Works well on Android, iOS and Web.
Installation
Install with your favorite package manager.
Using Yarn:
yarn add react-native-paper-phone-number-inputUsing NPM:
npm i react-native-paper-phone-number-inputAdd support for Web
This package should work out of the box on most desktop and mobile browsers on Web. However, Microsoft Windows does not ship with Flags Emoji by default. While the flags will display correctly on Firefox and its derivatives, Chromium based browsers like Chrome and Edge will not display the flags correctly and will show the two-letter country code instead.
To fix this, you should install country-flag-emoji-polyfill and import it in your project. This polyfill will add support for Flag Emojis on Windows. The setup process is described in the readme of the library. Briefly:
For expo users, you can add the polyfill by adding the following to your web/index.html file:
<script type="module" defer>
  import { polyfillCountryFlagEmojis } from 'https://cdn.skypack.dev/country-flag-emoji-polyfill';
  polyfillCountryFlagEmojis();
</script>
For other setups, you can either add the above snippet in your index.html file or import the polyfill in your web entrypoint.
yarn add country-flag-emoji-polyfill// App.web.tsx
import { polyfillCountryFlagEmojis } from 'country-flag-emoji-polyfill';
polyfillCountryFlagEmojis();See the example directory for a complete example. For further information including using local fonts instead of loading it from the CDN, please refer to the API Documentation of the library.
Note that this package uses the default font family Twemoji Country Flags for the relevant components. If you want to use a different font, in addition to using the proper parameters in polyfillCountryFlagEmojis call, you need to pass the relevant font families in the theme prop of the PhoneNumberInput or CountryPicker components.
<PhoneNumberInput
  code={countryCode}
  setCode={setCountryCode}
  phoneNumber={phoneNumber}
  setPhoneNumber={setPhoneNumber}
  theme={{
    fonts: {
      // For MD3Theme.
      bodyLarge: {
        fontFamily: '"YourFontFamily", ...',
      },
      default: {
        fontFamily: '"YourFontFamily", ...',
      },
      // For MD2Theme.
      regular: {
        fontFamily: '"YourFontFamily", ...',
      },
    },
  }}
/>
This package also exports defaultFlagsFont which is the default font family used for the flags. You can use this to display flag emojis correctly in other components in your application on Windows.
import { Text } from 'react-native';
import { defaultFlagsFont } from 'react-native-paper-phone-number-input';

// Use defaultFlagsFont in your components.
<Text
  style={{
    fontFamily: defaultFlagsFont,
  }}
>
  {selectedCountry.flag}
</Text>;
Usage
Import the PhoneNumberInput component from the library. You can then use it in your application like so:
// App.tsx
import React, { useState } from 'react';
import { PhoneNumberInput, getCountryByCode } from 'react-native-paper-phone-number-input';

// `showFirstOnList`, `includeCountries` and `excludeCountries` should be defined outsude
// the component to prevent uncessary recomputations and re-renders.
const includeCountries = ['AZ', 'BD', 'CA', 'GB', 'IN', 'NZ', 'US', 'TR'];

export default function App() {
  const [countryCode, setCountryCode] = useState<string>('BD'); // Default country code
  const [phoneNumber, setPhoneNumber] = useState<string>();

  const { name, flag, dialCode } = getCountryByCode(countryCode); // Get country details

  return (
    <PhoneNumberInput
      code={countryCode}
      setCode={setCountryCode}
      phoneNumber={phoneNumber}
      setPhoneNumber={setPhoneNumber}
      includeCountries={includeCountries}
    />
  );
}
A more complete example can be found in the example directory.
API
PhoneNumberInput
Props
| Prop | Type | Description | Notes |
|---|---|---|---|
code | string | The country code. | Optional. By default, the country code is set to ## which shows a world icon. |
setCode | (code: string) => void | A function that sets the country code. | Required. |
phoneNumber | string | The phone number. | Optional. By default, no phone number is set. |
setPhoneNumber | (phoneNumber: string) => void | A function that sets the phone number. | Required. |
showFirstOnList | string[] | A list of country codes that should be shown on top of the list. | Optional. By default, countries are shown alphabetically. |
includeCountries | string[] | A list of country codes that specifies which countries can be selected. | Optional. By default, shows all countries. |
excludeCountries | string[] | A list of country codes that specifies which countries cannot be selected. | Optional. By default, does not exclude any countries. |
limitMaxLength | boolean | Limit the maximum length of the phone number for the country as defined in E.164. | Optional. By default, the maximum length of the phone number is not limited. |
modalStyle | StyleProp<ViewStyle> | The style of the modal that shows the country code picker. | Optional. |
modalContainerStyle | StyleProp<ViewStyle> | The style of the container of the modal that shows the country code picker. | Optional. |
...rest | ...TextInputProps | Any other props that you want to pass to the TextInput component of React Native Paper. | Optional. |
!TIP
The props that accepts a list o f country codes such asshowFirstOnList,includeCountriesandexcludeCountriesshould be defined outside the component or memoized to prevent unnecessary recomputations and re-renders!!CAUTION If you set contradictory prop values in
includeCountriesandexcludeCountriesprops, theexcludeCountriesprop will take precedence over theincludeCountriesprop. ie. If you set the same country code in bothincludeCountriesandexcludeCountries, the country will be excluded.
Ref Methods
| Method Name | Description |
|---|---|
openCountryPicker | Opens the country code picker. |
closeCountryPicker | Closes the country code picker. |
CountryPicker
Props
| Prop | Type | Description | Notes |
|---|---|---|---|
country | string | The country | Optional. |
setCountry | (code: string) => void | A function that sets the country code. | Required. |
...rest | ...TextInputProps | Any other props that you want to pass to the TextInput component of React Native Paper. | Optional. |
Ref Methods
| Method Name | Description |
|---|---|
openCountryPicker | Opens the country picker. |
closeCountryPicker | Closes the country picker. |
getCountryByCode
type CountryWithoutCode = {
  name: string;
  flag: string;
  dialCode: string;
};

const getCountryByCode: (code?: string) => CountryWithoutCode;
Design Decisions/FAQ
How to set the default country?
You can set the default country by setting the code prop. This prop accepts a country code. For example, if you want to set the default country to Bangladesh, you can set the code prop to BD.
Why set the country code instead of the dial code?
Multiple countries can have the same dial code. For example, the dial code for United States is +1 and the dial code for Canada is also +1. So, if we were to set the dial code instead of the country code, wrong flag would be shown for the country.
To solve this, this library uses the country code instead of the dial code. This library also exposes a getCountryByCode method that can be used to get the country details from the country code such as the dial code, country name and flag.
Development
This project integrates with react-native-builder-bob. To get started:
- Fork and Clone the repository.
- Create your feature branch.
- Install dependencies using
yarn. - Run example project using
yarn example android,yarn example iosoryarn example web. - Make your changes and create a PR!
- Thank you.
License
This package is licensed under the MIT License.
Contribution
Any kind of contribution is welcome. Thanks!
