rtsp-samsung-tv v1.1.22
rtsp-samsung-tv
Description
Display RTSP streams from IP Cameras on Samsung smart TV (Tizen TV)
Features
- support more than 999 RTSP streams.
- switch channels(rtsp stream) using numpad on the remote control
- Run Inside docker container
- use server to convert rtsp streams using ffmpeg
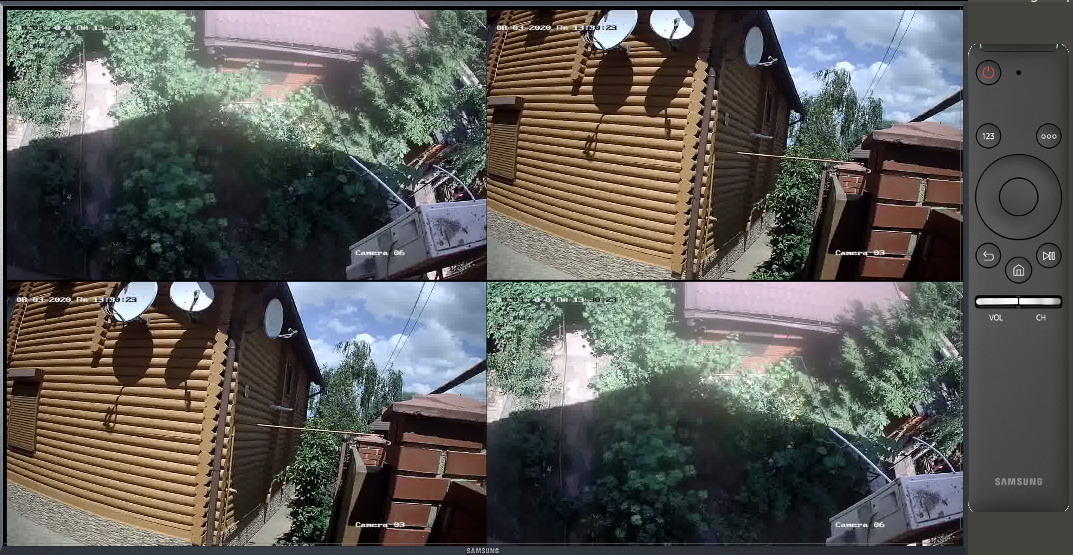
- group rtsp streams on the obe channel (Display 4 cameras streams on one channel)
- support udp and tcp transport
- tizen samsung tv application
- admin ui
- protect admin ui(optional)
- Voice Control
- Remote Control
- Supports parameters before "-i" and after it
- Raspberry Pi Hw acceleration
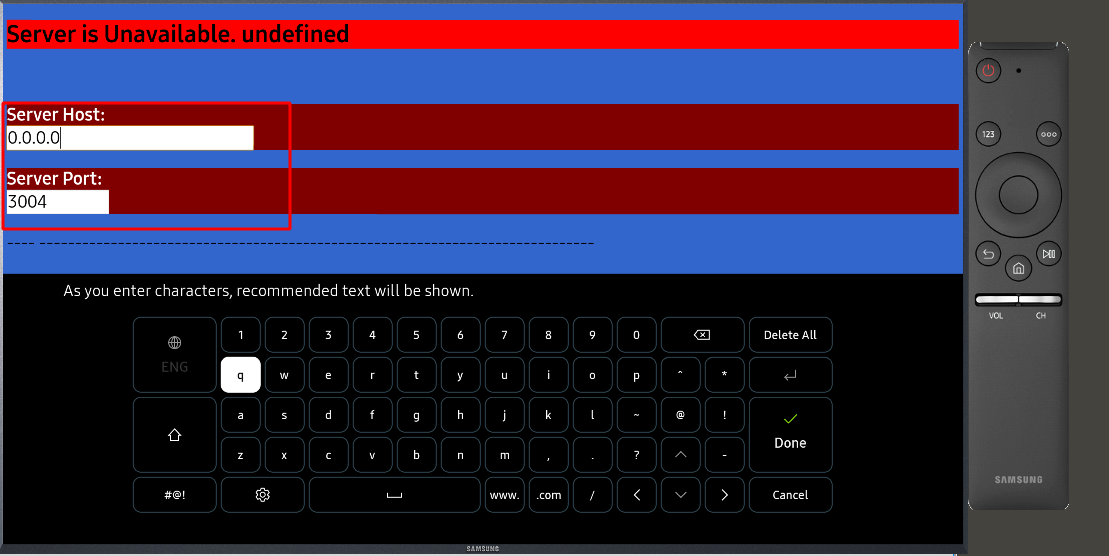 ,
, 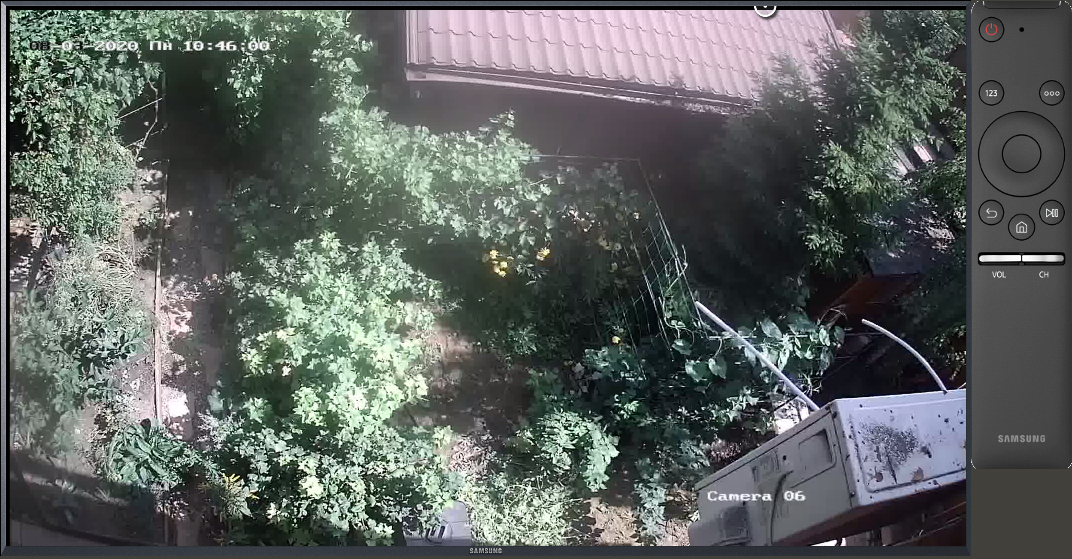 ,
, 
Server Installation
sudo apt-get install ffmpeg
wget -qO- https://getpm2.com/install.sh | bash
sudo env PATH=$PATH:/usr/bin pm2 startup systemd -u ${currentUser} --hp ${HOME}
sudo npm i rtsp-samsung-tv -g
sudo pm2 start `npm root -g`/rtsp-samsung-tv/server.js
sudo pm2 save
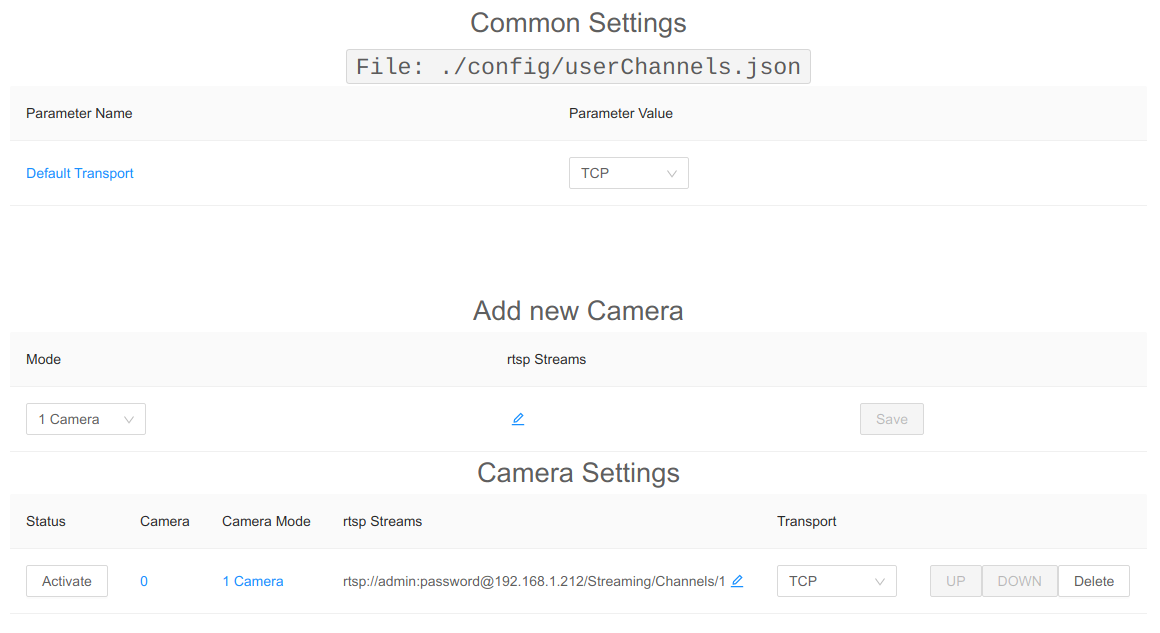
open http:\\<SERVER_IP>:3004 (Default Login: admin, Default Password: admin) and add a new Camera and click Save 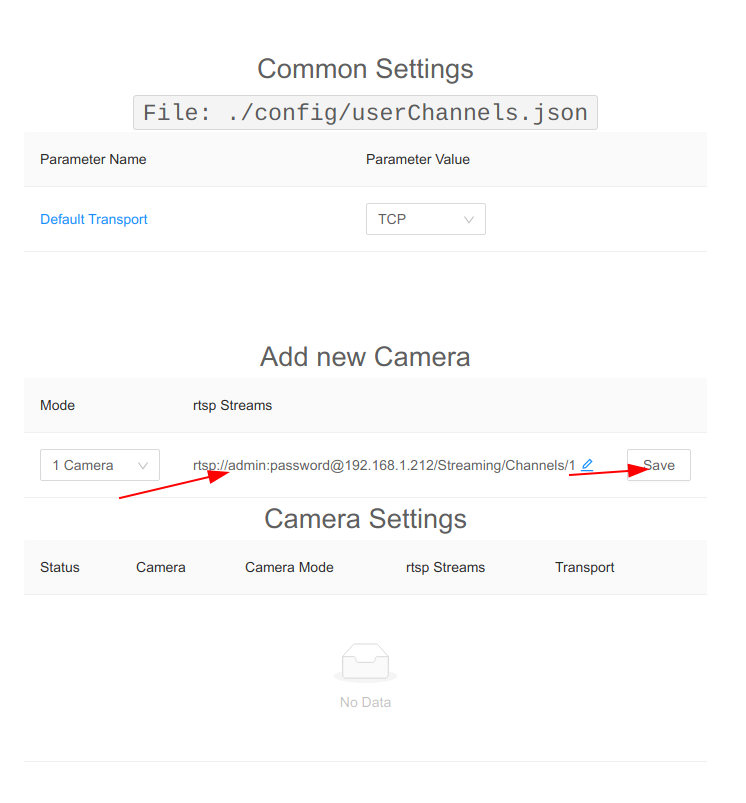
Run Inside docker container
docker run -d --name=rtsp-samsung-tv -p 3004:3004 -p 9999-10004:9999-10004 --restart=always vassio/rtsp-samsung-tv:latestConfiguration on Host:
echo "{}" >/opt/channels.json
docker run -d --name=rtsp-samsung-tv  -p 3004:3004 -p 9999-10004:9999-10004  -v /opt/channels.json:/opt/config/channels.json --restart=always vassio/rtsp-samsung-tv:latest
Keycloak Protection
echo "{}" >/opt/channels.json
docker run -d --name=rtsp-samsung-tv  -p 3004:3004 -p 9999-10004:9999-10004  -v /opt/channels.json:/opt/config/channels.json -v  `pwd`/keycloak.json:/opt/config/keycloak.json --restart=always vassio/rtsp-samsung-tv:latest
Install Samsung TV Application(Tizen Application)
- install java jdk
- install Tizen SDK on your PC https://developer.tizen.org/development/tizen-studio/download
- download application source
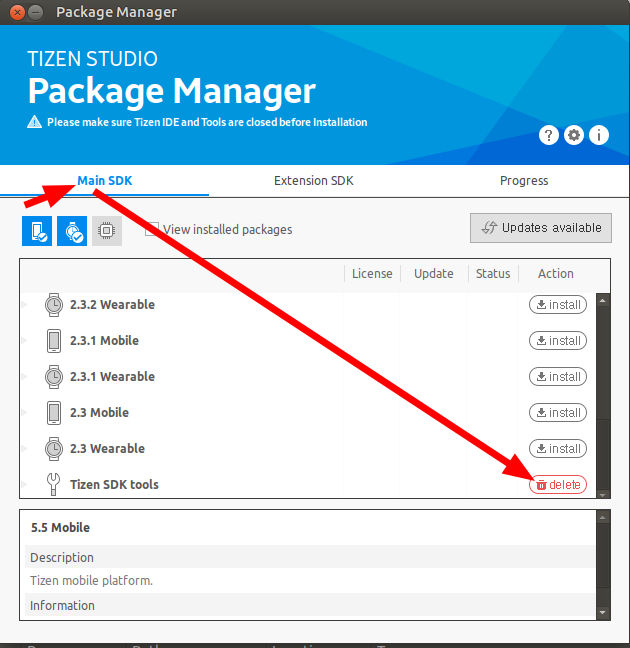
git clone https://github.com/vzakharchenko/rtsp-samsung-tv.git - in "Tizen Studio Package manager" install "Tizen SDK Tools"
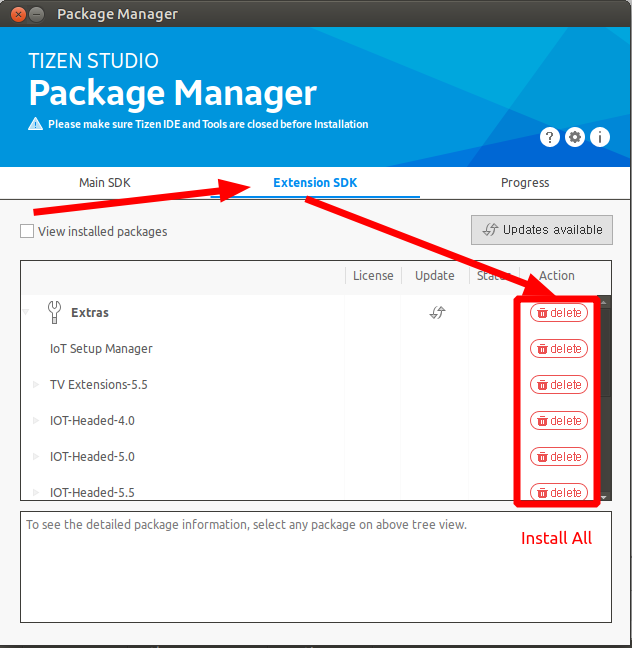
- "Extension SDK" install "extras"
- open "Tizen Studio"
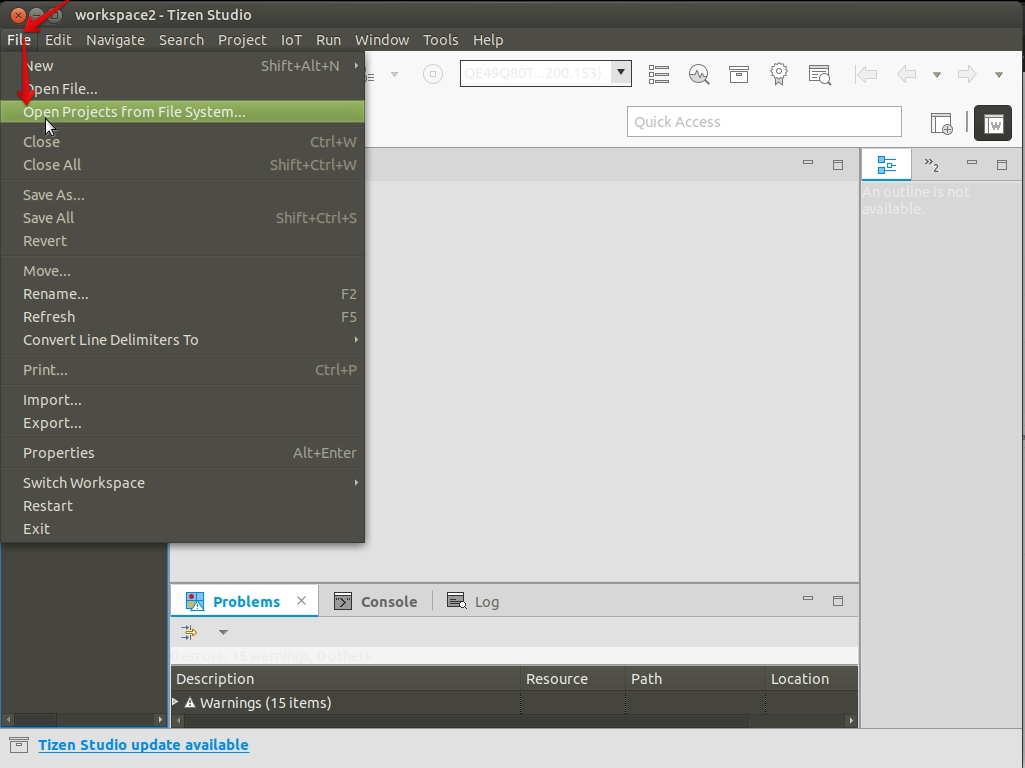
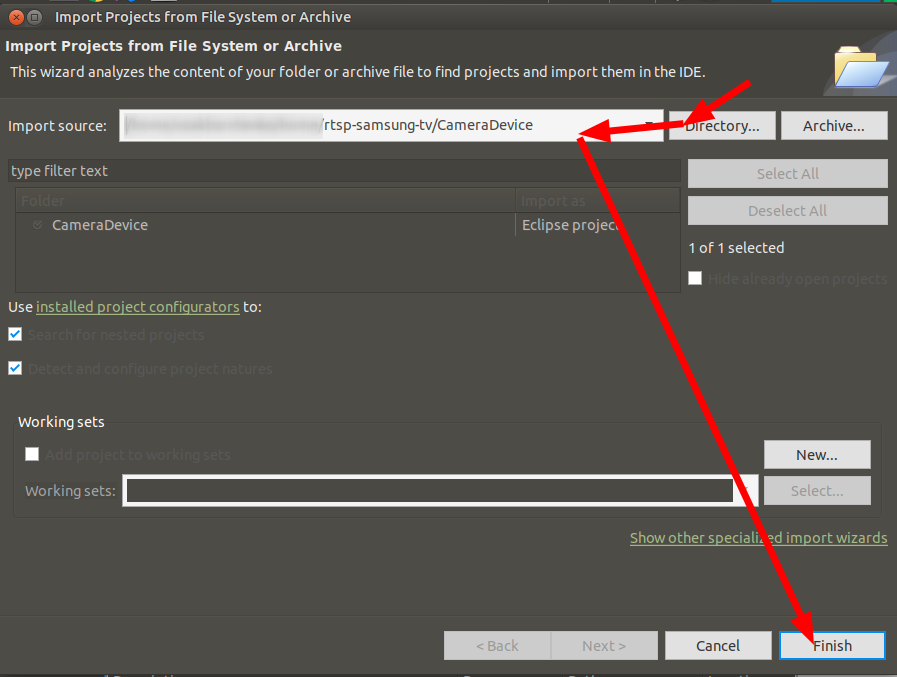
- File -> Open Project From File System
- open rtsp-samsung-tv/CameraDevice
- Enable Development mode on your TV
- open Device manager
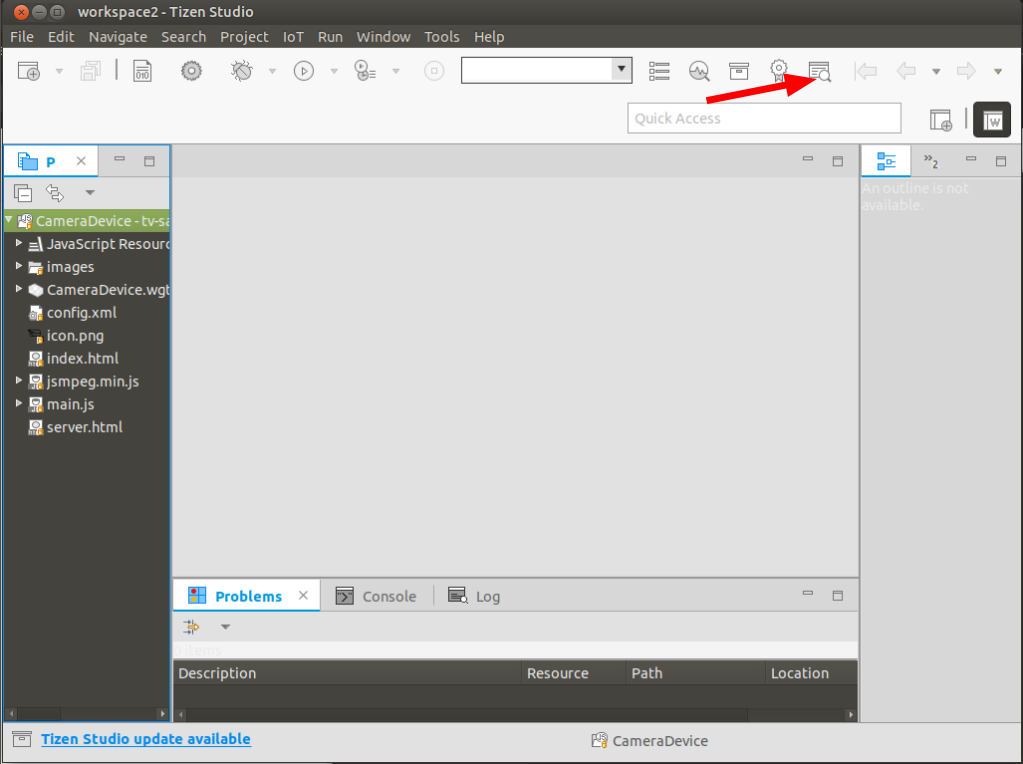
- click "Scan device"
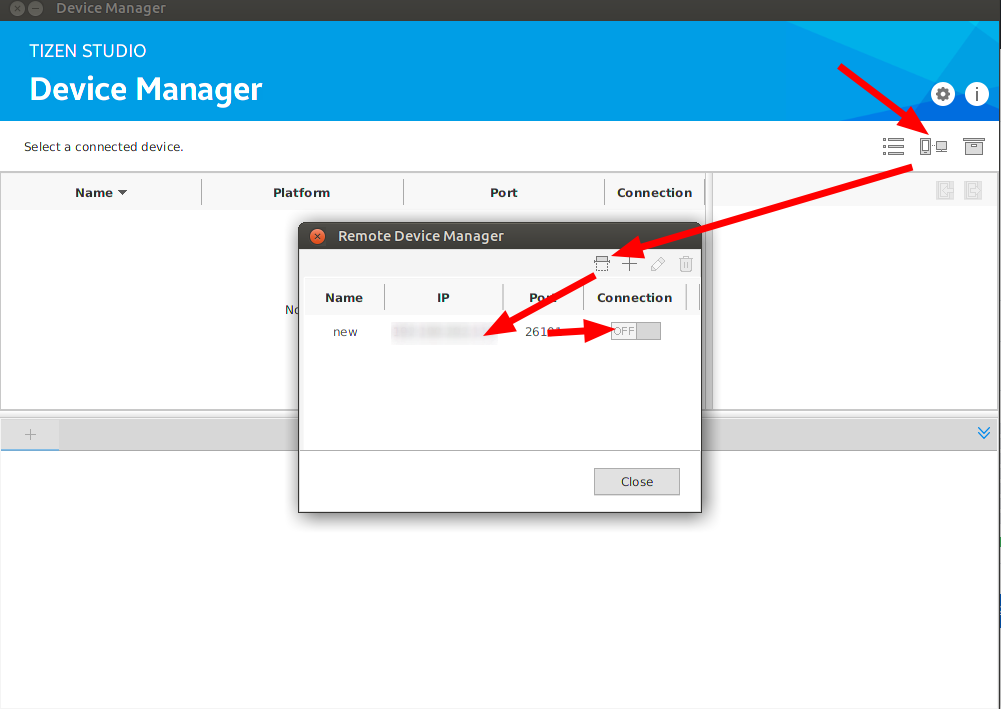
- set Connection to "On"
- right click on your connection and select "Permit install"
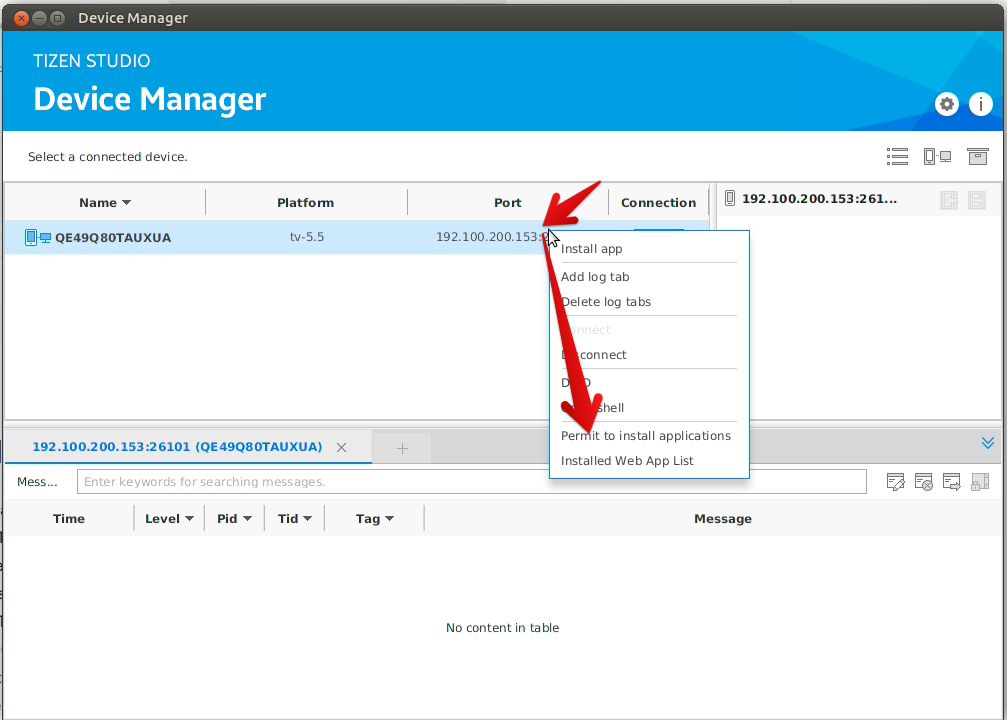
- If you see NO DUID For Selected Device
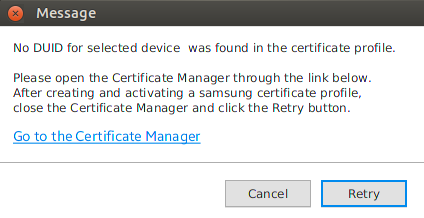 then you need to generate certificate for your TV
- in Tizen studio select project and run it on TV.Channel
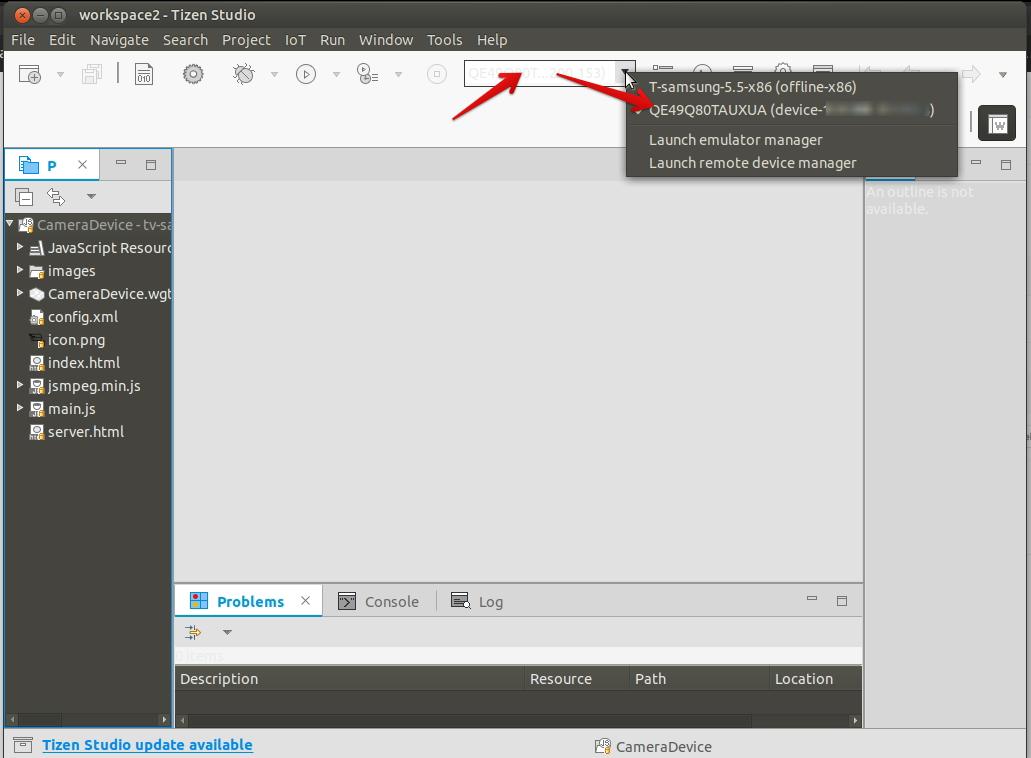
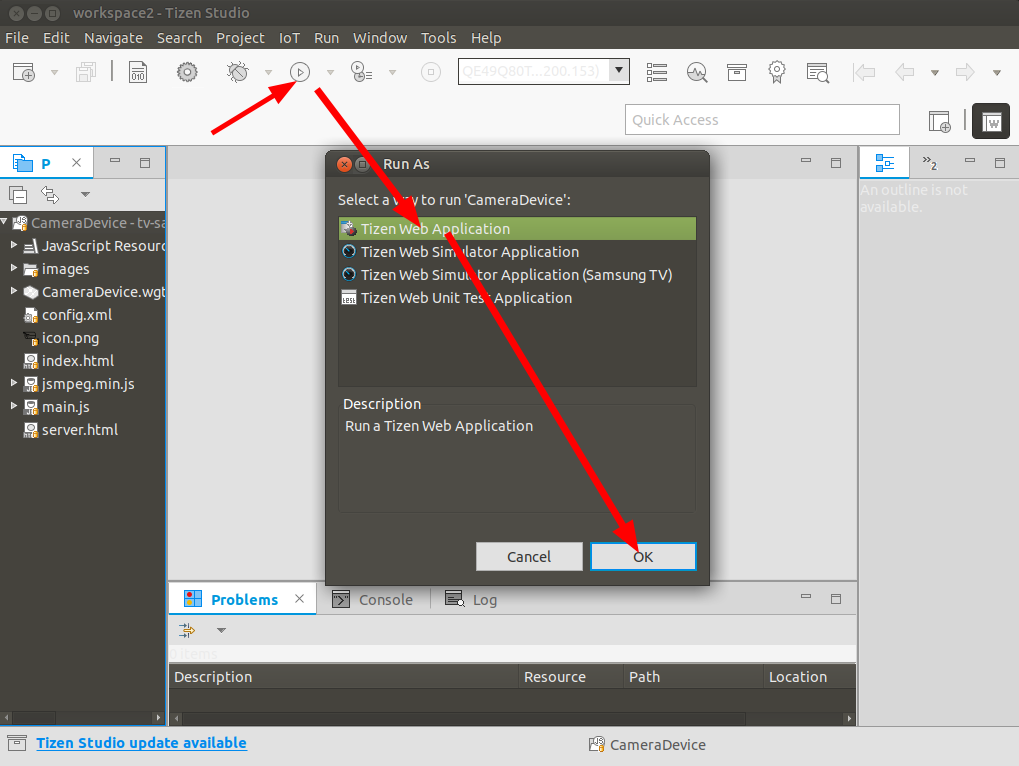
- setup server ip and port on TV.

Admin UI
Url: http:\\<SERVER_IP>:3004
- Default Login: admin
- Password: admin
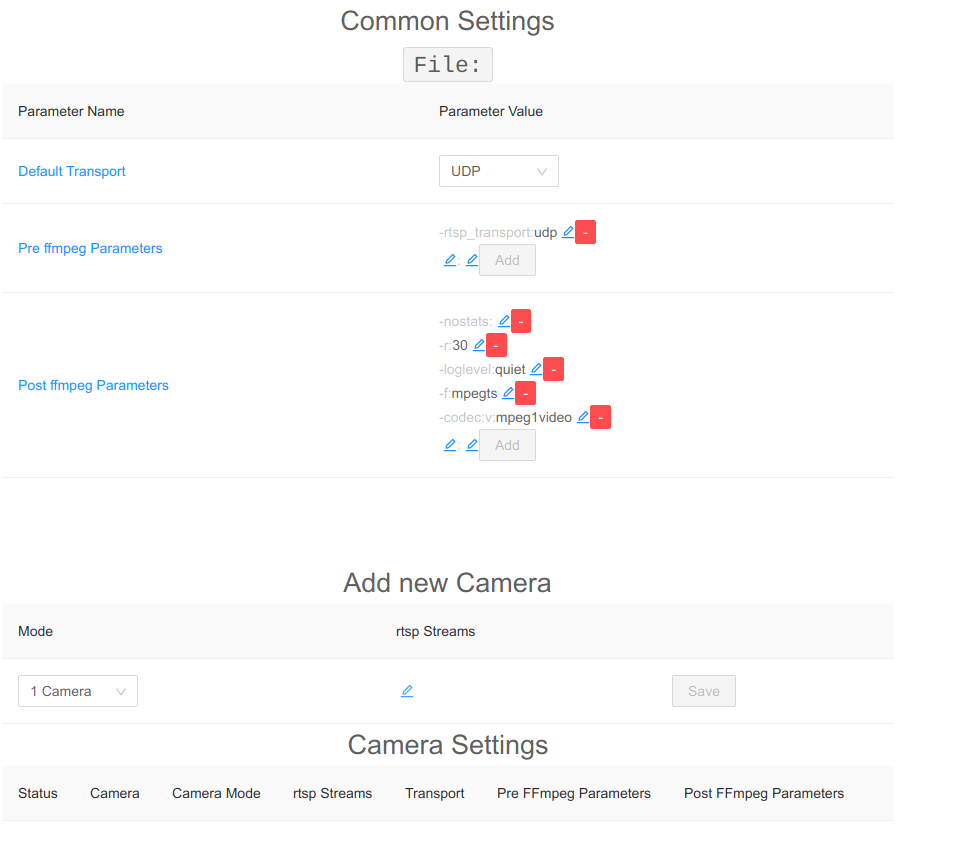
where:
- File path to config file.
- Default Transport Default RTSP Transport. Applicable to all cameras
- Default RTSP FFmpeg parameters Parameters before "-i". Applicable to all cameras
- Default Encode FFmpeg parameters Parameters before "-i". Applicable to all cameras
ffmpeg <Default RTSP FFmpeg parameters> -i rtsp://stream <Default Encode FFmpeg parameters>Camera Specific Columns:
- Status now on TV.
- Camera channel number.
- Camera Mode "1 Camera" : one camera on screen, "4 Cameras" : 4 cameras on one screen.
- rtsp Streams rtsp streams.
- Transport Camera RTSP Transport.
- RTSP FFmpeg parameters Parameters before "-i". Applicable to all cameras
- Encode FFmpeg parameters Parameters after "-i". Applicable to all cameras
ffmpeg <RTSP FFmpeg parameters> -i rtsp://stream <Encode FFmpeg parameters>add 1 Camera: 


Add 4 cameras on one screen: 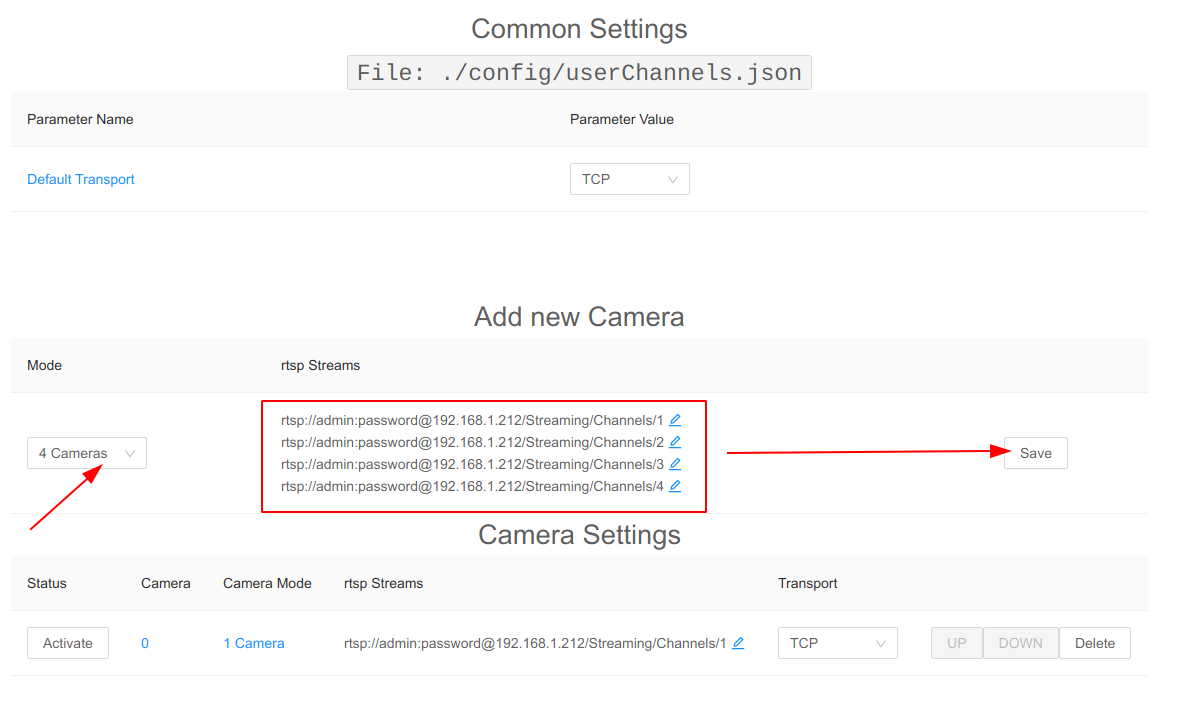
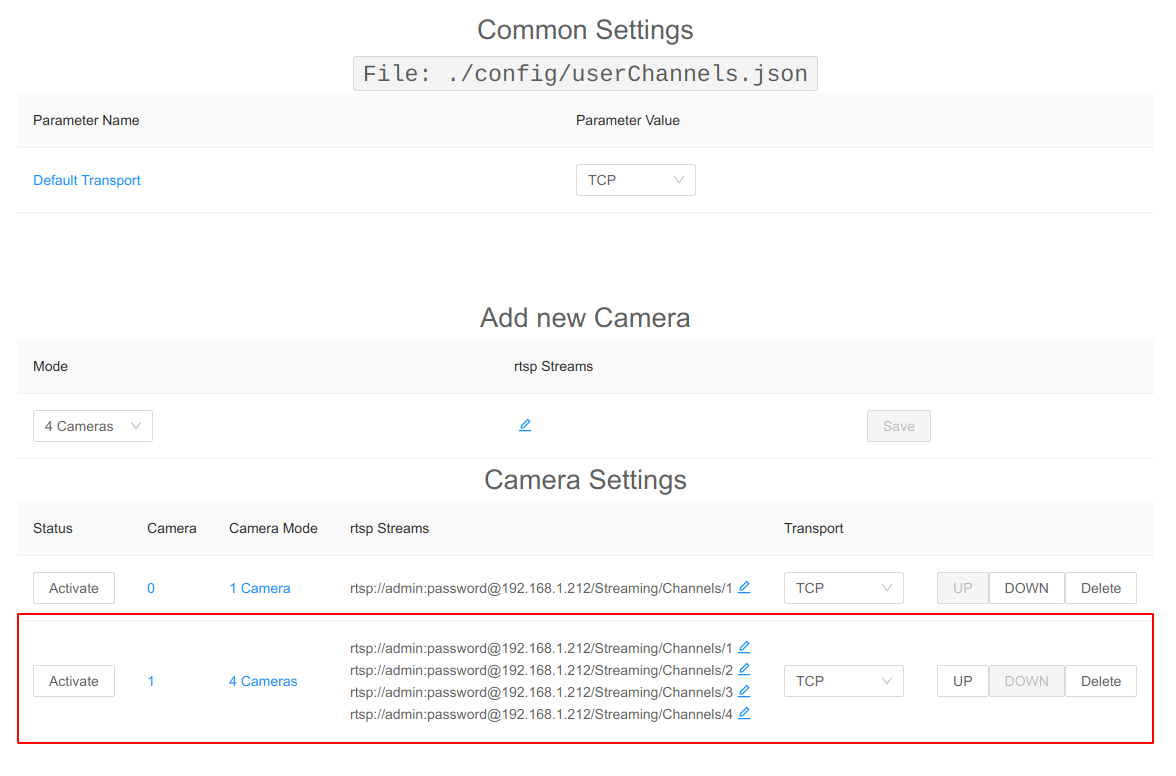

delete Camera 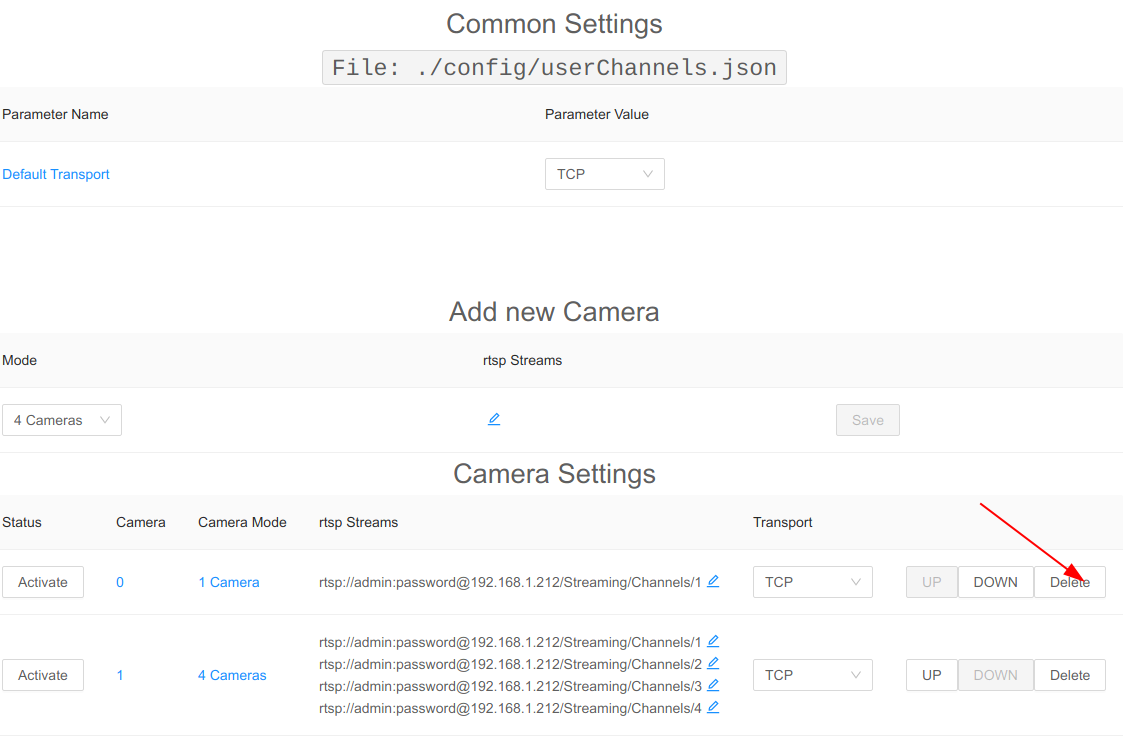
Protect Admin UI using Default Authentication
Default user: admin/admin
Protect Admin UI using keycloak SSO (Optional)
- download keycloak.json from the keycloak admin ui.
- save keycloak.json to ./config/keycloak.json or /opt/config
example of keycloak.json
{
  "realm": "RTSP",
  "auth-server-url": "https://localhost:8090/auth",
  "ssl-required": "external",
  "resource": "testClient",
  "credentials": {
    "secret": "secret"
  },
  "confidential-port": 0
}
Raspberry Pi Hw acceleration on ffmpeg (Raspbian Lite Image)
- build ffmpeg with mmal feature
sudo apt-get install libomxil-bellagio-dev
sudo apt-get install libomxil-bellagio-bin
git clone https://github.com/FFmpeg/FFmpeg
cd FFmpeg
git checkout origin/release/3.2
sudo ./configure --arch=armel --target-os=linux --enable-gpl --enable-mmal  --enable-omx --enable-omx-rpi --enable-nonfree
sudo make -j4
sudo make install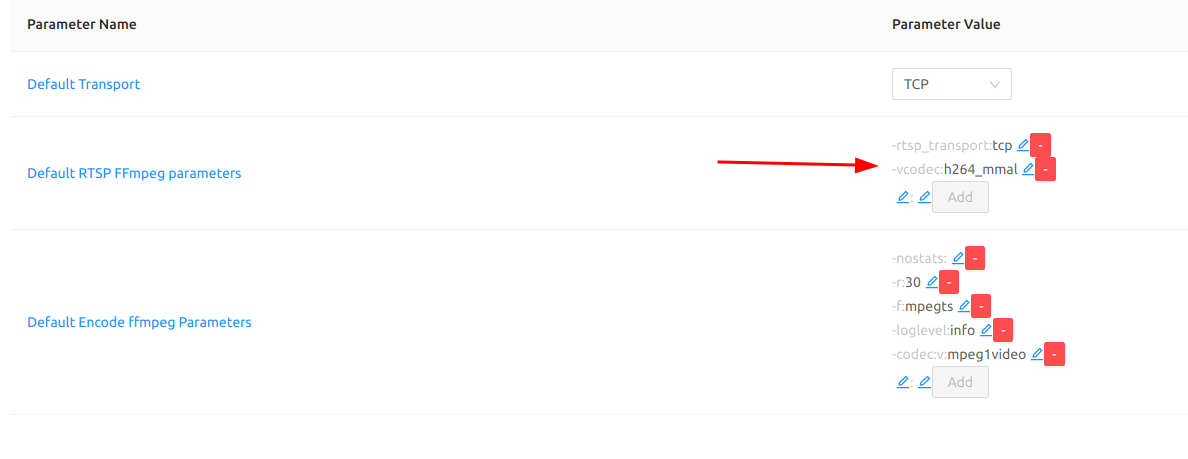
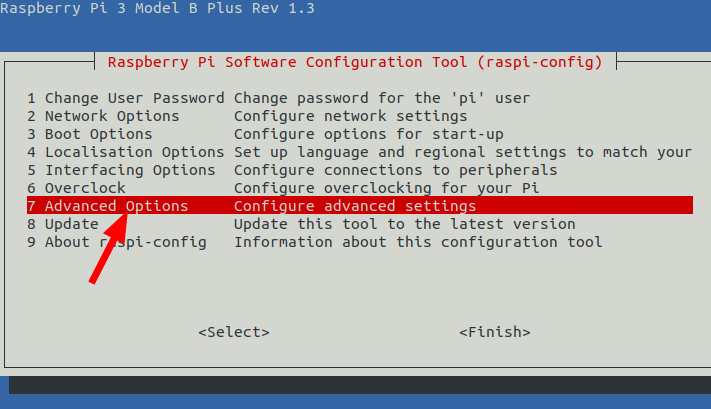
- increase the GPU memory?
sudo raspi-config- 7 Advanced Options
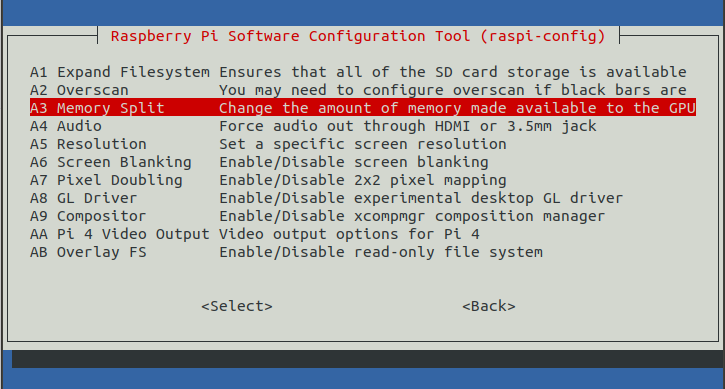
- A3 Memory Split
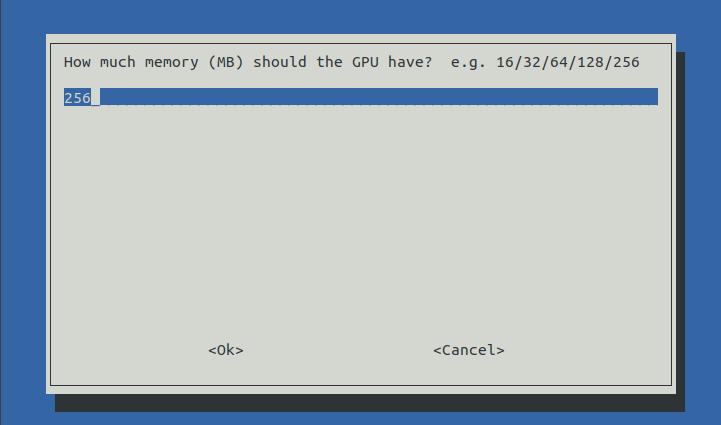
- set value 256 or more
Voice Control
1. Press VOICE button
2. Say command
List of commands: "Channel Up" (or the same on your language) "Channel Down" (or the same on your language) "1","2","3","4" ... "999"
Remote Control

Generate Samsung Certificate
- Open "Certificate Manager"
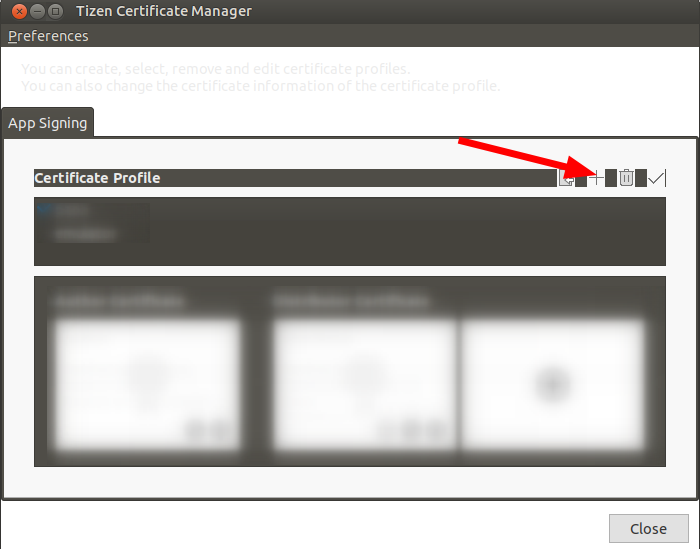
- Add a new Samsung Certificate
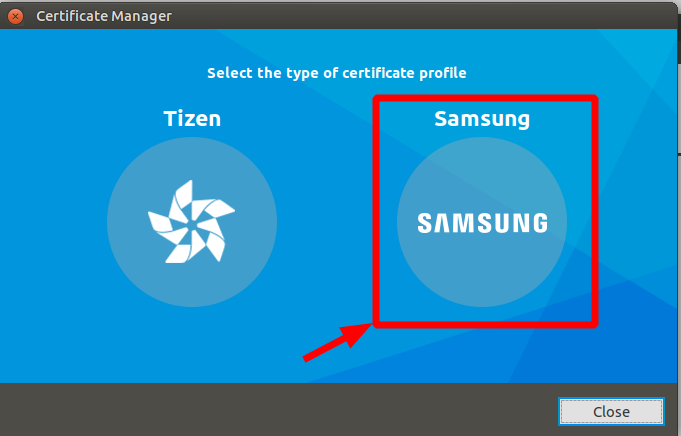
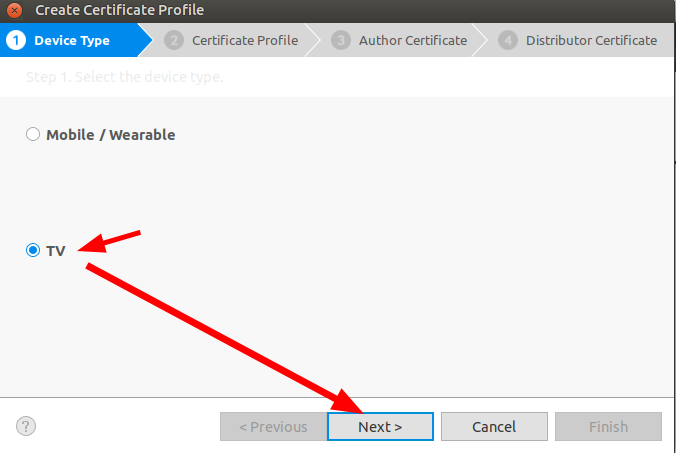
- Select DeviceType "TV"
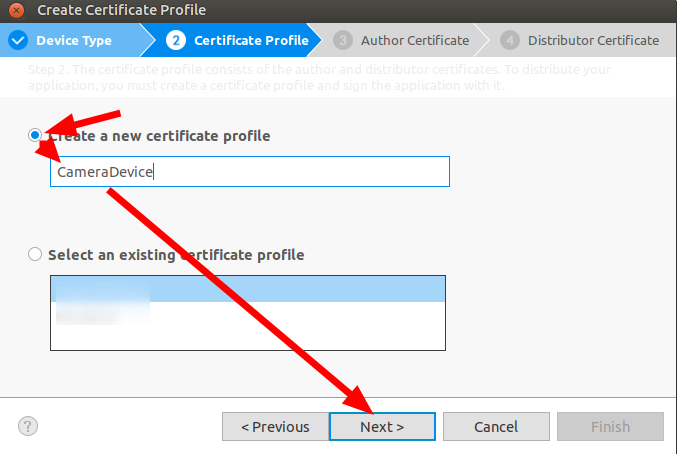
- Click Next
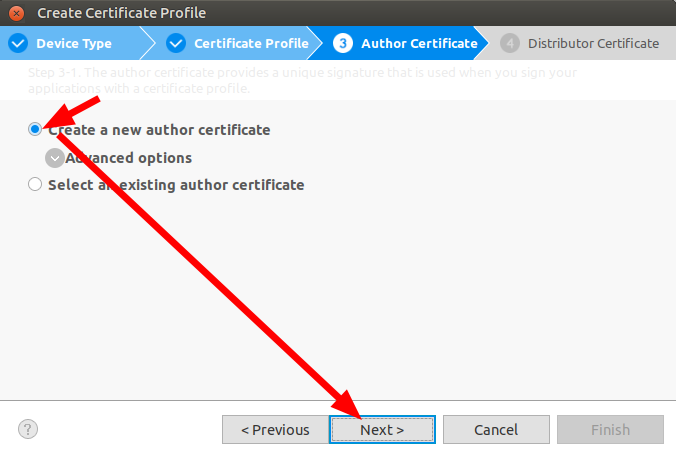
- Type any name and password
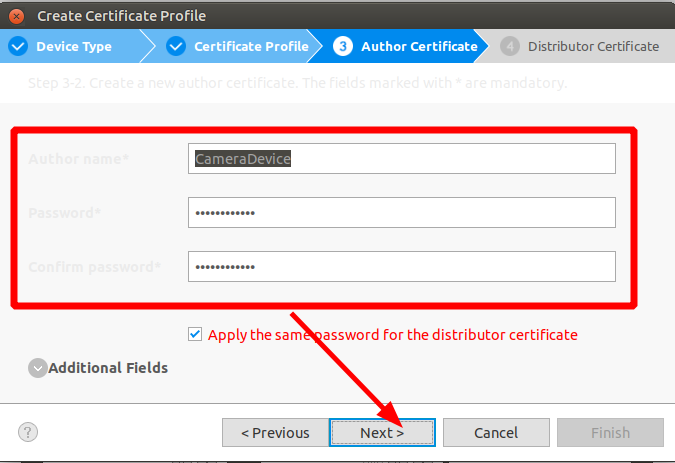
- Click Ok

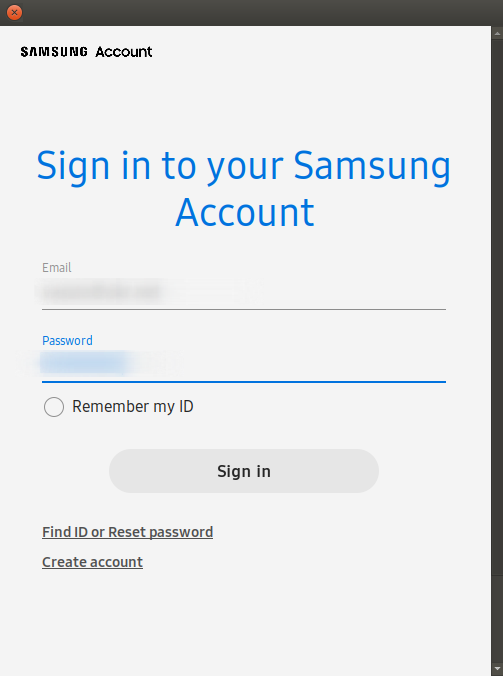
- Login to Samsung Account
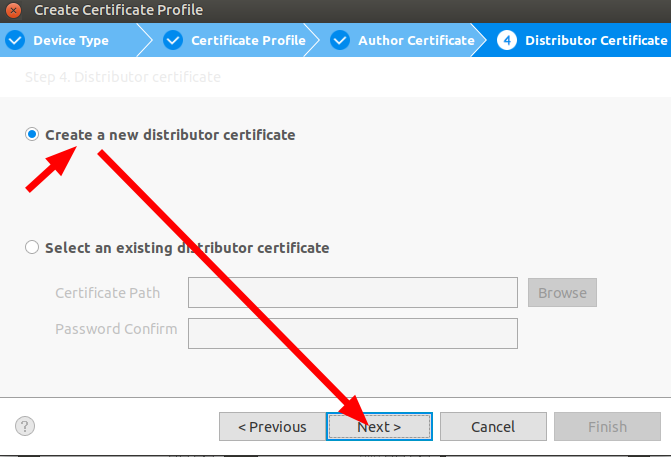
- Next
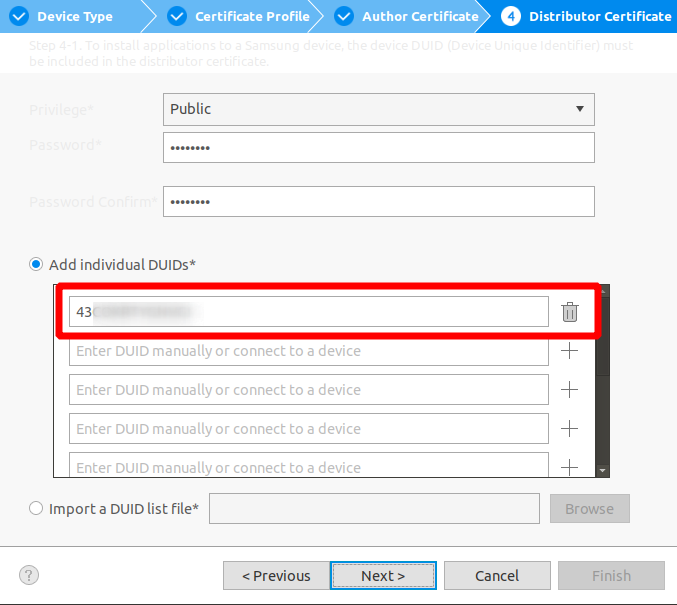
- Add Individual DUID
- Finish
Individual DUID
On TV select "Settings"->"Support"->"About TV"-> Information About Smart Hub-> Unique Device Id 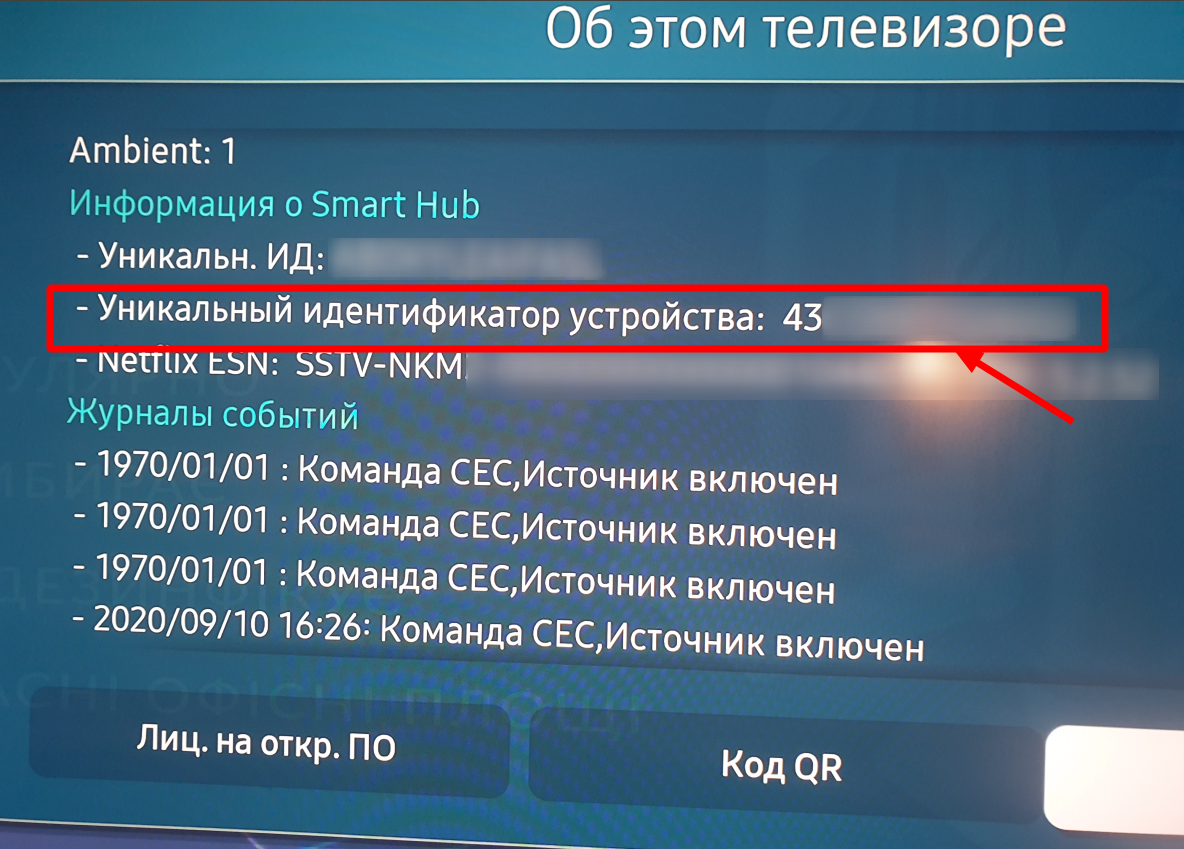
4 years ago
5 years ago
5 years ago
5 years ago
5 years ago
5 years ago
5 years ago
5 years ago
5 years ago
5 years ago
5 years ago
5 years ago
5 years ago
5 years ago
5 years ago
5 years ago
5 years ago
5 years ago
5 years ago
5 years ago
5 years ago
5 years ago
5 years ago
5 years ago
5 years ago
5 years ago
5 years ago
5 years ago
5 years ago
5 years ago
5 years ago
5 years ago
