sails-hook-crud-admin v0.2.2
sails-hook-crud-admin
Introduction
Hook Administrator for Sails Js. This is an installable hook that allows you to manage your models data from an admin web interface. From this interface you can perform the CRUD (Create, Read, Update, and Delete) operations on your models. It also includes an interface for managing admin users and their corresponding rights.
Goals
The purpose of this project is to provide a simple admin interface to administrate your models data.
Requirements
Sails 0.12
Getting Started
npm install sails-hook-crud-admin --saveNavigate to http://localhost:1337/administrator/ to access the admin interface.
Login with the credentials
username: admin and password access@crud-2018.
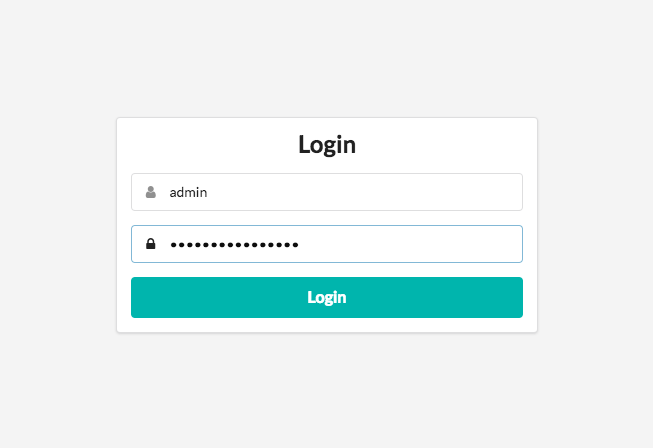
Note: It is adviced to change this password as soon as you can.
Sections of the admin
Login/Signin Section
You get access to the administrator navigating to http://localhost:1337/administrator/ which will take you to the login screen if not logged in.

Models Dashboard
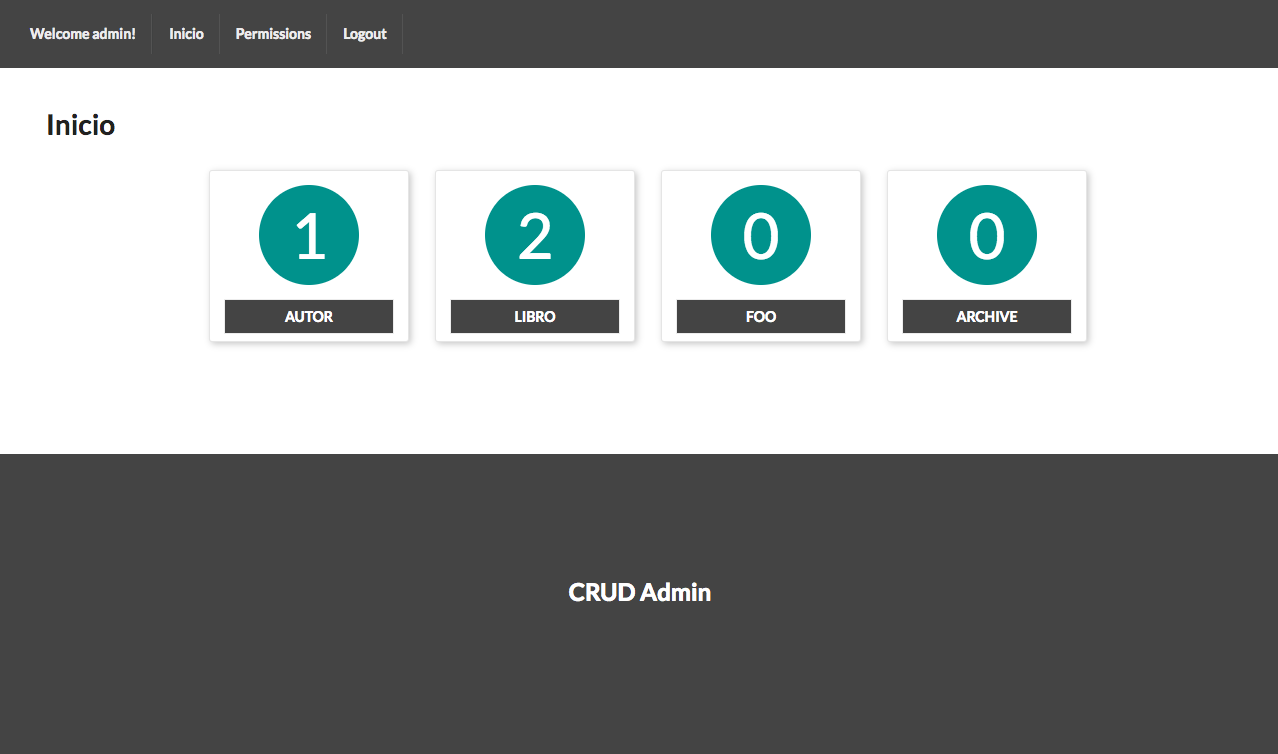
After signing in you are taken to the models dashboard where all your app models names are showed, along with their respective counts.
Permissions Dashboard
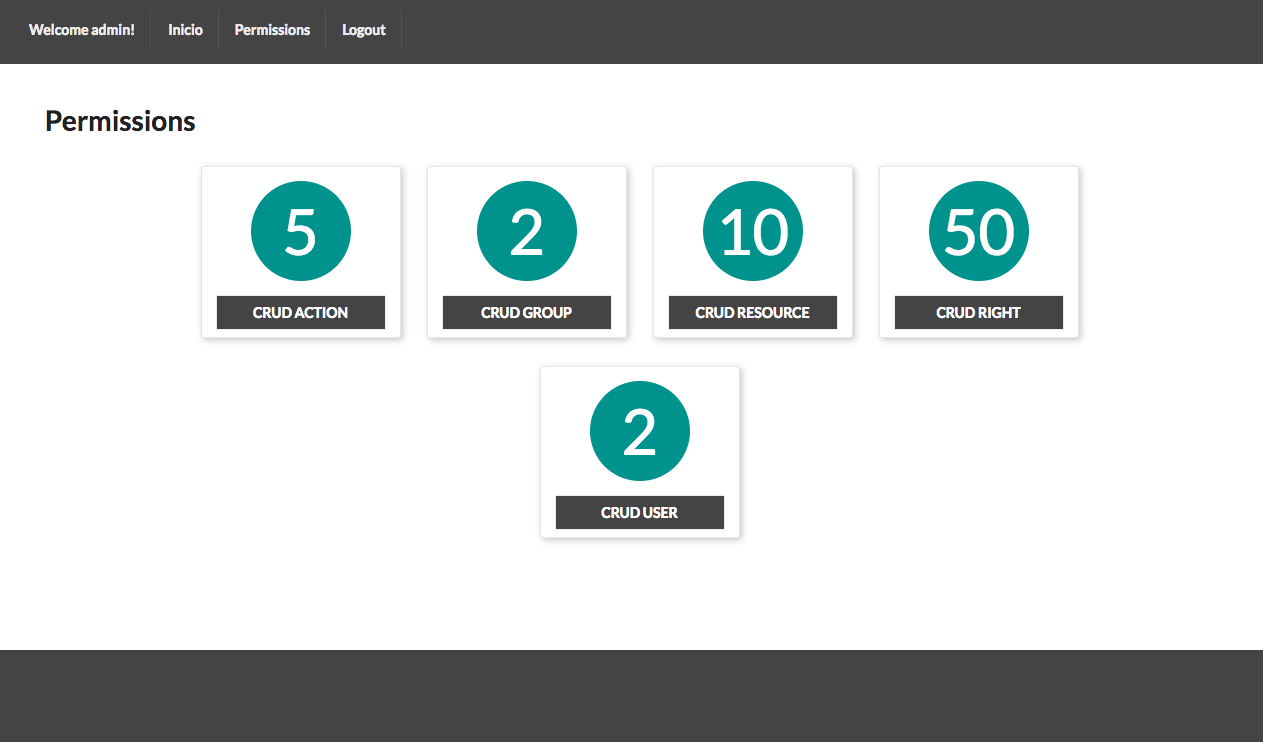
The permission models dashboard is where all the models related to user, group, access and permissions can be edited. From this dashboard you get access to the create, update and delete users and groups to control the access of your app.
Model Details
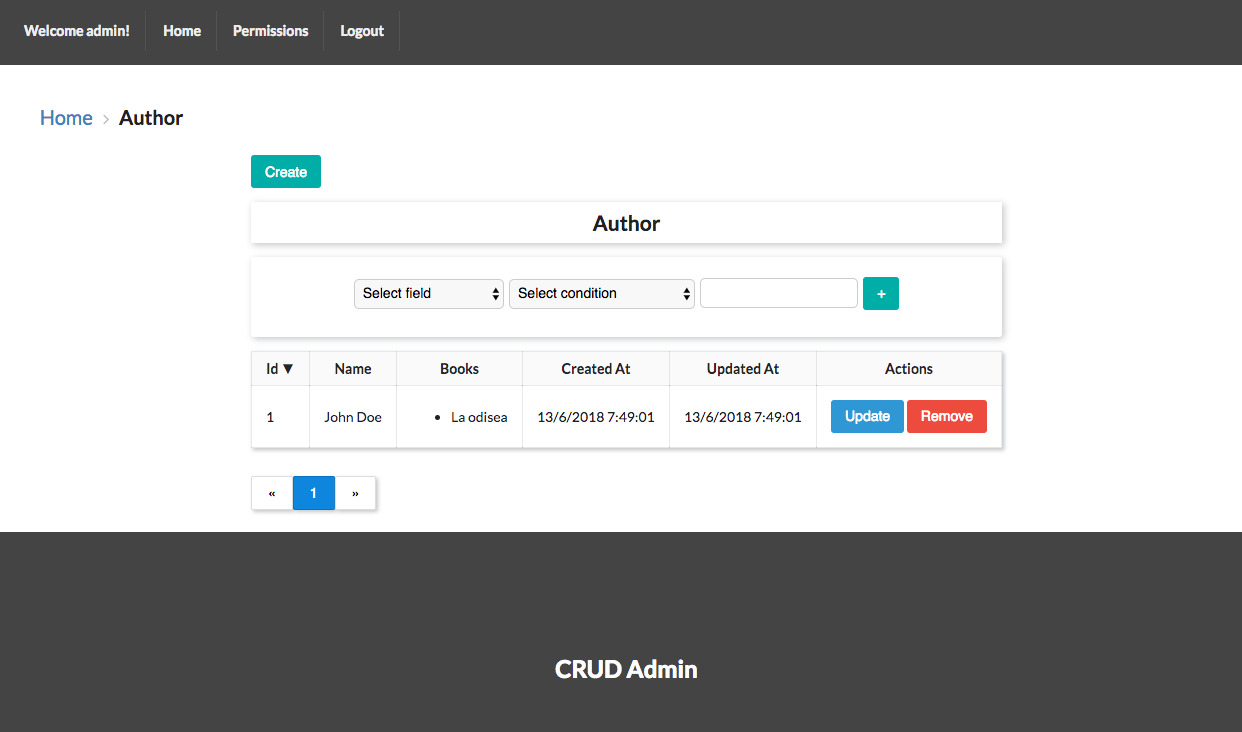
After clicking on one of the model box items in one of the dashboards (models or permissions) you get access to the details of the clicked model. From this screen you can see all the created instances of your model but also you can create, update and remove them.
Assets Section
You can get to this section by clicking the Assets options from the header. In this section you can upload your pictures and files, to be later consumed or used in your models. Every asset is categorized by the model it will belong to.
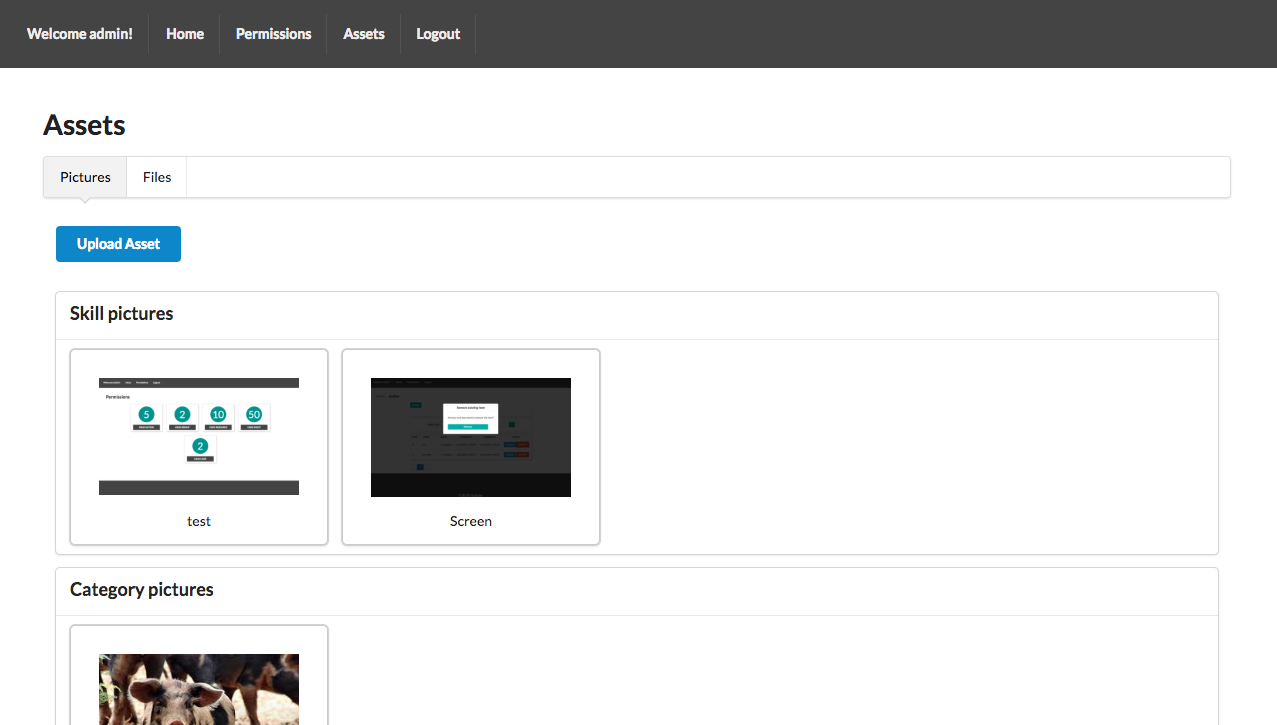
If you want one of your fields to be a picture for example, in the config file you select its renderer property for that field to be picture.
Items manipulation
Creating a new item
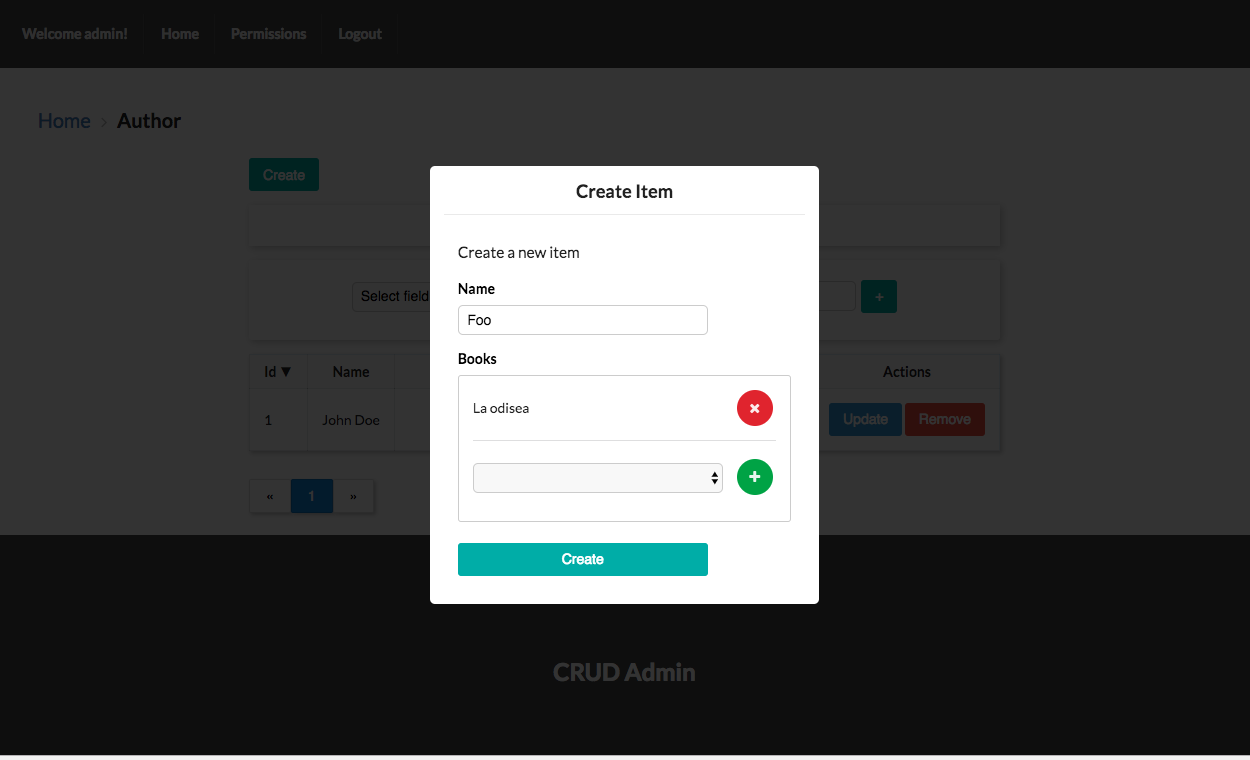
From your details of a model it is possible creating new instances of your model. This is pretty straightforward, you only need to click the Create button which is going to open a modal with a form to fill in.
Updating an existing item
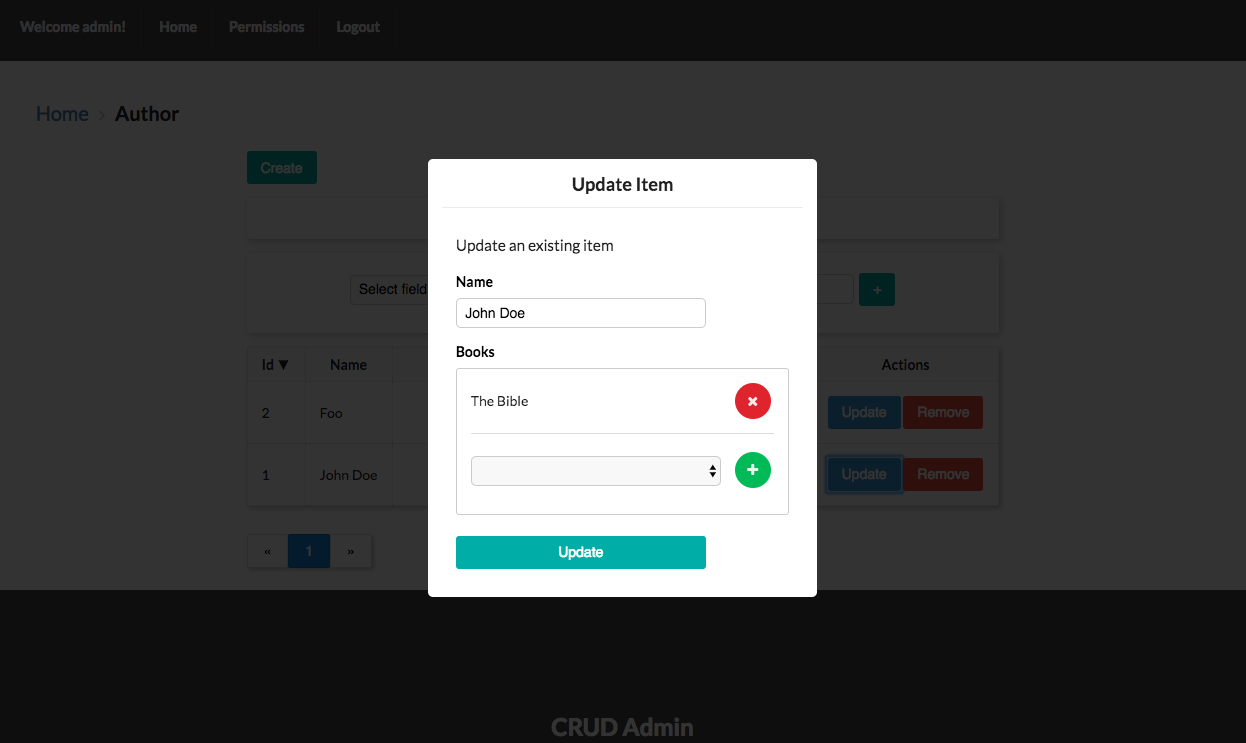
From your details of a model you can also update your existing model instances. This is pretty straightforward, you only need to click the Update button in the row of the desired item which is going to open a modal with a form in it.
Removing an existing item
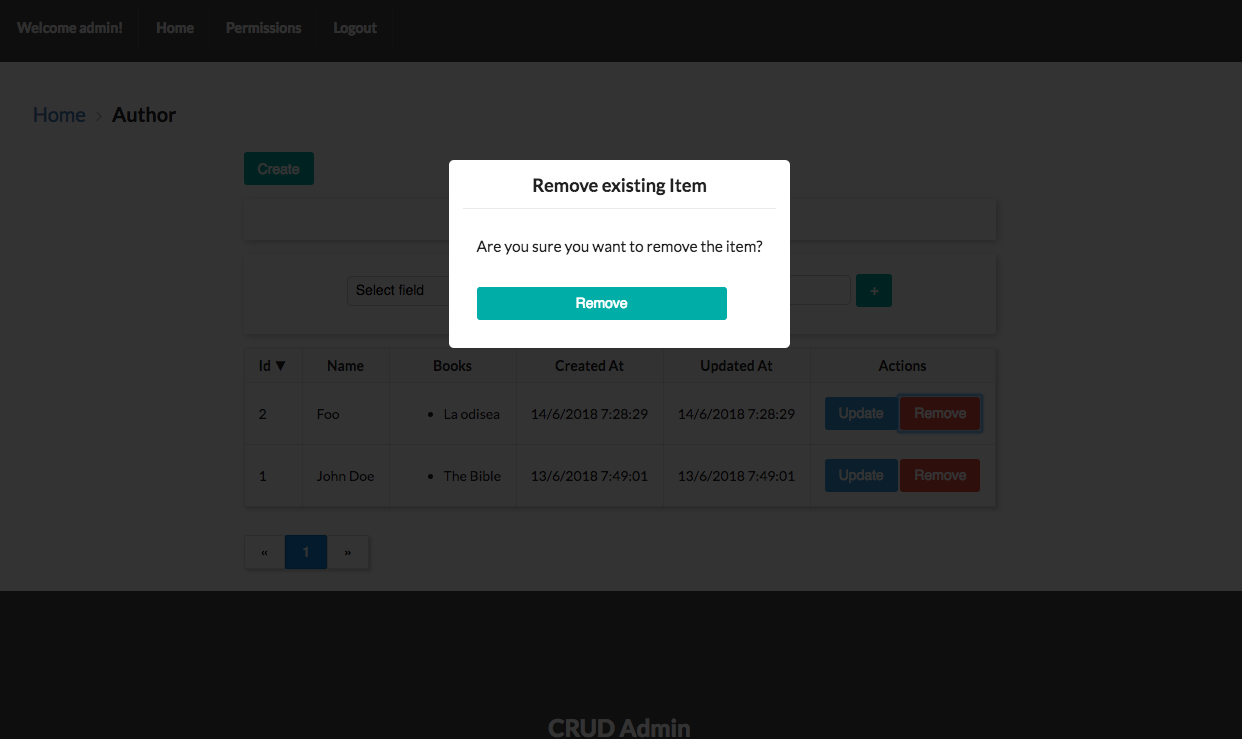
From your details of a model you can also remove your existing model instances. You click the Remove button in the row of the desired item which is going to open a modal to confirm the elimination.
Users and Permissions
Adding a new group with rights
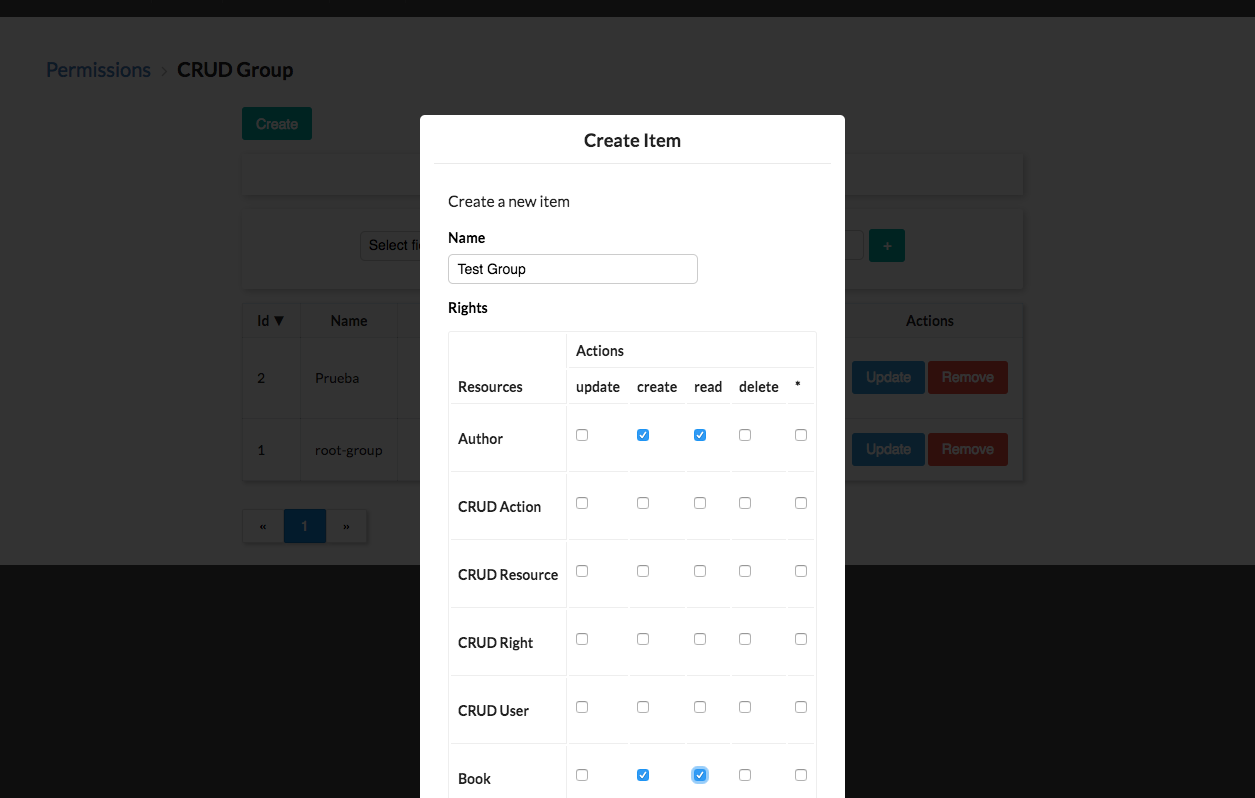
Creating a new group with rights is really easy you just need to go to the Permissions Dashboard and from there click the CRUD Group model box. This will take to its details screen where you get access to the create modal.
To create a new group, you give it a name and select the permissions it is going to have.
Assigning permissions is a pretty simple process. You check the actions options for the desired resources. The defined actions are create, update, read, delete, *.
The last one (*) means any of the previous actions.
The resources are defined based on the existing models of your app plus the CRUD models of the administrator.
Adding a new user
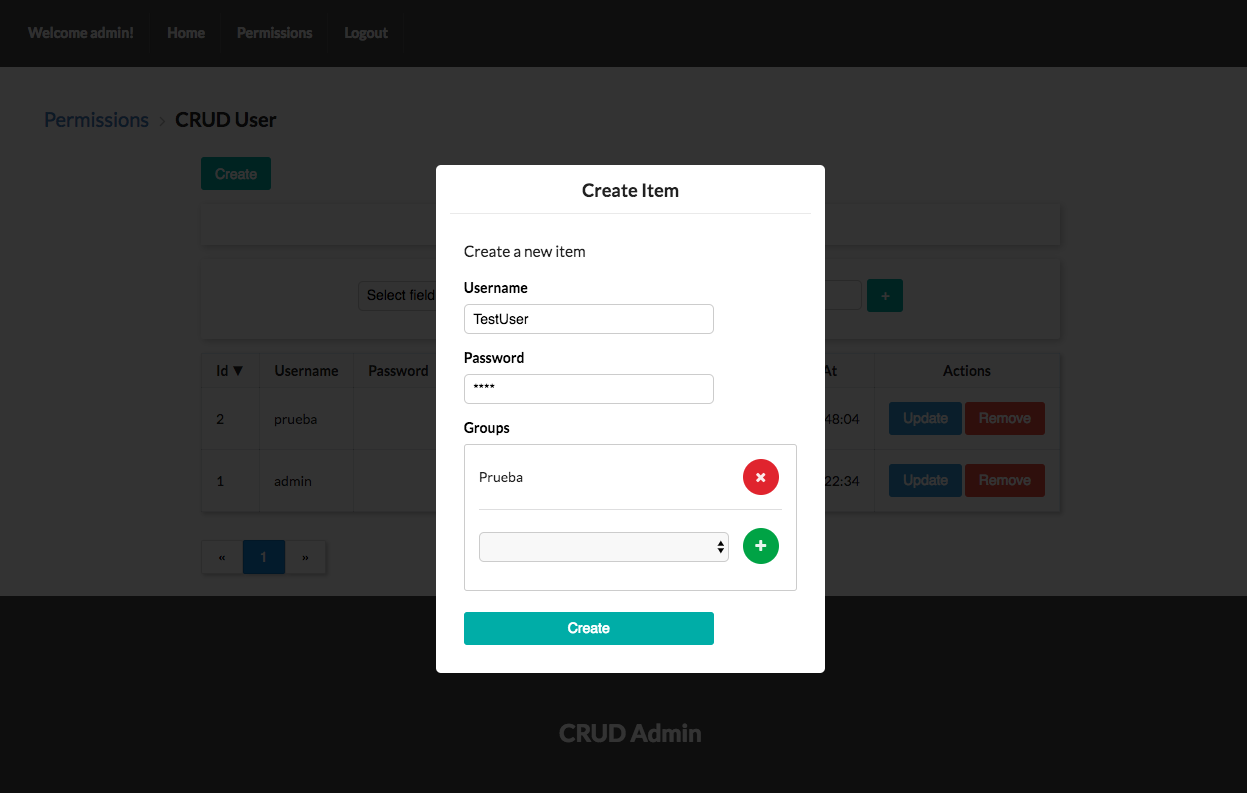
The process of creating a new user is simple. You just go to the Permissions Dashboard and from there click the CRUD User model box. This will take to its details screen where you get access to the create user modal.
To create a new user, you give it a name and select the groups it is going belong to.
Configuring the Admin
Customization
To customize things like labels and texts from buttons, and your models you need to create crudAdmin.js file like following and make your desired changes.
This file goes under the config directory.
/**
 * Custom configuration
 * (sails.config.crudAdmin)
*/
module.exports.crudAdmin = {
  general: {
    labels: {
      home: 'Inicio',
      actions: 'Acciones',
      createFormTitle: 'Crear item',
      updateFormTitle: 'Actualizar Item',
      removeFormTitle: 'Remover Item',
      createFormMessage: 'Crear un nuevo item',
      updateFormMessage: 'Actualizar un item existente',
      removeFormMessage: 'Esta seguro que lo quiere remover?',
    },
    buttons: {
      update: 'Actualizar',
      create: 'Crear',
      remove: 'Remover',
      seeDetails: 'Ver detalles',
    },
  },
  models: {
    author: {
      valueTemplate: '<%= author.name %>',
      label: 'Autor',
      fields: {
        name: {
          label: 'Nombre',
        },
        books: {
          label: 'Libros',
          valueTemplate: `
            <ul>
              <% _.forEach(books, function(book) { %>
                <li> <%- book.title %> </li>
              <% }); %>
            </ul>
          `
        },
        createdAt: {
          label: 'Creado'
        },
        updatedAt: {
          label: 'Actualizado'
        },
      }
    },
    book: {
      valueTemplate: '<%= book.title %>',
      label: 'Libro',
      fields: {
        title: {
          label: 'Titulo',
        },
        description: {
          renderer: 'textarea',
        },
        picture: {
          valueTemplate: `
            <% if (typeof(picture) !== "undefined") { %>
              <div>
                <img
                  src='<%= picture %>'
                  alt='Book Picture'
                  style="
                    width: 100%;
                    max-width: 100px;
                  "
                />
              </div>
            <% } %>
          `,
          renderer: 'picture',
        },
        status: {
          label: 'Estado',
        },
        author: {
          label: 'Autor',
          valueTemplate: '<%= author.name %>',
        },
        createdAt: {
          label: 'Creado',
        },
        updatedAt: {
          label: 'Actualizado',
        },
      }
    },
  }
};
Authors
See the list of contributors who participated in this project.
Contributing
Feel free to contribute by make any suggestion to improve the project or by creating your own pull requests.