salesforce-silent-login v1.2.2
Salesforce Silent Login
This module provides functionality to generate a signed JWT and use this JWT to login to Salesforce using the Salesforce JWT OAuth Flow. It can be used to login as a normal Salesforce user or a Experience Cloud user.
To use the module you must first
- Generate public/private keypair (crypto keys) for signing the JWT and verifying the signature
- Create a Connected App that uses the public key (certificate) to verify JWT signature
- Configure Salesforce users to enable access to the Connected App
Generate Crypto Keys
Create folder for public/private key pair
mkdir cert
cd cert
Generate private key and certificate
See docs/cert for example.
openssl genrsa -out privatekey.pem 1024
openssl req -new -x509 -key privatekey.pem -out publickey.cer -days 3650 \
        -subj "/C=DK/ST=Aalborg/L=Aalborg/O=pfrandsen/OU=Development/CN=pfrandsen.dk"
# optionally generate fingerprint
openssl x509 -in publickey.cer -noout -fingerprint > fingerprint| Field | Meaning | Example |
|---|---|---|
| /C= | Country | DK |
| /ST= | State | Aalborg |
| /L= | Location | Aalborg |
| /O= | Organization | pfrandsen |
| /OU= | Organizational Unit | Development |
| /CN= | Common Name | pfrandsen.dk |
Create Connected App
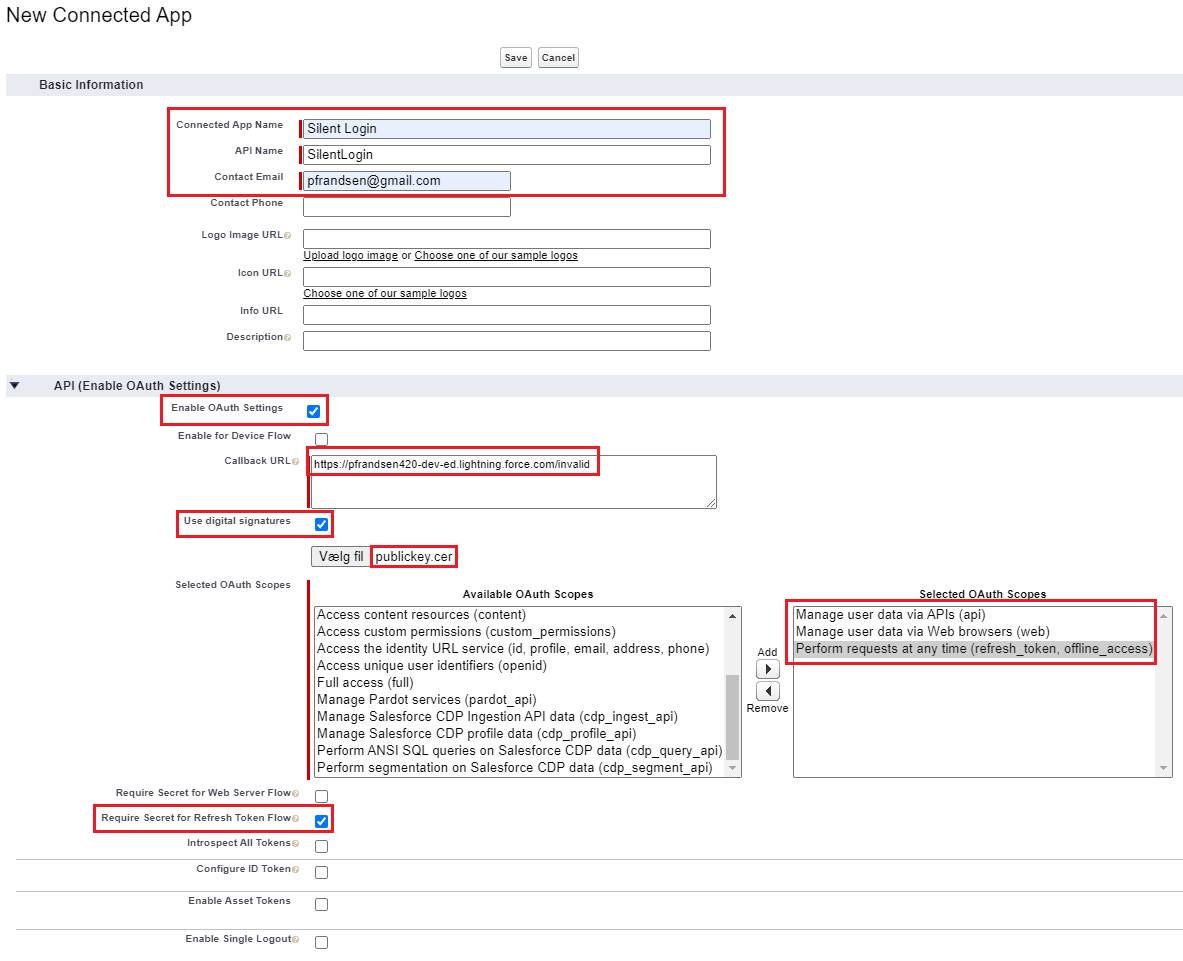
Go to: Setup -> Apps -> App Manager and click the New Connected App button.
Configure the new Connected App

Check these checkboxes
- Enable OAuth Settings
- Use digital signatures
- Require Secret for Refresh Token Flow
Enter a URL in the Callback URL field. It is not used but needs to be set.
Upload the certificate (publickey.cer) generated in the Generate Crypto Keys step above.
Select these OAuth scopes
- Manage user data via APIs (api)
- Manage user data via Web browsers (web)
- Perform requests at any time (refresh_token, offline_access)
Click the Save button to generate the Connected App. After clicking the button it will take a few minutes before the Connected App is ready. Just click Continue.

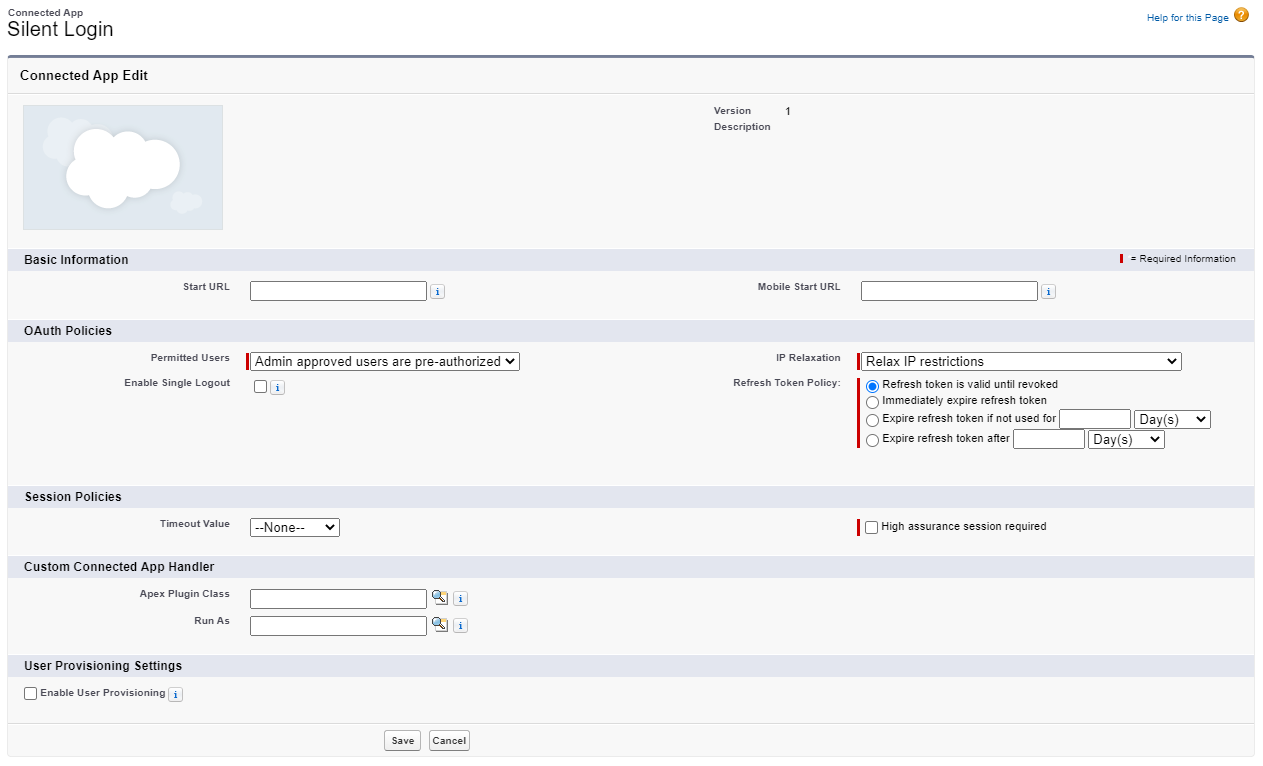
Set OAuth Policies
Go to: Setup -> Apps -> Connected Apps -> Mange Connected Apps and click edit next to the apps name.

Set the OAuth policies that are relevant for your scenarion (e.g., users are pre-authorized etc.) and click the Save button.
Get Client Id (and optionally secret)
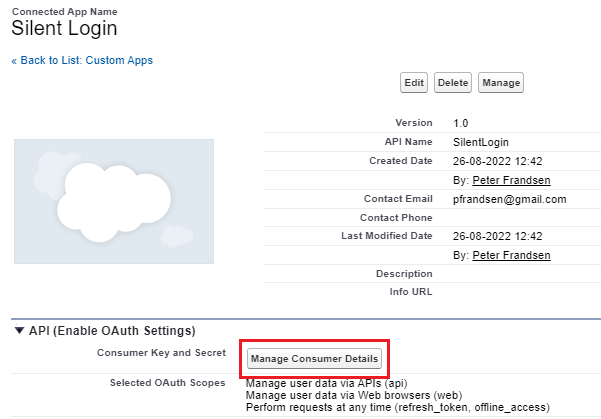
Go to: Go to: Setup -> Apps -> App Manager and click the View option in the dropdown list next to the Connected App name. Then click the Manage Consumer Details (you will be asked to confirm with two factor authentication).

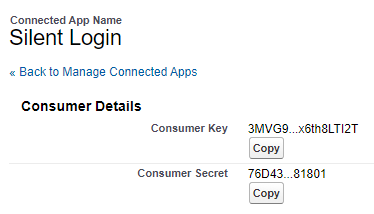
In the screen that is shown after two factor authentication you can see (and copy) the Consumer Key (Client Id in OAuth 2 terminology) and the Consumer Secret (Client Secret).

User Setup
Note: This technology allows the owner of the private key to impersonate users and it is therefore very important to protect this key. It was developed to be able to provide Single SingOn (SSO) between trusted applications and to be able to perform automated UI tests with different user profiles.
For the scenario where the Connected App is used as a Single SignOn solution for a trusted external application to e.g., deep link into a Experience Cloud site, it is recommended to add the Connected App to the Experience Cloud user profile(s). When you have a large number of users, as is often the case with Experience Cloud, permission sets are a real hassle as assignment to users are difficult to automate.
For the scenario where the Connected App is used to impersonate internal users, e.g., to run UI tests, it is recommended to add the Connected App to a Permission Set that is assigned to specific (test) users.
Example Code
The example below get access token for an Experience Cloud user in a Sandbox environment.
import * as sfLogin from 'salesforce-silent-login'

const clientId = '<consumer-key-from-Connected-App>' // clientId
const audience = 'https://<sandbox-name>.sandbox.my.site.com/<experience-cloud-site>'
const subject = '<experience-cloud-username>'
const data = sfLogin.getJwt(subject, clientId, audience, sfLogin.getCertInfo('<path-to-crypto-keys>'))
const tokenUrl = `https://<sandbox-name>.sandbox.my.site.com/<experience-cloud-site>${sfLogin.TOKEN_PATH}`
const tokenResponse = await sfLogin.getAccessToken(data.token, tokenUrl)
console.log('tokenResponse', tokenResponse)
The response will look like
{
  "access_token": "00D2...S9C",
  "sfdc_community_url": "https://<sandbox-name>.sandbox.my.site.com/<experience-cloud-site>",
  "sfdc_community_id": "0DB5p000000k9n9GAA",
  "scope": "web api",
  "instance_url": "https://<sandbox-name>.sandbox.my.salesforce.com",
  "id": "https://test.salesforce.com/id/00...AS/00...AK",
  "token_type": "Bearer",
  "ok": true
}
To access the Experience Cloud site open url like the ones given below.
const retUrl = '<relative-site-path>'
// use this to deep link into the Experience Clod site
const url = `${tokenResponse.sfdc_community_url}/secur/frontdoor.jsp?sid=${tokenResponse.access_token}&retURL=${retUrl}`
// use this to go to the default start page in the Experience Clod site
const main = `${tokenResponse.sfdc_community_url}/secur/frontdoor.jsp?sid=${tokenResponse.access_token}`