sheetah v0.3.4
Sheetah Node.js SDK
Sheetah is a Node.js library that streamlines the process of exporting Excel files. With the sheetah.io service, you can generate Excel files from your data and templates fast and effortlessly.
Installation
Install Sheetah using npm:
npm install sheetahGetting Started
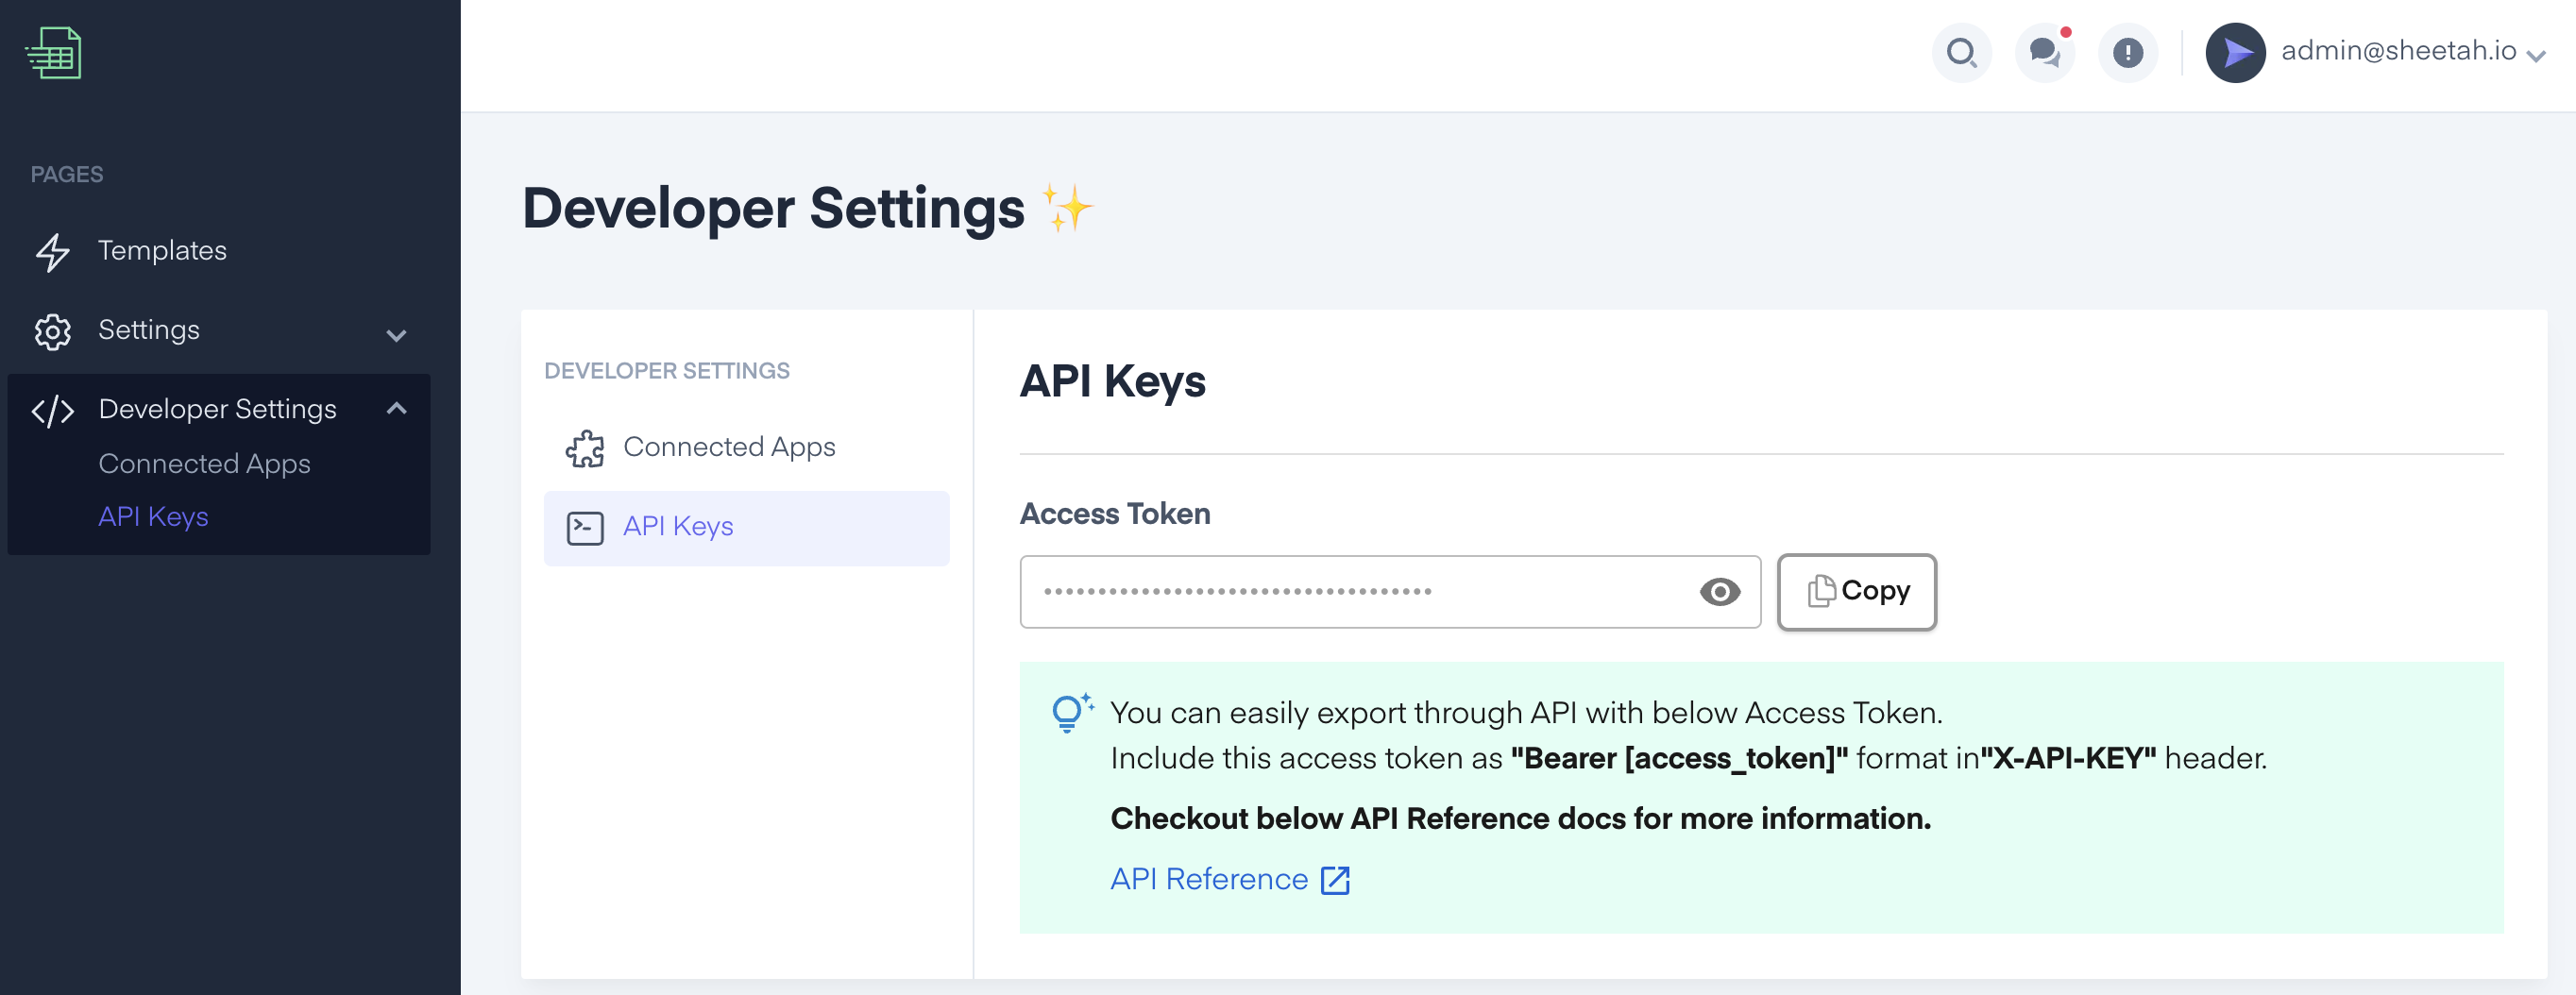
First, obtain your API key from the Developer Settings Page. Then use the following code to initialize Sheetah:
const Sheetah = require("sheetah");

const API_KEY = "YOUR_API_KEY";
const sheetah = new Sheetah(API_KEY);
Usage
Follow these steps to export an Excel file using Sheetah:
Step 1: Generation
1.1. Setting the Template ID
Specify the template by using setTemplateId method:
sheetah.setTemplateId(35);1.2. Setting the Tables
Add tables with the setTables method:
sheetah.setTables([
  {
    id: "table1",
    columns: [
      { name: "Column 1", filter: false, totalFormula: "none" },
      { name: "Column 2", filter: true, totalFormula: "average" },
    ],
    rows: [
      ["Row 1", "Data"],
      ["Row 2", "More Data"],
    ],
  },
]);
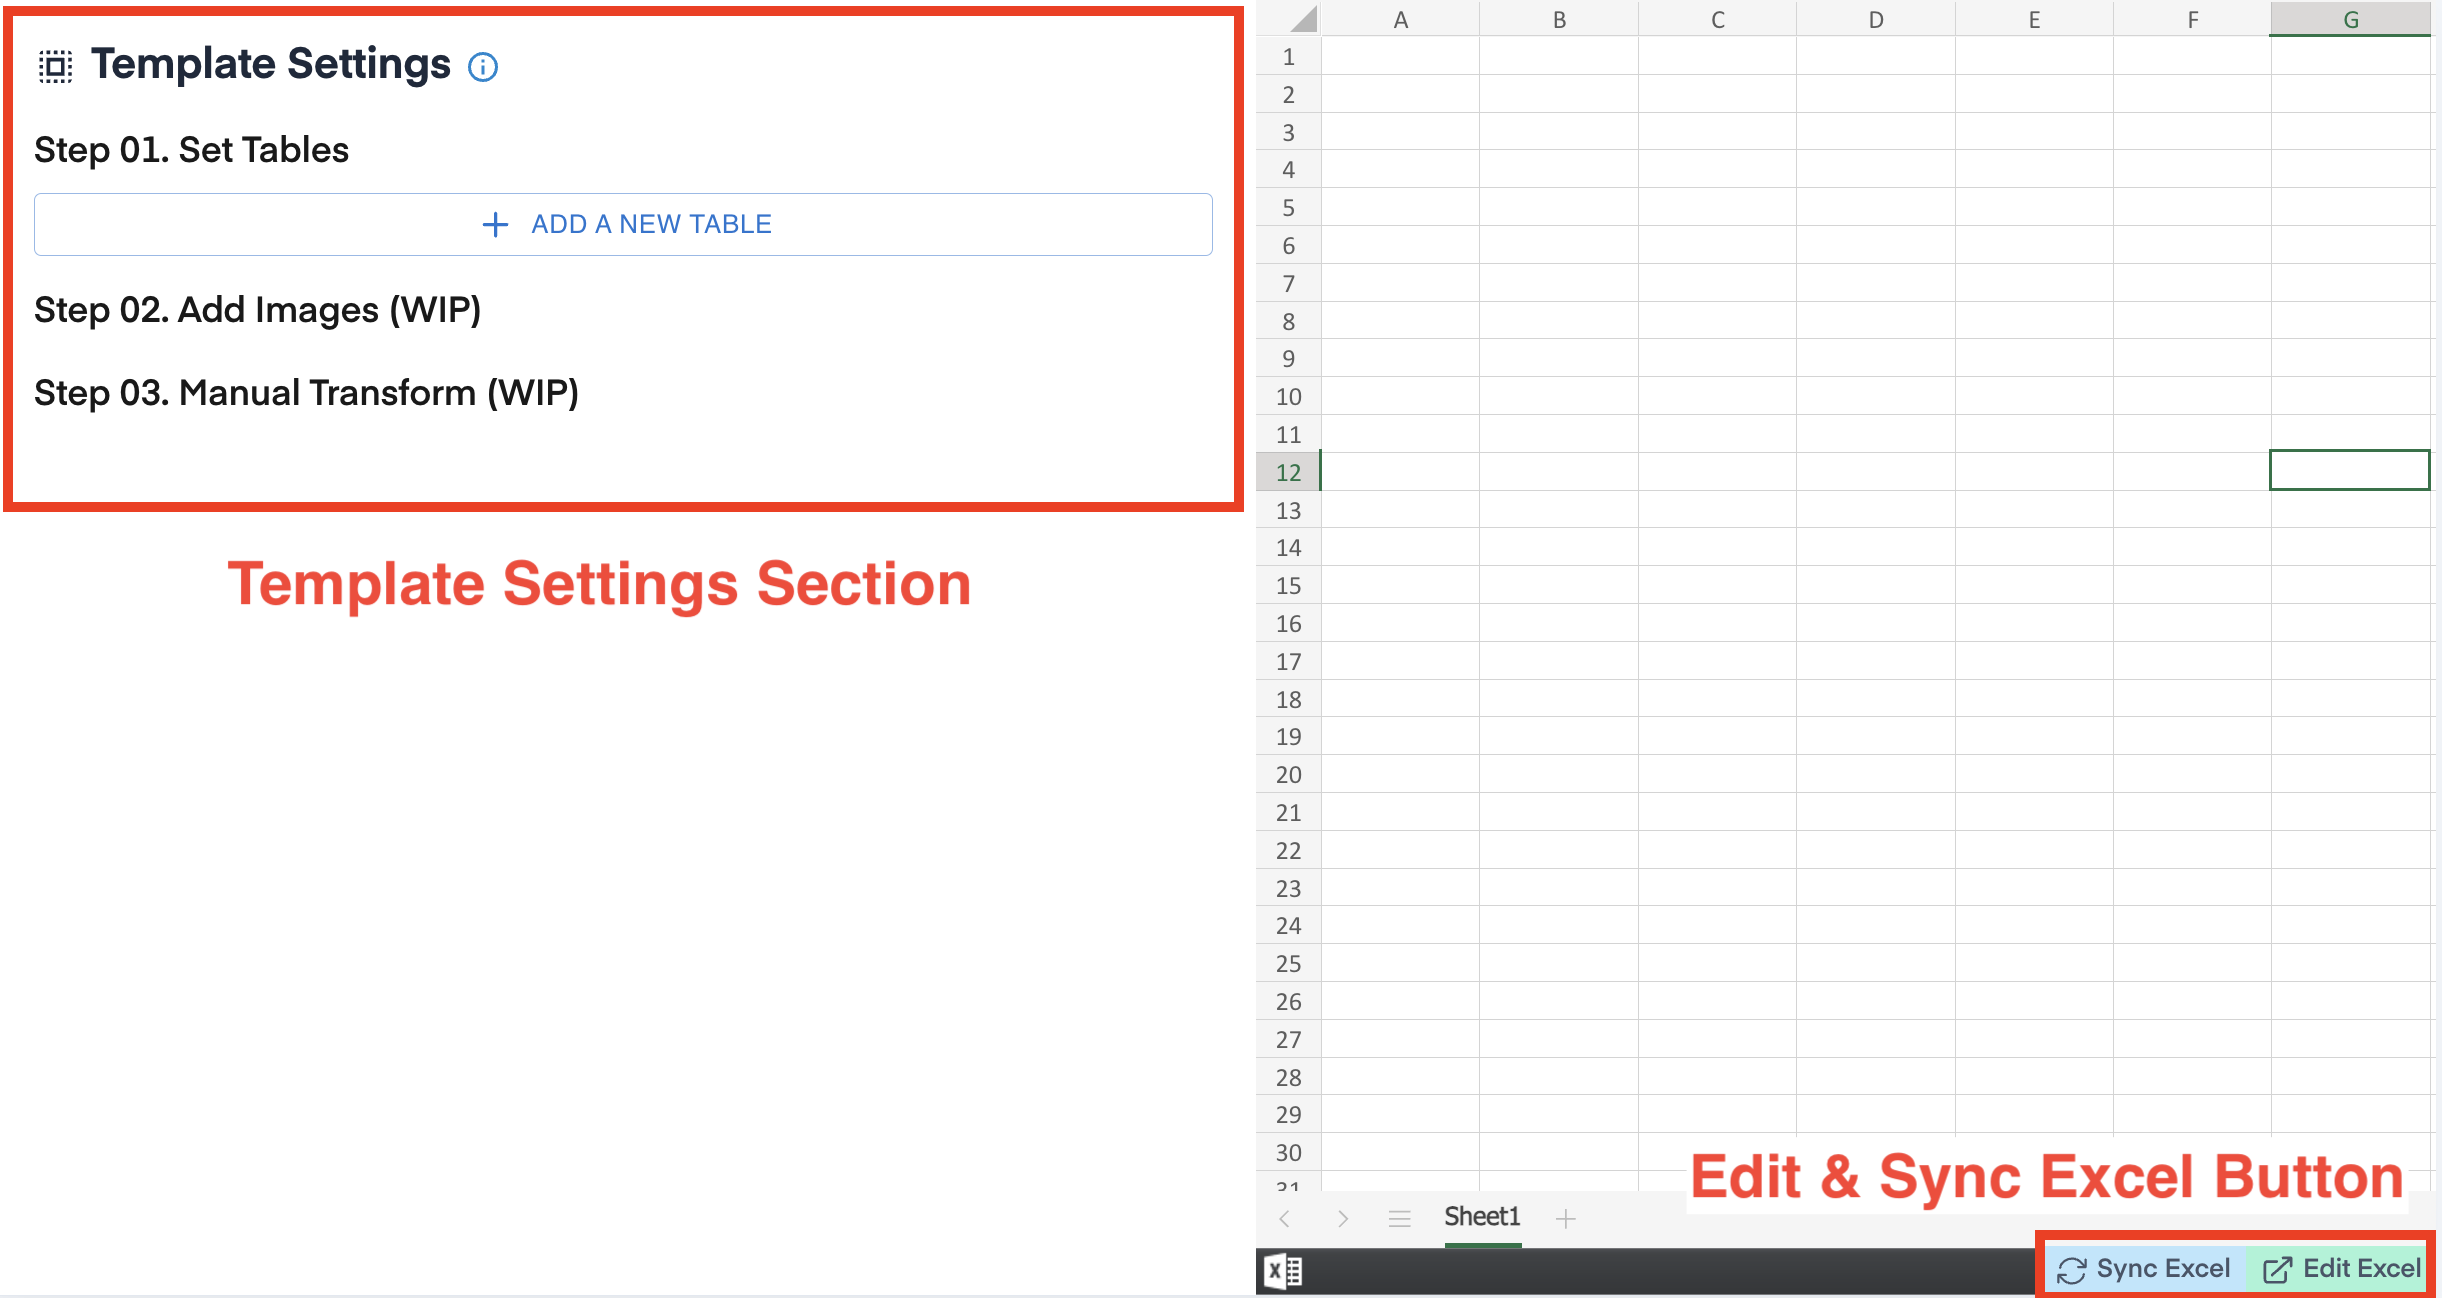
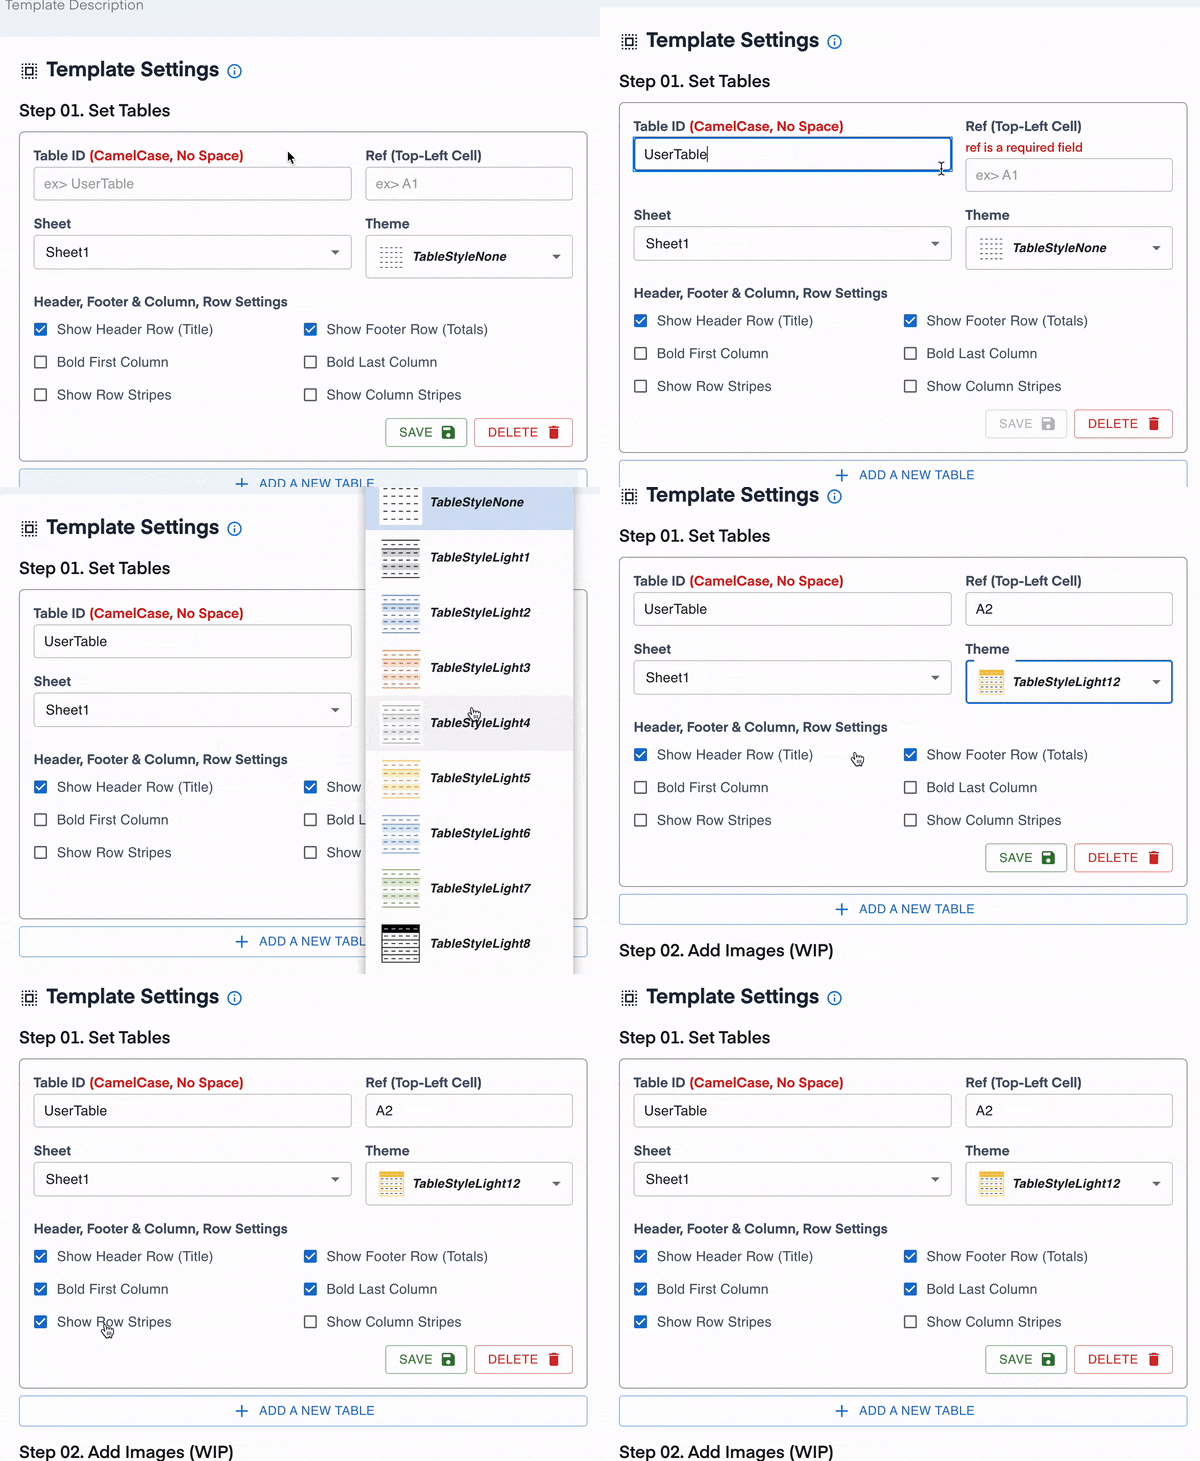
Table settings must be completed on the Template Settings Page.
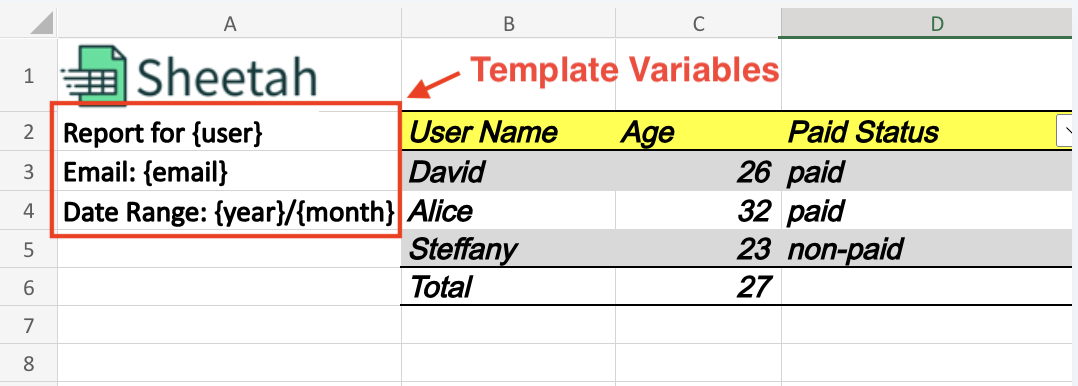
1.3. Setting Variables
Use the setVariables method to add dynamic data. This is useful for dynamic data insertion:
sheetah.setVariables({
  user: "Dave",
  email: "admin@example.com",
  year: "2019",
  month: "08",
});
1.4. Setting Sheets
Use the setSheets method to add sheets:
sheetah.setSheets([
  {
    id: 1,
    name: "Budget",
    directData: {
      A1: "This is cell A1 on Budget sheet",
    },
  },
  {
    id: 2,
    name: "Expenses",
    directData: {
      B2: "This is cell B2 on Expenses sheet",
    },
  },
]);
1.5. Setting Options
With setOptions you can specify filename, password, and expiration days:
sheetah.setOptions({
  filename: "Survey Results",
  password: "mypassword",
  expireInDays: 7,
});
Step 2: Export
2.1. Export to File URL
Export your file to a downloadable URL with exportExcelToFileUrl method:
(async () => {
  const result = await sheetah.exportExcelToFileUrl();

  if (result.message === "success") {
    console.log("Download URL:", result.fileUrl);
  } else {
    console.log("Download Failed:", result.message);
  }
})();
2.2. Export to Buffer
Alternatively, you can also export the sheet and get it as a byte array using exportExcelToBuffer method:
(async () => {
  const result = await sheetah.exportExcelToBuffer();

  if (result.buffer) {
    // Do something with result.buffer
  }
})();
2.3. Export to File
Lastly, you can also save the exported sheet as a local file:
(async () => {
  const result = await sheetah.exportExcelToFile("/path/to/file.xlsx");

  if (result.file) {
    console.log("Downloaded file =", result.file);
  }
})();
Contributing
Contributions are welcomed. If you are interested, please fork the repository and make your changes. A detailed description of your changes when making a PR is appreciated.
License
This project is licensed under the MIT License.
_Note: Don't forget to replace 'YOUR_API_KEY' with your actual API key when using the library.