steezy-api v1.9.0
STEEZY Studio
Installation
Use your terminal to run the commands below during the installation process.
Clone GitHub repository onto your local environment.
git clone git@github.com:steezyinc/fury.gitNavigate to
furyroot folder in your terminal and install npm modules.npm iCreate .env in your root folder. Get access to Steezy's shared LastPass space and copy the
fury-local-env-fileenvironment variables under theShared-STEEZY Engineeringspace to your new file.Run local development environment on
fury.npm run devAccess the application on
http://localhost:3001/graphql
GraphQL Playground Setup
If you haven't already, head over to the Sprite repo and follow the README.md to set it up locally.
Copy the following snippet and paste it into the
HTTP HEADERSsection of GraphQL Playground.
{
  "Authorization": "Bearer {TOKEN}",
  "apollographql-client-name": "gui",
  "apollographql-client-version": "1.0.0"
}- Replace
{TOKEN}with a firebase auth token (steps for obtaining your auth token are on Guru).
Git Workflow
We are following the source-control branching model of Github Flow
Go to root folder of your app and pull
mainbranch.git checkout main git pullCreate a new branch off of
main. Name your branches off of the ticket number from the project management board e.g.STZY-###orSTZY-###-what-you-are-working-ongit checkout -b STZY-###-some-titleCommit your files early and often with a descriptive message of WHY the commit was needed.
git add [FILE_NAME]

git commit -m "A clear descriptive message of WHY this commit was needed and NOT WHAT was implemented"
Push your branch to central respository.
git push -u origin HEADOnce you are finished with your task, go to Github and create a pull request from your new branch to
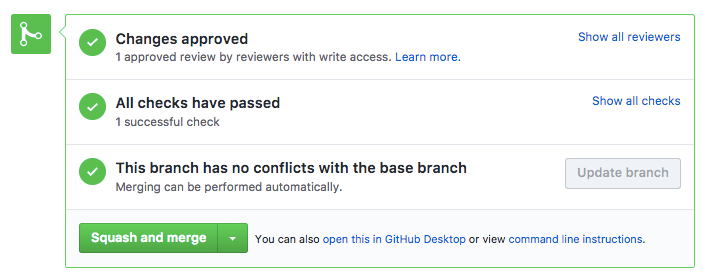
main. There must be a review and approval from at least ONE other developer (if no developers are available, it's up to the discretion of the author to self-review or wait)Once the pull request has been approved, be sure to
Squash and mergeyour pull request into main. Adhere to AngularJS's commit message convention and provide a short title of the commit with a description of the changes (Be as detailed as possible with the description. These notes will automatically be compiled into the release notes). Don't forget to prefix your commit title with a type. This helps the package semantic-release automate version management and release notes. e.g.
e.g. feat(STZY-###): Adding new featureorfix(STZY-###): remediates this bug
Deployment Process
View build workflows on CircleCI: https://app.circleci.com/pipelines/github/steezyinc
Testing Environment
Located @ https://dev-api.steezystud.io/graphql
- CircleCI will automatically deploy to the testing environment whenever there is a commit or merge onto
main.
Production
Deploys to production are manual and are done through CircleCI.
Go to CircleCI Dashboard.
Click on the CircleCI job that corresponds to your commit.
Inside the workflow there will be a job labeled
approve-productionwith a pause button. Click this button to manually approve build promotion from testing to staging.
Hotfixes
When subscribing to the Github Flow hotfixes are handled just like features. Since every commit to main is production-ready, hotfixes can just be branched off of main, fixed, PR reviewed, squash & merged, and deployed to production after QA on testing and staging. Don't forget to prefix the commit title with fix: commit title and a description of what was updated so that patch releases to our app is automatically bumped and release notes updated.
5 years ago