switchenv v1.2.1
switchenv
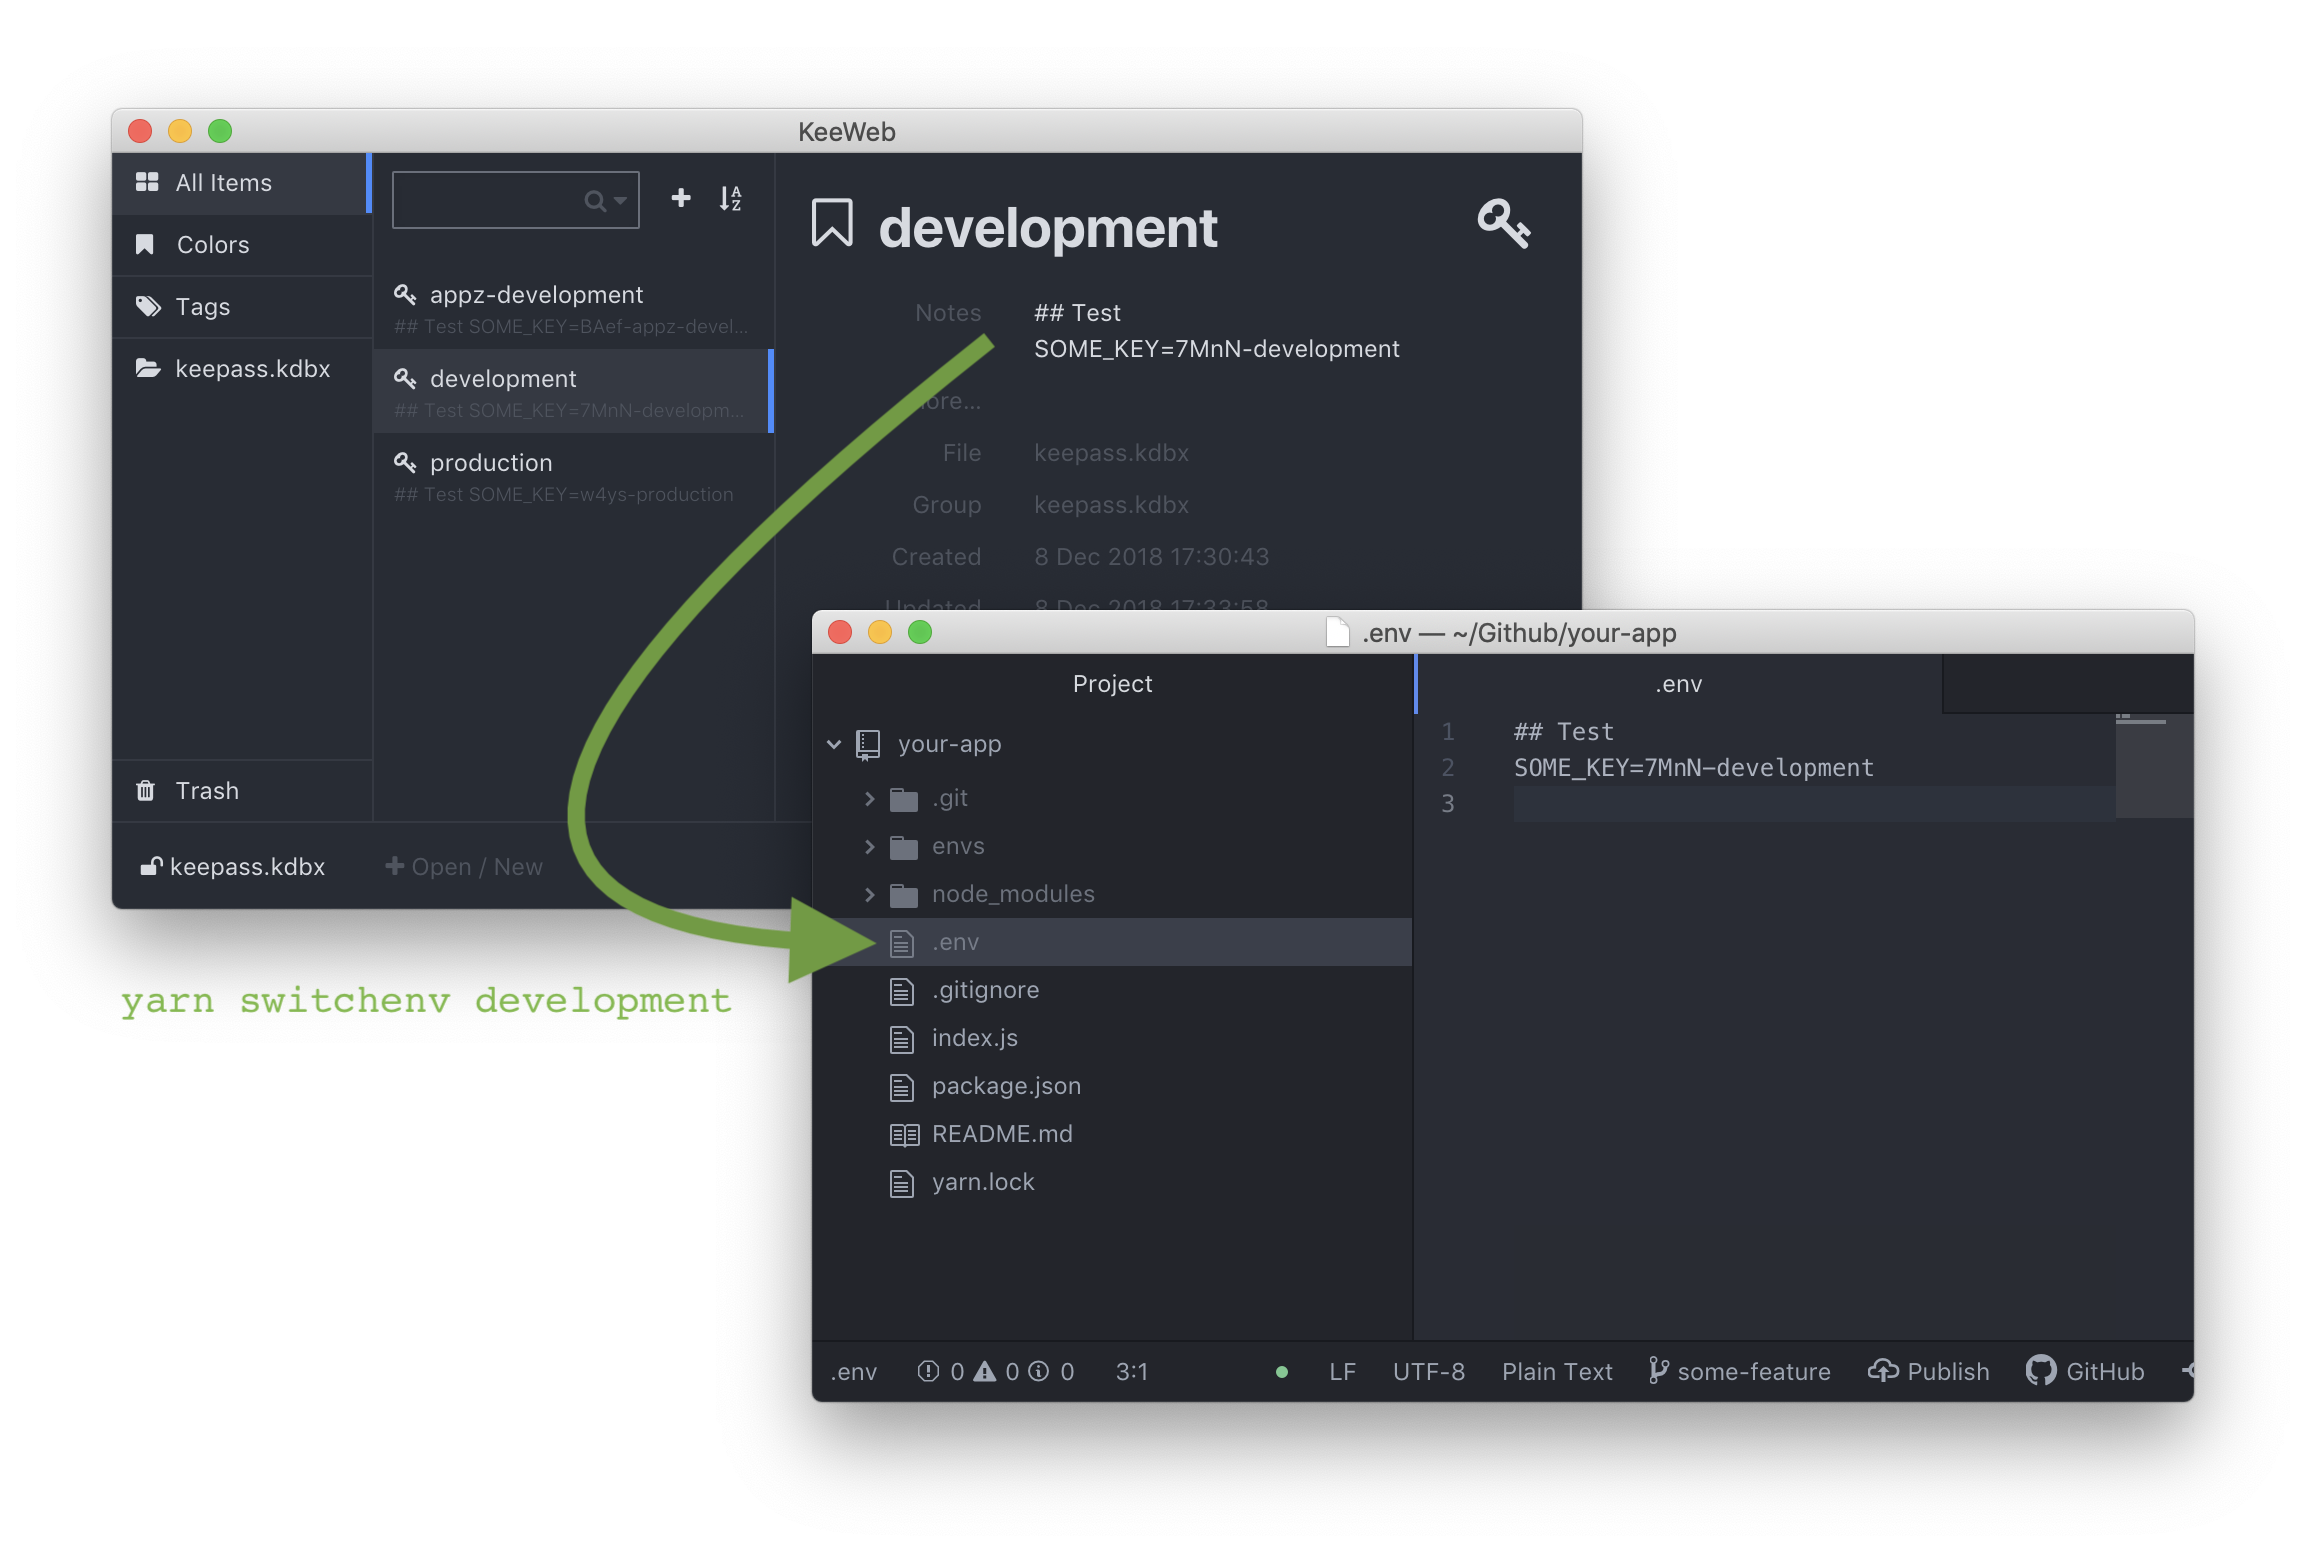
Command line tool to quickly switch .env file from Keepass entries (content from the Notes field)

Install
yarn add -D switchenv
or
npm install -D switchenv
Usage
You need to go through a one time setup per project. That will take you a few minutes. Afterwards you'll be able to run this command to change your .env file.
yarn switchenv development
or
npm run switchenv development
It will read and decrypt the keepass file and look for an entry with the title: development. The Notes of that entry will overwrite the .env file.
Nota Bene: It will overwrite the .env file without warning!
Setup
You need to do this setup once per project.
- Go to your project folder where the
package.jsonresides. - Create a directory to store your keepass file and keyfile in.
Add the created directory to your .gitignore file!!
NB: Your keepass and key file should never be committed!
In that directory create a keepass file.
- Create a new entry in the keepass file for each environment.
- The Title field of the entry should be the name of your environment. Use names like development, staging, production.
- The Notes field of the entry is the desired contents of your .env file for that environment.
- Generate a key file for the keepass file. Preferably store it in the same directory as your keepass file.
- In your app's
package.jsonfile add aswitchenvcommand in thescriptssection.
{
  ...
  "scripts": {
    "switchenv": "node ./node_modules/switchenv --source /envs/keepass.kdbx --key /envs/keyfile"
  },
  ...
}
In this example
--source /envs/keepass.kdbxis the path to the keepass file.--key /envs/keyfileis the path to the key file.
Optionally
--target /config.jsif you want to write to something else than /.env--title .env-{title}-backendif you have longer entry titles like.env-development-backendinstead of justdevelopment. In this case, you can still runyarn switchenv development