video-streaming-webcomponent-hls.js v1.0.0
Video Streaming - Web Component
Web component to do video streaming implementing the hls.js library.

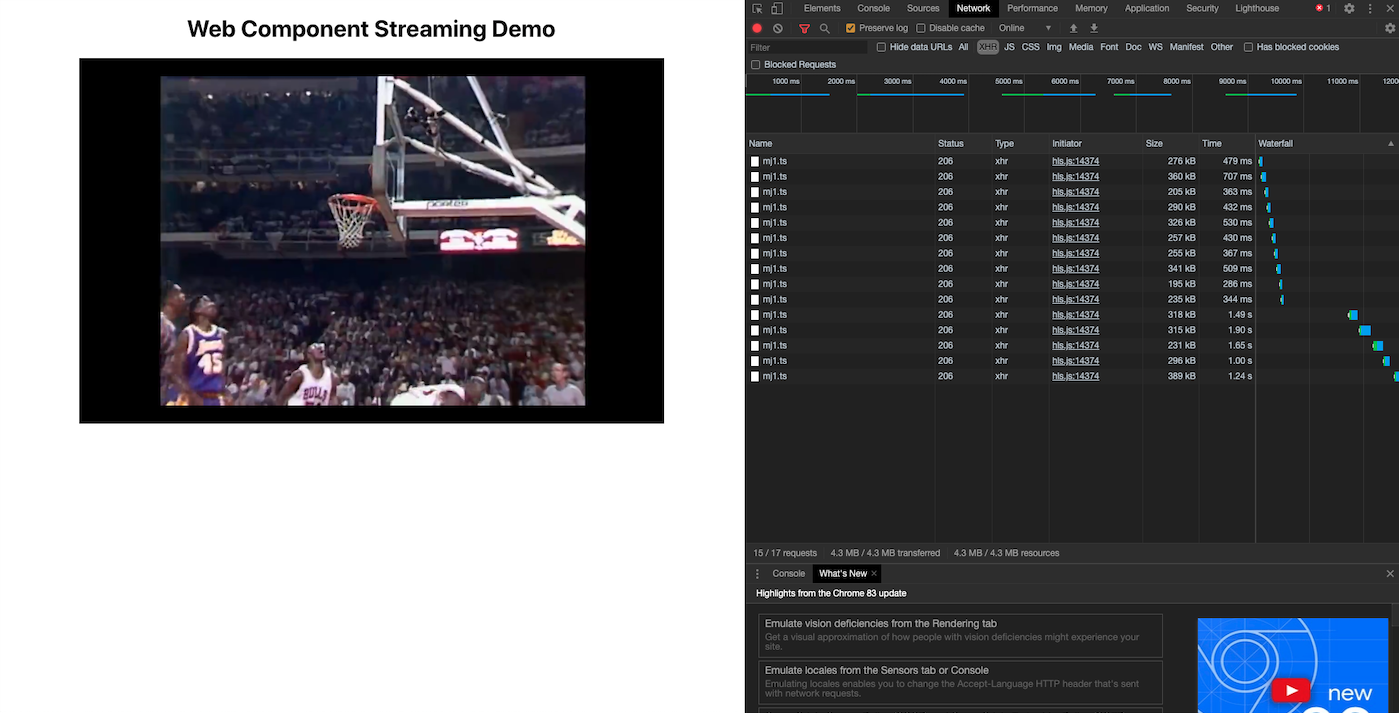
The code for the page above :
<!DOCTYPE html>
<html lang="en">
	<head>
		<meta charset="UTF-8" />

		//IMPORT
		<script src="player.js"></script>
		<script src="https://cdn.jsdelivr.net/npm/hls.js@0.13.2/dist/hls.min.js"></script>

		<meta name="viewport" content="width=device-width, initial-scale=1.0" />
		<title>Web Component</title>
	</head>
	<body>
		<h1>Web Component Streaming Demo</h1>

		//WEB COMPONENT
		<player-videostreaming
			id="video-MichealJordan"
			url="https://webcomponent-streaming-demo.herokuapp.com/assets/sample1/sample.m3u8"
			widthChoice="800"
			heightChoice="500"
			autoPlay="true"
			backgroundColor="#000"
		>
		</player-videostreaming>
	</body>
</html>
Live demo here : https://webcomponent-streaming-demo.herokuapp.com/
Summary :
1) What's video streaming ? 📺
2) What's the Hls.js library ? 🗂
3) What are web components ? 🧱
4) How to use the Video Streaming Web Component ? 🧾
ps : feel free to jump right into part 4 if you already know all this stuff and you are only here to use the web component.
1) What's video streaming ? 📺
Video streaming has become more and more common, and now represents a norm in the internet.
Whithout video streaming you'd have to wait several minutes for your navigator to load the entire video file before ever being able to play it. Which could sometimes be very long given the fact that the majority of all the videos in the internet are in high definition and weigh more than several gigabytes.
When you stream a video you don't have to load the entire file. You give your navigator the time to load a small portion of the video and as you progress in your viewing the navigator gets the time to load more 'chunks' from this video, which gives you the time to view the entire content whitout being interrupted.
2) What's the Hls.js library 🗂
Of course it would be very dreadful to code the entire video streaming feature when there are already very good solutions out-there.
We will use the hls.js library which is an open-source solution used by many big video companies like : 'Dailymotion', 'TED talks', 'Adult swim' to name a few.
This library is very useful, so you might think it accepts your regular .mp4 file. But it does not. It only accepts .m3u8 which might be new for some of you, at least it personnally was.
As it told you in the first part, video streaming consist on playing different chunks of a video seperatly so that the user do not have to wait for the entire thing to load. So given this principle, our video file will be segmented into different chunks.
So that's what a .m3u8 file is. It's a file that gives the player timestamps on which chunk to play at which moment of the video.
Example of a .m3u8 file :
#EXTM3U
#EXT-X-VERSION:3
#EXT-X-TARGETDURATION:10
#EXT-X-MEDIA-SEQUENCE:0
#EXTINF:8.400000,
sample0.ts
#EXTINF:4.560000,
sample1.ts
#EXTINF:3.120000,
sample2.ts
#EXTINF:5.640000,
sample3.ts
#EXTINF:1.880000,
sample4.ts
#EXTINF:2.160000,
#EXT-X-ENDLIST
So in order to use the hls.js library you will have to convert your regular .mp4 file into a .m3u8 file. We will teach you how to do it later.
3) What are web components ? 🧱
Web components are really useful for web developpers as they are :
- Easily implementable.
- Can be used and re-used from one project to another.
- Written in native, so you don't have to install anything to use them, they are written in vanilla javascript.
Web components are like if you were able to write your own HTML Tag.
With polymorphism all the web components inherite from the HTMLElement class. So it means that all the class that inherite from this tag are web components.
So you can create a project entirely based on web components. Web components that were maybe created by other users.
Our video streaming web component is called player.js and you can see the code for yourself and notice that it inherite from the HTMLElement class.
The whole purpose of this video streaming component is to allow you to easily stream videos by only writing this in your HTML <body> :
<!DOCTYPE html>
<html lang="en">
	<head>
		<meta charset="UTF-8" />

		//VERY IMPORTANT : IMPORT THE LIBRARY AND THE PLAYER WEBCOMPONENT
		<script src="player.js"></script> //PLAYER VIDEO STREAMING COMPONENT
		<script src="https://cdn.jsdelivr.net/npm/hls.js@0.13.2/dist/hls.min.js"></script> //HLS.JS LIBRARY
		//VERY IMPORTANT : IMPORT THE LIBRARY AND THE PLAYER WEBCOMPONENT

		<meta name="viewport" content="width=device-width, initial-scale=1.0" />
		<title>Web Component</title>
	</head>
	<body>
		//WEB COMPONENT
		<player-videostreaming
		    id="video1"
			url="https://test-streams.mux.dev/x36xhzz/x36xhzz.m3u8"
			widthChoice="800"
			heightChoice="500"
			autoPlay="true"
			backgroundColor="#000"
		>
		</player-videostreaming>
		//WEB COMPONENT
	</body>
</html>
4) How to use the Video Streaming Web Component ? 🧾
Five easy steps to follow in order to stream your video :
- Import the library and our player-videostreaming webcomponent to your HTML file
- Write the player-videostreaming component and see if everything works 🐇
- Convert your .mp4 file into a .m3u8 file
- Learn how to create an URL to access your .m3u8 file
- Change the URL atributes in your web-component in order to stream your own video
4-1 ) Import the library and our player-videostreaming webcomponent to your HTML file
To make an import in good old HTML you just have to add <script src: > tags
- Import the hls.js library :
<!DOCTYPE html>
<html lang="en">
	<head>
		<meta charset="UTF-8" />
		//IMPORT THE HLS.JS LIBRARY HERE :
		<script src="https://cdn.jsdelivr.net/npm/hls.js@0.13.2/dist/hls.min.js"></script> //HLS.JS LIBRARY

		<meta name="viewport" content="width=device-width, initial-scale=1.0" />
		<title>Web Component</title>
	</head>
	<body>
	</body>
</html>
the url link to put between the script tags :
https://cdn.jsdelivr.net/npm/hls.js@0.13.2/dist/hls.min.js- Import the player.js webcomponent :
For this one you will have to download the 'player.js' from the github repo, and put this file into your project folder. Then to import it you'll simply need to specify the path leading to this file.
<!DOCTYPE html>
<html lang="en">
	<head>
		<meta charset="UTF-8" />

		//IMPORT THE HLS.JS LIBRARY HERE :
		<script src="https://cdn.jsdelivr.net/npm/hls.js@0.13.2/dist/hls.min.js"></script> //HLS.JS LIBRARY
		//IMPORT THE PLAYER.JS WEBCOMPONENT :
		<script src="player.js"></script>

		<meta name="viewport" content="width=device-width, initial-scale=1.0" />
		<title>Web Component</title>
	</head>
	<body>
	</body>
</html>
ps : A solution to make the Player.js file accessible by an URL link will arrive soon 😉
Congrats we've imported everything we need 👏
4-2) Write the player-videostreaming component and see if everything works 🐇
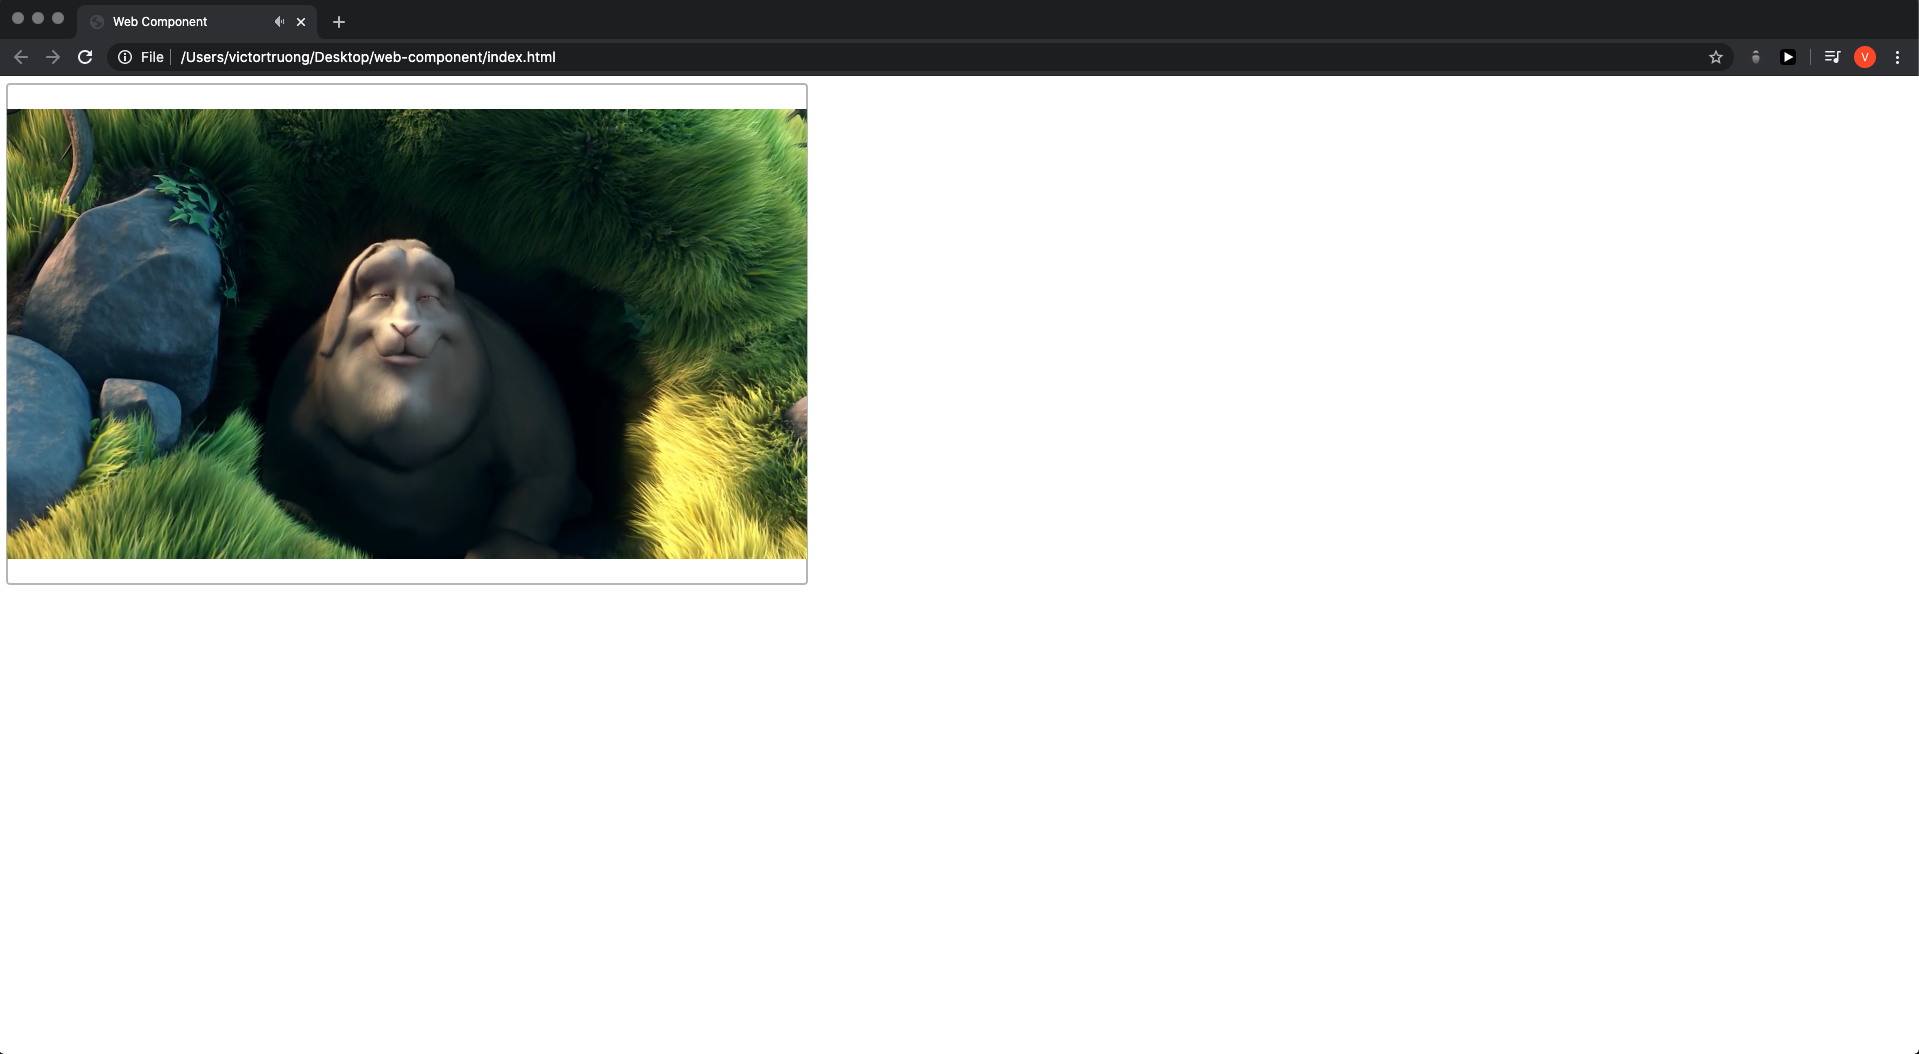
Now we need to assure ourselves that everything works. To check if everything is working you'll need to be able to stream on your page the video of a rabbit.
What you will need to have by the end :

- Use the webomponent that you have imported :
<!DOCTYPE html>
<html lang="en">
	<head>
		...
	</head>
	<body>
		//Web component :
		<player-videostreaming>
		</player-videostreaming>

	</body>
</html>- Fill it with all the parameters that are necessary :
<!DOCTYPE html>
<html lang="en">
	<head>
		...
	</head>
	<body>
		//Web component :
		//the url param is the url path leading to the rabbit video.
		<player-videostreaming
			id="video-rabbit"
			url="https://test-streams.mux.dev/x36xhzz/x36xhzz.m3u8"
			widthChoice="800"
			heightChoice="500"
			autoPlay="true"
			backgroundColor="#000"
		>
		</player-videostreaming>

	</body>
</html>
TADA 🎉 It works even in JavaEE :
.png)
(of course if you want to properly center the video in the middle of the page change the properties in the css)
Congrats 👏 Now that we made sure that everything worked it's time to do the same with a video of our own.
4-3) Convert your .mp4 file into a .m3u8 file
There are many ways to convert a .mp4 file to a .m3u8 file. The way we are going to do it, is by intalling ffmpeg. It's not the easiest way but we think it's the most realiable way as some file converting softwares have file size limits.
How you'll install ffmpeg will be slightly different if you are using a mac or windows device. I owe a mac so unfortunantly for windows users you will only be able to rely on this video : https://www.youtube.com/watch?v=S97gTZa_rCo&t=145s
but for mac users you'll simply have to type those command on your terminal :
/bin/bash -c "$(curl -fsSL https://raw.githubusercontent.com/Homebrew/install/master/install.sh)"then this one :
brew install ffmpegto verify if everything is installed :
ffmpegNow that we have installed everything, windows and mac.os users should be able to use ffmpeg to convert .mp4 file into .m3u8 file.
With your terminal go to the file where your mp4 video is located. Then run this command :
(Change 'sample.mp4' by the name of your .mp4 file)
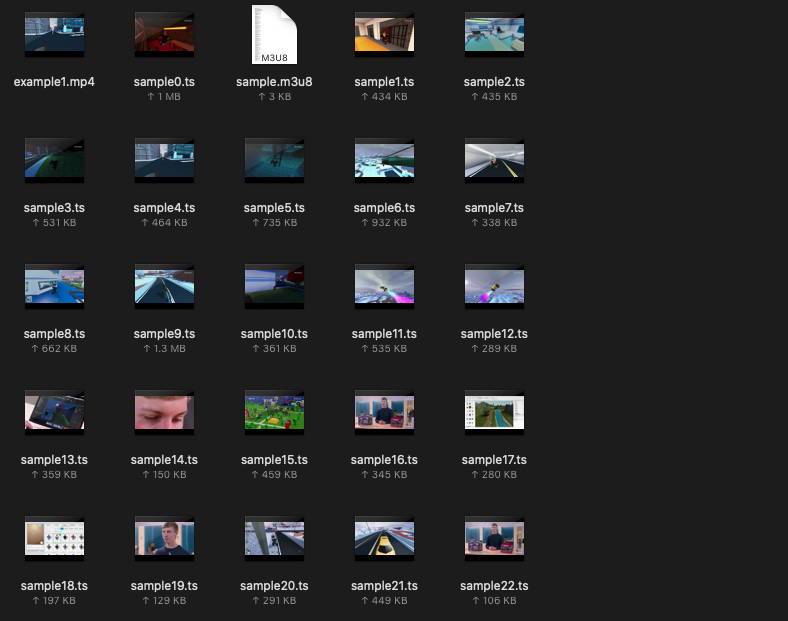
ffmpeg -i sample.mp4 -profile:v baseline -level 3.0 -s 840x560 -start_number 0 -hls_list_size 0 -f hls sample.m3u8You should see something like this in your files :

ffmpeg chunked your video into different .ts files and left you with a .m3u8 file.
If you got the same thing as above that's perfect.
4-4) Learn how to create an URL to access your .m3u8 file
Now that our .m3u8 file and all our .ts chunks are ready we need to put them in your project in a folder in our project. I personnally called this folder 'assets'.
Everything can only work if you're running your code on a server either online or local.
the url should be written this way :
http://{the-name-of-your-server}/{the-name-of-your-project-folder}/{the-path-that-leads-to-your-m3u8-file}My url for my example is this one :
http://localhost:8080/PROJET/assets/videos/sample.m3u8Another example of url for a deployed website is :
https://webcomponent-streaming-demo.herokuapp.com/assets/sample1/sample.m3u84-5) Change the URL atributes in your web-component in order to stream your own video
Now we just have to put our last url from the last step :
<player-videostreaming
	id = 'video1'
	url = 'http://localhost:8080/PROJET/assets/videos/sample.m3u8'
	widthChoice = 800
	heightChoice = 500
	autoPlay = true
	backgroundColor = '#000'>
</player-videostreaming>
And there it is !
.png)
Congrats you've made it 🎉🎉🎉🎉🎉🎉
ps : If you have two different videos on your page don't forget to change the id of both
ps : if you use react and want a react component version of this code.
5 years ago