
@eeacms/volto-toolbar-actions

Volto Toolbar extra actions for Site Administrators
Features
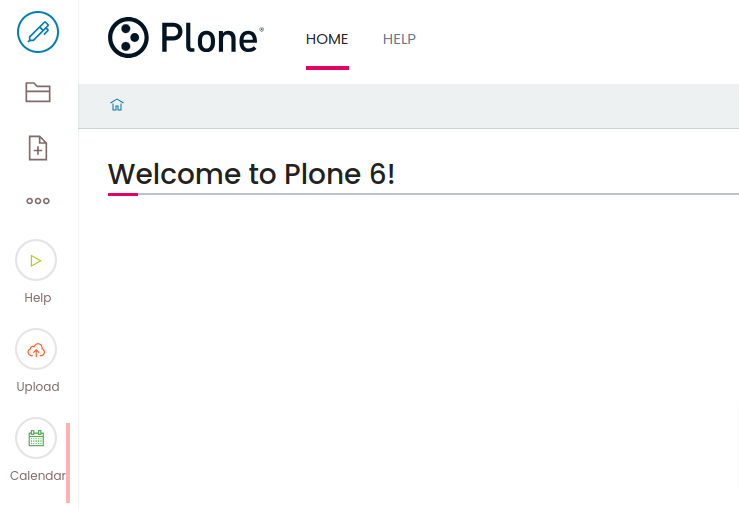
Demo - How to add a toolbar action via ZMI
- Go to ZMI > portal_actions
- Add a new CMF Action Category called toolbar_top_actions or toolbar_bottom_actions
- Within this category add a new CMF Action called help
- Edit help
- Title:
Help - URL (Expression):
string:${portal_url}/help - Icon (Expression)
string:play circular orange largeSee Semantic UI Icon for more icons variations. Aditionally you can provide:no-title- to hide the action titleno-icon- to hide the action icon
- Condition
python:'/help' not in plone_context_state.object_url()See ContextState available methods - Permissions
Modify portal content
- Title:
Upgrade
Upgrading to 4.x
This version requires
Volto 18orVolto 19and Node.js 22.
The add-on keeps the same API, so upgrading from 3.x on Volto 18 needs no code changes. The release adds Volto 19 support and moves the repository to the Volto 19 layout, where the published package lives in packages/volto-toolbar-actions.
Breaking changes
- Node.js 22 or newer is required (
engines.node >= 22), 3.x declared no engine. - React 18 is required. The package declares
reactandreact-domas^18.2.0peers, 3.x declared no peers. - The package no longer ships the Jest setup.
jest-addon.config.jsandjest.setup.jswere removed in favour of Vitest, so a Volto 18 project that still runs the Jest harness has to keep its own copy.
Requirements
Backend
Frontend
- Node.js:
>=22.0.0
Installation
Make sure you have a Plone backend up-and-running at http://localhost:8080/Plone
docker compose up backendStart Volto frontend
If you already have a volto project, just update
package.json:"dependencies": { "@eeacms/volto-toolbar-actions": "*" }and
volto.config.js:const addons = ['@eeacms/volto-toolbar-actions'];If not, create one with Cookieplone, as recommended by the official Plone documentation for Volto 18+:
uvx cookieplone project
cd project-title
Install or update dependencies, then start the project:
make installFor a Cookieplone project, start the backend and frontend in separate terminals:
make backend-start
make frontend-start
Go to http://localhost:3000
Happy editing!
License
See LICENSE.md for details.