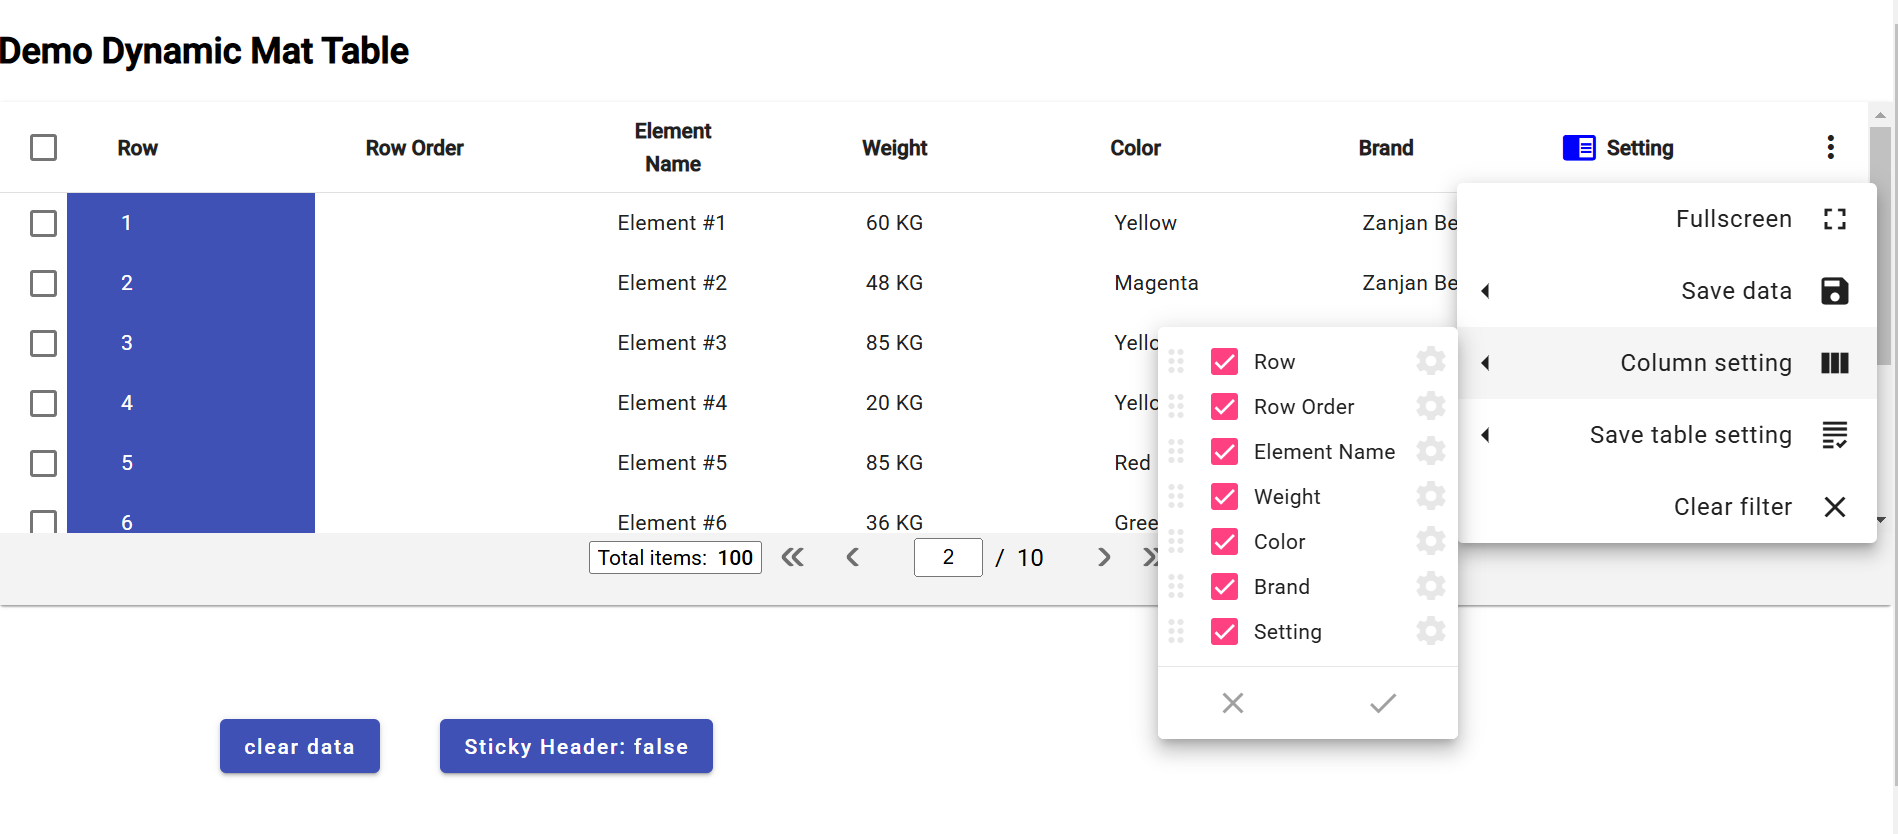
@martintrajanovski/dynamic-mat-table v1.6.2
Dynamic Table for Angular

Online Demo
You can view the table in stackblitz here:
https://stackblitz.com/edit/angular-ivy-wge9lp
version (1.3.2):
https://stackblitz.com/edit/angular-ivy-s4ne42
A full demo can be found on the github repository.
Getting Started
1. First you need to install with npm:
Write npm i @martintrajanovski/dynamic-mat-table in your terminal to install the package
2. After installation you need to include DynamicMatTableModule in your module imports:
import { DynamicMatTableModule } from '@martintrajanovski/dynamic-mat-table';
...
imports: [
    DynamicMatTableModule
  ],
...
How Use The Table
Creating the table html element
first you need to write the html element like so:
<dynamic-mat-table tableName="my-table" [columns]="columns" [setting]="setting" [dataSource]="dataSource$"></dynamic-mat-table>Full Specification:
<dynamic-mat-table tableName="demo_table" [scrollStrategyType]="scrollStrategyType" [contextMenuItems]="contextMenuItems" [showReload]="showReloadData" [direction]="direction" [expandComponent]="expandComponent" [rowHeight]="rowHeight" [columns]="fields" [pending]="pending" [setting]="setting" [sticky]="stickyHeader" [dataSource]="dataSource$" [pagingMode]="paginationMode" [pagination]="pagination" [showNoData]="showNoData" [printConfig]="printConfig" [rowSelectionMode]="rowSelectionMode" [rowSelectionModel]="selectionModel" [showProgress]="showProgress" [rowContextMenuItems]="contextMenuItems" (onTableEvent)="tableEvent_onClick($event)" (onRowEvent)="rowEvent_onClick($event)" [class.conditional-class]="conditinalClass" (settingChange)="table_onChangeSetting($event)" (rowSelectionChange)="table_onRowSelectionChange($event)"> </dynamic-mat-table>by binding the properties you can set columns, set the table settings , set a datasource and more to the table
Setting the columns
to set the columns you first need to import TableField and creat a porpery that takes this type as an arry like so:
import { TableField } from '@martintrajanovski/dynamic-mat-table'
...
export class MyTable {
  columns:TableField<any>[] = [];
}
then you can set each column as an object of this arry
...
const colusmnsConfig:TableField<any>[] = [
  {
    name: 'column-one',  //this is a key for data
    header: 'column-one', //this is the name displayed
    type:'number', //type of the data
  },
  {
    name:'column-two',
    header:'column-two',
    type:'number',
  },
  ...
];
The full column type is defined as follow:
export interface TableField<R extends TableRow> extends AbstractField {
  classNames?: string;
  rowClass?: string | AtClassFunc;
  customSortFunction?: AtSortFunc<R>;
  customFilterFunction?: AtSortFunc<R>;
  toPrint?: ToPrint;
  toExport?: ToExport;
}
export interface AbstractField {
  index?: number;
  name: string; //data  key
  type?: FieldType; //data type
  width?: number; //width of the column
  header?: string; //displayed name of the column
  isKey?: boolean; // turn column in to unique key column
  inlineEdit?: boolean; // allows column to have inline edit
  display?: FieldDisplay; // allow column to be hidden or visible
  sticky?: FieldSticky; // allow column to stick in horizontal scrolling
  filter?: FieldFilter; // sets data filtering mode(none: hidden filter button)
  sort?: FieldSort; // set data sorting mode( none: hidden sort button)
  cellClass?: string; // set a class for column cells
  cellStyle?: any; //set a style for column cells
  icon?: string; // displays a mat-icon in column header
  iconColor?: string; // set a color for column header icon
  dynamicCellComponent?: any; // set the component used in column cells
  draggable?: boolean; // allows column to be rearranged with drag and drop
  // filterable?: boolean; // allows column to filter its data (shows filter button)
  clickable?: boolean; // allows column to have a function when clicked
  clickType?: "cell" | "label" | "custom"; // sets the click ability region
  printable?: boolean; // allows column to print its data
  exportable?: boolean; // allows column data to be exported
  enableContextMenu?: boolean; // enables context menu in columns
  rowSelectable?: boolean; // Coming soon...
  footer?: FooterCell[]; // creates footers for column
  cellEllipsisRow?: number; // maximum number of cells shown before ellipses
  cellTooltipEnable?: boolean; // allows column cell to have a tooltip
  headerEllipsisRow?: number; // maximum number of rows shown in column before ellipses
  headerTooltipEnable?: boolean; // allows column header to have a tooltip
  option?: any; // a spacial object for storing data state (like saving in inline edit)
  categoryData?: any[]; // Coming soon...
  toString?: (column: TableField<any>, row: TableRow) => string; // turns column data to a string (used mostly for exporting data)
  customSort?: (column: TableField<any>, row: any) => string; // allows you customize data sorting in column
}
Ceateing a data source
after setting the columns you need to set the data you want to use in your table.
Your data source must be a BehaviourSubject<any[]>
so in order to creat a data source you must do so like wise:
import { BehaviourSubject } from 'rx-js';
...
type dataType = {...};

const data:dataType[] = [
  { "row": 1, "name": "Element #4", "weight": "65 KG", "color": "Magenta", "brand": "Zanjan Benz", "type": "Van" }, ...];
...
export class MyTable implements OnInit {

  public dataSource$: BehaviorSubject<any[]>;

  constructor(){}

  ngOnInit(){
    this.dataSource$.next(data);
  }

}
Configureing the table settings
next thing is configuring the table settings.
to do so we need to create a property that takes the TableSetting type like so:
import { TableSetting } from '@martintrajanovski/dynamic-mat-table';
...
export class MyTable {
  settings:TableSettings = {};
}
then we can set the values of this object to customize our table.
For Exmaple:
const tableSettinsConfig: TableSetting = {
  direction: "ltr",
  visibleActionMenu: actionMenu,
  rowStyle: {
    "background-color": "#70e181",
    color: "ffffff",
  },
  alternativeRowStyle: {
    "background-color": "afafaf",
    color: "55fab3",
  },
  autoHeight: true,
};
the full interface is described below:
export interface TableSetting {
  direction?: Direction; // sets the directopn of the table
  columnSetting?: AbstractField[]; //
  visibleActionMenu?: VisibleActionMenu; // configures the actoin menu
  visibleTableMenu?: boolean; // controls the table men's visablity
  alternativeRowStyle?: any; // sets a style for the odd rows
  normalRowStyle?: any; // sets a style for the even rows
  scrollStrategy?: TableScrollStrategy; // sets a scroll strategy
  rowStyle?: any; //
  enableContextMenu?: boolean; // controls the context menu visablity
  autoHeight?: boolean; // allows the table to automaticly controls its height
  saveSettingMode?: "simple" | "multi" | "none"; // controls the saving mode
  settingName?: string; // name for the setting
  settingList?: TableSetting[]; //
  currentSetting?: string; //
}
Adding a paginator
adding a paginator is just like columns and setting.
first we add the Property with the TablePagination type then we configure it like so:
import { TablePagination } from '@martintrajanovski/dynamic-mat-table';
...
export class MyTable {
  pagination:TablePagination = {};
}
the full description for the TablePagination is as below:
export interface TablePagination {
  length?: number; // total number of data records
  pageIndex?: number; // initial page
  pageSize?: number; // number of rows in each page
  pageSizeOptions?: number[]; // page ination options
  showFirstLastButtons?: boolean; // controls the first/last button display
}